
 |
| Well it's not a defensive retrofit, so you're correct! |
| "Big is beautiful, I repeat: big is beautiful. Don't get down on yourselves, YV-666s." |
One final note on ATN: although it allows your Heavy squadrons at distance 1-2 of the ship to stop engaged enemy squadrons from attacking ships, it does not stop those enemy squadrons from leaving (as you're still Heavy). Keep that in mind for getting best use out of this upgrade.
 |
| They put a lightning rod on their spaceship? |
 |
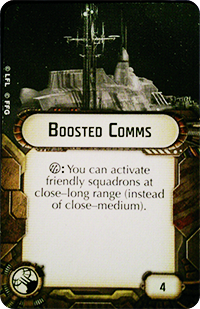
| In space, no one can hear you scream at your squadrons to go do something already. |
Overall, I like Boosted Comms most on carrier ships that intend to be supporting bomber squadrons. Bombers will more frequently be used further from your own ships and thus Boosted Comms are more frequently useful in commanding them. It can also be handy on nervous flotillas that are looking to stay far away from any actual fighting. It's a fundamental squadron command upgrade, though, and merits consideration against other cornerstone upgrades like Expanded Hangar Bay and Reserve Hangar Deck (in Swarm-friendly squad groups).
 |
| If you keep breaking your toys, we won't buy you new ones! |
- Remember that Disposable Capacitors can only be equipped on small or medium ships. I know it says it right there on the card, but people can on occasion forget about the restriction and start daydreaming about putting it (illegally) on an ISD or HMC80.
- The triggering window is when you activate the ship the Capacitors are equipped to.
- Because you can pre-measure any time you want, you can measure the range from that ship to its intended targets prior to officially activating it, so you never need to guess if the Capacitors will be useful or not.
- Remember that the "when you activate" window is at the very beginning of your activation. If you've already moved past the reveal command dial step, you're too late. Some people may not let you use the Capacitors if you miss your window, so be careful!
- The blue dice extending effect only works against ships, not squadrons.
- Attacks made at long range are still at long range and so evades will work at full strength.
- The effect lasts until the end of the round, so your blue dice will still go out to long range for effects like Fire Lanes.
 |
| Sup dog I heard you liked TIE Fighters.. |
Otherwise, it's a very straightforward upgrade. It lets you command one more squadron with a single command dial. It's often competing for the offensive retrofit slot with Boosted Comms. I tend to favor Boosted Comms all other things being equal, but if the ship is a mixed-role combat ship/carrier that's going to be getting stuck in and/or it is using Flight Commander as its officer, then Expanded Hangar Bay has a bit more appeal.
On a side note, Expanded Hangar Bay is to my knowledge the only upgrade that changes a ship's base statistics that isn't a Modification.
 |
| Is that scrub behind me still looking at explosions? Amateur. |
- The ship must be medium or large (sorry small ships and SSDs).
- The ship must be your flagship.
- It's a Modification, so that might inconvenience your upgrade plans.
- The equipped ship can't use any command tokens to resolve a fleet command.
- This means if the ship already had a fleet command slot (like a Cymoon), you can give it Flag Bridge for a second fleet command, but then you can't use command tokens to feed either of the fleet commands.
The knee-jerk reaction to Flag Bridge is "why would I ever use this?" but I honestly think it's got legs. It's zero points, so unlike the similar CR90 Liberator title, you're not spending extra points to get the fleet command, just your Modification slot and your offensive retrofit slot. Sometimes that's a tough ask, but I find fairly often you're not doing much with either. The downside, of course, is your fleet command becomes a one-shot affair: discard it to use it and it's done. The upside is you don't need to spend points on a command-token system to feed the fleet command, so instead of the fleet command costing X points plus Y points spent on whatever other things you're using to feed the fleet command, it's just X points. A one-shot fleet command isn't something you can strongly build a fleet around, but for 5-6 points, I'll happily use a one-shot fleet command like Intensify Firepower, Take Evasive Action, or Entrapment Formation in a ship-heavier fleet or All Fighters Follow Me for the alpha strike in a squad-heavy fleet.
Flag Bridge has some new life with wave ten Clone Wars fleet commands that do not consume tokens to operate, which side-step its main restriction: they didn't want tokens anyways. Please remember that the ship in question can't use tokens to feed any of its fleet command upgrades, so you're best using Flag Bridge on a flagship without a native fleet command slot (or if you wanted to double up on the Clone Wars fleet commands, I guess?). Still, being able to bring along Jedi Hostage or Mercy Mission relatively easily can be handy for the right fleet and is not to be overlooked.
 |
| In a universe where one-man fighters keep blowing important things up, making flak guns optional feels dumb. |
Flak Guns require a bit of extra rules stuff:
- Your anti-squadron dice must be changed to black. It's not optional.
- This includes their range as well - you're stuck only flakking at close range. Your dice don't stay the same as usual for checking range and then suddenly swap to black dice when it's time to roll your attack.
- Your salvo attacks against ships effectively improve their range by one step: blue dice go out to long and black dice go out to medium.
- Note that only your battery armament improves this way, not your anti-squadron armament. If we get some kind of effect like pre-nerf Rhymer that allows squadrons to attack at medium range (please AMG no), you couldn't salvo back at squadrons any further away than normal.
- Speaking of which, this interaction is super weird. Because salvo uses your printed values, your anti-squadron armament only for your salvo attacks uses your regular anti-squadron armament and not the black-dice-replaced armament. I don't think that's the intent, but that's how it works until we get an FAQ at least.
- A reminder that it only applies to salvo attacks. Regular attacks remain unaffected.
The short version is: Flak Guns are for salvo ships. Specifically salvo ships with blue and/or black dice that want to consistently threaten enemy ships from farther away. They're pretty cheap so they do just fine on ships with a single salvo token but they're really ideal on a ship that can credibly threaten to salvo back more than once per round due to having multiple salvo defense tokens and/or through defense token recovery or the like. Flak Guns form a cheap and tasty combo with the DBY-827 Heavy Turbolaser on black-dice salvo ships, firing that black die out to medium on a salvo and guaranteeing a hit+crit on it.
What
about the anti-squadron dice change? It's a feature of the card, for
good or for ill. It depends a lot on the ship in question: changing red
flak dice to black is painful, especially on ships that can take Linked Turbolaser Towers
for the reroll - that's strictly a downgrade as you lose a lot of range
and a rerollable red die is pretty decent at producing damage. Changing
blue dice black is more of a sidegrade: you lose some range but gain
some punch. If that ship also has Ordnance Experts,
then changing from blue to black is a definite improvement as you can
reroll them now. So it depends, basically, but the
anti-squad-dice-changing element of the card isn't strong enough to
really merit taking Flak Guns on its own. It's more of a flavor element
compared to the much stronger salvo-buffing element.
 |
| "All the work order says is 'paint it red and make it more orky', does anyone know what that means?" |
- Obviously, it's for Large ships only. No small, medium, or huge ships allowed.
- It's common for people to misread this as "you don't take damage from overlaps involving smaller ships," but that's not quite how it works. You take 1 fewer facedown damage card. This can be an important distinction in a few circumstances:
- When you are overlapped by a Garel's Honor Hammerhead, you will take a faceup damage card. Garel's Honor effectively dodges the Hardened Bulkheads by delivering a damage card faceup, which Hardened Bulkheads doesn't prevent.
- It's important to note that Garel's Honor only does its thing when it is the one ramming you, not the other way around. So should you overlap Garel's Honor during your own maneuver, Hardened Bulkheads will work just fine.
- If you are suffering from the Damaged Controls faceup damage card effect, you will suffer an extra facedown damage card whenever you overlap a ship or obstacle (in addition to the regular effects), which will result in one total facedown damage card being applied to your Hardened Bulkheads ship if it overlaps a smaller ship (1+1-1=1).
 |
| At least in card art a CR90 fits inside an ISD's hangar bay... |
- Phylons' window is upon activating prior to even flipping your command dial over, so keep an eye on its triggering window! When in doubt, put the card on top of your command dial stack to remind you about it when you activate that ship.
- In practice, I find most people don't mind letting you use them so long as you haven't started any attacks, but it's really best to use them when you're supposed to.
- Remember that flotillas are small ships, so a flotilla with Phylons can slow down other small ships. I run into a number of people who believe flotillas are a size class smaller than small, but that's simply not true.
- The FAQ made it clear that a Tractored ship must spend a nav token if possible. If it can't, then it reduces its speed by 1 to a minimum of 1. The text of the card itself is unclear if the targeted ship gets a choice or not, but they don't. Therefore, you can use Phylons to snipe nav tokens off ships.
 |
| Qui-Gon gets it. |
There's also the fact that you don't always necessarily want to slow enemy ships down when they're going too fast. The good news is you pretty much always want to deprive enemy ships of navigate tokens because the less movement options your opponent has, the better. I'd recommend using your Tractor Beams primarily as anti-nav-token tech with a secondary use for slowing ships down if the circumstances dictate that's the right call. This can be especially handy when paired with Slicer Tools and the like to set your opponent to non-navigate commands to really cut down their maneuver options. This kind of approach also works well with raid tokens and other upgrades that mess with speed. The issue is avoiding the Konstantine trap of making speed screwage your primary strategy. So long as you can keep it affordable, it's at best a useful sub-strategy.
To kind of summarize all of this: Phylon Q7 Tractor Beams can be a bit tough to get working and you need to consider carefully whether to include them in a fleet, but since trying them again recently and changing my approach to thinking of them as primarily a means of cheaply sniping nav tokens, I've found they can be pretty handy when used well.
 |
| All Rebel forces: retreat from the awfulness of this upgrade card immediately! |
The problem with Point-Defense Reroute is it requires your ship to attack a squadron at close range. It has no benefit whatsoever to black flak dice (as their crit sides already have the hit you're looking for). When you do reroll your crit icons on blue dice or red dice, you have a 50% chance on blue dice or 37.5% chance on red dice of your reroll coming up a damage. Given the average damage roll against squadrons from a red or blue die is 0.5 (because the red has less consistency but that one double-hit side), the math works out like so:
25% chance of rolling a crit against a squadron * 0.5 average damage = 0.125 extra average damage per red or blue die in the flak attack, taking them from 0.5 to 0.625.
Of course, if it's an ace squadron and you're looking for an accuracy that reroll is a bit more useful provided you've already got some damage in the pool to pair it with. It should also be noted that PDR lets you reroll every crit in the pool under these circumstances, so if you're capable of getting a lot of anti-squadron red and blue dice into a flak attack, it can be a good fallback option. This is typically the case with heavier ships built to be flak-oriented with extra flak upgrades and Quad Laser Turrets (see below), so basically I mean the Assault SSD. It's fine for the right SSD build. Otherwise, avoid.
 |
| Ultimate Frisbee got even more ultimate but less Frisbee. |
- It helps to check the basic mines rules to see how they work in-game.
- You place the mines after deploying obstacles and before deploying fleets.
- The restriction on tokens beyond distance 5 of enemy ships is future-proofing. At this point, there is no way for ships to be on the table prior to usual fleet deployment.
- Because you're deploying mines prior to deploying fleets, keep in mind what options your opponent has for fleet deployment. If you cluster mines too heavily, certain parts of the table become very unattractive for fleet deployment. That can be the entire point, but if you'd rather some of your mines actually detonated, you may want to spread them out a bit more.
- Deploying mines on top of obstacles helps keep them safe from anti-mine ship attacks but makes those obstacles a big priority for avoiding. Whether the increased mine survival is worth the decreased chance of exploding is your call.
- If the obstacles move (like purrgil do), mines on top of them move as well. It's a fun way to deliver mines to ships.
- The timing window is such that it happens after effects that occur after deploying obstacles, so objectives like Intel Sweep will put down their tokens before you deploy mines (as "after deploying obstacles" is slightly before "before deploying fleets").
- Because each ship gets mines equal to half its Engineering value, rounded down, that means Engineering 3 or less ships get 1 mine and everything else gets 2.
- This generally makes them more valuable on your big Engineering 4+ ships with spare offensive retrofit slots, but don't overlook the Command Pelta for cheap access to Engineering 4 on the Rebel side.
- That said you can still definitely spam them in an MSU fleet bringing a lot of Raiders or Hammerheads if you like. Flotillas can bring them too, so you can bring 6+ copies of this card in the right fleets.
The big issue is having your mines get ignored. The best use of the mines for that reason is with objectives that punish player 1 for not getting to a scoring zone quickly enough. Layer mines in front of the Contested Outpost or Fire Lanes scoring zones, for example. Or maybe your opponent's Intel Sweep tokens really needed a bunch of mines running from point A to point B. You get the idea: if there's an area of the table where points are to be had and you'd rather your opponent didn't, Proximity Mines are for you. For that reason I prefer including Proximity Mines with appropriate objectives to make being player 2 even more appealing, but you can also use them as a spoiler for your opponent if they brought similar objectives along and you're player 1, it's just less reliable.
 |
| Notice how the turrets are wasting resources doing nothing to those X-Wings? The artist is trying to warn you! |
The damage problem with Quad Laser Turrets is Counter 1 effectively hits an attacking squadron for 0.5 average damage. If that's all you're doing against enemy squadrons, it will take 6 attacks on average to kill a lowly TIE Fighter. You can improve this on the Rebel side with Toryn Farr being within range for the blue die reroll so the damage average improves to 0.75 and/or by including Draven to add an extra die against Intel or Counter squadrons.. Similarly, you can improve this on the Imperial side with Agent Kallus, who can add a die of any color to the attack if you're Countering a unique squadron.
All on their own, Quad Laser Turrets are pretty underwhelming. If you've already committed to flak upgrades on the ship in question, their value can definitely increase, but they're insufficient all on their own to dealing with squad threats to your ships.
 |
| I've seen religious pamphlets with less text and we still had no idea how to use this card until the FAQ and subsequent email clarification. |
- Remember that the set aside squadrons are not deployed, they're placed next to the ship they're stored in. Otherwise, the "storage" part of the card is pretty straightforward.
- When you resolve a squadron command, you may place up to the number of squadrons you can activate using that squadron command within distance 1 of the ship. This does not affect the subsequent squadron command in any way.
- So basically if you're using a squadron dial, you can drop as many of the stored squadrons as you want until they're gone and if you're using a squadron token, you can drop 1 of them. There may be some niche circumstances/upgrades that affect this, but 99% of the time, that's how it works.
- Again, the "dropping stored squadrons off" portion of the upgrade triggers before resolving a squadron command but does not in any way "use up" any part of that squadron command just yet.
- Once you've dropped those squadrons off you can use your squadron command on the dropped-off squadrons or on other squadrons. During that squadron command, dropped-off squadrons that are commanded can't move but can attack if they are activated. Other squadrons are commanded like usual.
- If you choose to drop off squadrons but not activate them during that squadron command, subsequent squadron commands from other ships work on them just fine - they can move and attack.
I'm not a big fan of Rapid Launch Bays (hereafter RLBs). There are a few issues I have with it overall:
- It's expensive. 6 points is not the kind of upgrade that can get tossed onto something just for fun.
- It reduces your number of deployments. In most cases, filling an RLBs ship with squadrons will cost you 2 deployments (or one and a half, with the last straggler squadron not really doing much to help with its final deployment). That can make a very large difference in how effective you are in the deployment portion of the game, diminishing your advantage or exacerbating a disadvantage.
- It ties your squadrons to that specific ship.
- Ship destroyed early by a strong enemy attack before it launched squads? The RLB squadrons won't ever make it to the fight and count as destroyed.
- If your ship finds itself in an area without good targets, the squadrons inside of it are often wishing they had deployed normally so they could go after better targets.
- Similarly, the RLB ship telegraphs exactly where the squadron threat is and so the much more mobile enemy squadrons can react accordingly.
- If your ship finds itself in danger of either of the above two problems, it may need to use a squadron command early just to dump its squadrons onto the table so they're not stuck in a bad situation later.
 |
| "You do realize you're flying away in an unsafe, incompletely-repaired starfighter, right?" |
- The qualification for RHD has a number of requirements: you need to be a 1) non-unique squadron 2) with Swarm 3) at distance 1-5 that 4) just got destroyed.
- Similarly, the revived squadron must be set to 1) 2 hull remaining, 2) activated, 3) unengaged and 4) at distance 1 of the ship that used RHD.
- Just because squadrons are brought back at 2 hull doesn't mean that's their maximum. A quick stop by the space station can fix you up good as new.
- Note that the squadron that was destroyed originally is saved. It doesn't count as destroyed and provides no points to the opponent. It's not that you got a new (slightly beat up) squadron, it's that you saved the old squadron.
When you're using RHD, give some consideration to exactly where you're respawning the squadron at. It can be handy to throw a chump generic in the way of an upcoming bombing run (as when you respawn they aren't engaged then, but they will be shortly), but you may also want to respawn away from trouble so you get a chance to get your punches in next round. It depends on the situation.
Have you given any thought to using RLB with the Hyperspace Assault objective?
ReplyDeleteI have, but it seems very high-risk high-reward to put so much of your total fleet into Hyperspace (especially the your opponent has Strategic squadrons to mess with your tokens and the big reduction in your deployments also seems rather risky.
DeletePlus you need to go second and get your opponent to pick it, so I'm not super confident in it. It definitely would be fun to try, but I'm skeptical for the reasons I gave above.
I went undefeated with RLB at a tournament once. Every single game my opponent forgot about those hangared squadrons (Norra + 3 Bwings), putting his really expensive ship at medium range of my MC80. Even ISDs went down pretty quick.
ReplyDeleteWhile I'm pleased to hear it went well for you, I'm loathe to recommend an upgrade that works well when your opponents are forgetful.
DeleteHey everyone I wanted to know in which expansion pack can I get the Rapid launch bays?
ReplyDeleteThanks ;)
It comes with the Phoenix Home/Pelta.
DeleteNOT VIABLE AT ALL BUT FUN/CHEESE LIST:
ReplyDeleteAdmiral Raddus
MC-75 Armored Profundity and RLB's housing:
Garel's Honor and 3 B-wings
Very risky but it is a MASSIVE amount of damage in a single turn.
So, what's your opinion on "stacking" Rapid Launch Bays with the Invisible Hand title? IE, storing vultures/tri fighters in IH, and Hyena bombers in RLB, and launching them when the Invisible Hand gets closer to the enemy fleet and/or squadrons?
ReplyDeleteInvisible Hand is already a lot of eggs in one basket, going in on it even harder with Rapid Launch Bays exacerbates both the advantages and disadvantages. I'm personally not a big fan of that type of plan - it's too prone to disruption of some kind or another and it makes your game very dependent on what happens to the Invisible Hand.
DeleteYeah, see, My thought was to basically use IH to deploy fighters directly into engagements, then use RLB to deploy bombers in safer locations to bomb, followed by activating the fighters with IH. I was thinking about using a Munificent with Hyperwave Signal Boost to keep the bombers useful while Invisible Hand babysits the Vultures.
ReplyDeleteMostly I'm just trying to figure out how a Separatist player would make a working Squadron list, especially since their squadron-centric upgrades seem so wishy-washy, and all of their squadrons need constant attention.
Honestly, the comment section of the offensive retrofits article isn't really the place to get much deeper into that but a few things:
DeleteI don't doubt IH with Rapid Launch Bays will be able to get work done sometimes but again, it's lots of eggs in one big obvious basket. It should do fine against players who are worse than you but against better players it's super telegraphed and they'll do what they can to disrupt it or pressure you into using it poorly. You also lose the RLB deployments so you have to deploy IH pretty early and then they counter-deploy after the obvious threat is on the table. Raid and/or Slicer-Tools-style dial-screwage can also cause big problems for getting those squads on the board. In short, I don't really see much benefit of using RLBs there that can't be achieved by the speed 4 Hyenas just following IH until it's safe to bomb.
Keep in mind that Hyperwave Signal Boost doesn't give a full move+shoot squadron activation. It allows you to activate X squads in the squad phase (so move or shoot) instead of the default 2, and if any of those squads you activate attack then they benefit from AI. That's all it does. It can be useful, but to keep bombers on target and attacking, you're going to usually want full squadron commands.
In general with Separatist squads, it's about delivering the Hyenas as intact as possible due to only being 4 hull and Separatists lacking Escort. People are still experimenting with exactly how best to do that but a big potent alpha from your fighters against enemy fighters is obviously part of the equation. For my money, I think it's probably fine to bring more squads than you can command all at once and focus on commanding fighters early and bombers after it's safe. Some combination of Reserve Hangar Decks to keep your fighter numbers consistent and Hyperwave Signal Boost (to get the AI buff from fighters you don't want to command later on once the dogfighting is dying down but you still want to keep an edge) is probably part of an answer.
Thanks for the help. I have other separatist-related questions, but this was the only o e relevant here, since it involved RLB and a card that hasn't had time to be experimented with yet.
ReplyDeleteIs there somewhere specific I should be asking questions, like a forum or discord channel? Otherwise, I was just planning to ask in the "Squadron Fleet" area of the fleet building section.
Honestly I'd recommend the Steel Noun discord server (we're buddies with them and didn't see the point to running our own discord server if we already liked theirs). The regular Armada discord is... uh... well, kind of toxic and unbearable but the Steel Noun guys have a good alternative set up:
Deletehttps://discord.gg/FfrPmQRxay
The Armada subreddit isn't bad either:
https://www.reddit.com/r/StarWarsArmada
You can ask questions in the Separatist squad article (https://cannotgetyourshipout.blogspot.com/2020/12/separatist-squadron-groups.html) if you like, but when it comes to outright fleet-building we don't really dig into the nuts and bolts with that here in the comment section typically.
RHD can be applied twice on the same ship?
DeleteNo upgrades can be used twice on any ship.
DeleteRHD, could it be triggered on multiple shipsb by losing only one qualified squadron. I know its not logic, but rules as written...?
ReplyDeleteYou need to completely resolve a card before doing something else, so by the time one RHD is done resolving there is no longer a destroyed squadron to do anything with.
DeleteConcerning Rapid Launch Bays, your explanation is very clear and the community seems likewise clear on how it should work, but I am still confused. Interestingly, I have two different printed versions of the mini card--probably one from Phoenix Home and one from SSD--and one version matches exactly word-for-word the 5.3 errata version from AMG. I am getting hung up on the 5.3 version with the word 'instead': "...for each squadron you would activate with this command, you may INSTEAD..." With the word 'instead' I read that as replacing what you would normally do (move and/or attack) with deploying one squadron *and doing nothing else*. If the intention is different as clearly seems to be, why did they go to the trouble of printing a 5.3 errata (only last year) and not clean up the language?
ReplyDeleteThe version of the card without the word instead actually seems to follow the example better. Anyway, trying to get back into the game and came across this conundrum. Keep up the good work and thanks for your help!
The wording is a little sloppy and it's a shame that a card that generally isn't very good has caused so many headaches but here we are, unfortunately.
Delete