
Hey everybody! It’s your friendly neighborhood Truthiness checking in. And for the first time on CYGSO! It’s been a while since I wrote or talked about anything Armada related. Between the 2021 and 2022 Vassal World Cups, I only played a grand total of six Armada games. After AMG’s rather disappointing Armada news, like many Armada veterans, I just wasn’t feeling great about the state of the game or its future. So I took a pretty long break. I’ve been playing a mix of other games, most notably Dropzone and Dropfleet Commander. I’ve been having a blast, but I still love Star Wars and Armada. When the Vassal World Cup came up again, I signed up mostly out of habit and fond memories. I didn’t put a whole lot of effort into my fleet other than “be different than last year.” That’s how I ended up in the Vassal World Cup with three Ackbar shrimp supported by a couple flotillas and Shara and Tycho. I had one very close loss, one blowout win, and one blowout loss. About when I was losing my second shrimp to massed Munis, I realized that the game had changed noticeably during my break. That’s pretty damned cool for a game with no releases in between. It speaks volumes about the community’s constant experimentation and evolution. It’s something I’ve always loved about our competitive scene. So after my rather embarrassing early exit from the Vassal World Cup this year, I decided to start developing some new fleets for this meta. I’ve now played more Armada games in the last month than I did all of last year. Better late than never right?
 |
| Footage of Truthiness trying to be competitive again |
I started with more of a stated purpose than a real solid concept. First of all, I wanted something entirely fresh. I still have my Crackentor list that I continually tweak and update, but I hate repeating myself. There was a time I flew squad heavy B-Wings swarms. These days I’m more known for Liberties and TRC90s. The few games I played last year were mostly using Ackbar. I wanted something else entirely. I might still default back to the Crackenator in highly competitive events, as I am quite comfortable flying it and it still looks very effective in this meta. However, for this foray back into Armada, I wanted something entirely new for me. I bounced around some ideas with friends, including some Yularen squadrons, some Grievous TRC spam, or even some Agate with a pimped out MC75. What I’ve settled on in recent weeks is something I did not expect to enjoy: Tarkin Venators. Today I’m going to break down the fleet, how I got to where I am right now, and what makes the whole thing tick.
The basic structure of the fleet is two Venators with SPHA-Ts, a supporting Pelta, and a moderate squadron wing for fighter cover. Tarkin is the lubricant that keeps the parts moving, with concentrate fire tokens feeding SPHA-Ts and Intensify Firepower. I’ve had a version of this in my back pocket for sometime. I’ve never gotten to flying it, assuming that it wouldn’t be all that fun to fly anyway. Fun is always my top priority when picking a fleet. I always try to optimize my fleets, but not at the expense of enjoyment. You’ll never find me flying a fleet just to win. I don’t say that to judge, just to explain why I never really got around to this fleet archetype until recently. It sounded boring all around. In an effort to knock myself out of my comfort zones, though, I gave it a try. I was pleasantly surprised. Venators were more fun than I remembered. Rather than being bored with what I assumed would be easy to use SPHA-Ts, I found the placement and use of the weapons to be quite nuanced. It was a very different style and feel than I had experienced in Armada in quite some time. I like it when I find something new to enjoy. As Barney Stinson says, new is always better. After some refinement, I’ve ended up at this point:
 |
| Yes, this is what I'm reference. No, I don't regret it. |
Tarkin Presents: Clonelodeon Splat! (67/400/400)
================================================
Venator II-class Star Destroyer (100 + 55: 155)
· Admiral Tarkin (30)
· Clone Captain Silver (4)
· Local Fire Control (4)
· SPHA-T (7)
· Electronic Countermeasures (7)
· DBY-827 Heavy Turbolasers (3)
Venator I-class Star Destroyer (90 + 35: 125)
· Clone Captain Zak (5)
· Ordnance Experts (4)
· Intensify Firepower! (6)
· SPHA-T (7)
· Assault Proton Torpedoes (4)
· XI7 Turbolasers (6)
· Tranquility (3)
Pelta-class Transport Frigate (45 + 8: 53)
· Comms Net (2)
· Projection Experts (6)
Axe (17)
2 x Delta-7 Aethersprite Squadron (2 x 17)
Kickback (16)
Contested Outpost
Doomed Station
Station Assault
I’ll start first with the token infrastructure that holds up the whole thing. Needless to say, this is the most complicated part of the fleet. It takes a lot of practice and some forgiving opponents while you learn to make it all work together. I’m only like 60% there, so thank you to everyone I’ve played with it so far. Remembering to trigger tokens at the right windows with the precision the fleet requires is not exactly easy. Between Intensity Firepower and two SPHA-Ts, the need for concentrate fire tokens is obviously pretty intense. That’s where Tarkin comes in. His timing window allows me to grab concentrate fire tokens at the beginning of the turn and then immediately fuel Intensity Firepower. The difficulty comes with readying the SPHA-Ts at the end of the turn. While the Venator 2 can just hang onto its token until the end of the turn, the Venator 1 needs a second concentrate fire token to ready its own SPHA-Ts at the end of the turn. The Comms Net Pelta addresses that issue. It passes its own Tarkin token to the Venator 1 during its activation. Since the first token is spent at the beginning of the ship phase, the Pelta can activate at any point in the turn, provided it can stay in range of the Venator 1. That makes the positioning on the Venator 1 in relation to the Pelta a careful proposition. The actual token plan for Tarkin is pretty simple. He starts the game with 2 repair and 4 concentrate fire tokens. On turn one, he gives out repair tokens. On turns two through five, he gives out concentrate fire. If he’s still around on turn six, he gives out the final set of repair tokens.
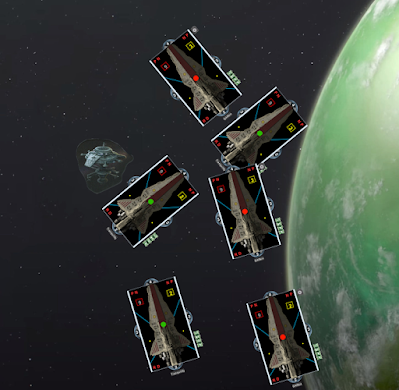
 |
| I'm sure this will in no way collapse on me. |
The Venators operate pretty dependently on one another, generally needing to stick together to work properly. The Venator 2 flagship, with ECM to help it stay durable, is the screening ship. It is the one that is supposed to take the brunt of damage, especially early in the game when incoming dice pools are at their highest. As such, it generally wants to start pumping out repair commands no later than turn four. When it’s not repairing, it’s generally using squadron commands. I always want at least one squadron command out of the ship on turn two. Sometimes a turn three squadron command is helpful, but more often than not, I’m repairing on turn three. Only if it looks like it’s going to get away scot free do I dial up a navigate command. Normally going without a navigate on a big, less maneuverable ship like the Venator would be a death sentence. Enter Captain Silver, the man with the speed plan. Being able to so rapidly adjust speed without a navigate command cannot be understated here. Thanks to SPHA-Ts, extra ticks of yaw are less of a concern. After all, three out of four arcs are pretty dangerous from a considerable range. Given this ship is designed to be on the front line taking shots, it should be no real surprise then that I’ve found great use out of Local Fire Control and DBY-827 Heavy Turbolasters. The result is that the Venator 2 is able to plunge into the heart of the fight, blasting away with abandon.
If the Venator 2 flagship is the shield, then the Venator 1 is the sword. At the start of the game, I prefer to keep it further away from the enemy fleet, allowing the Venator 2 to take most of the punishment, or forcing opponents to take damage from the Venator 2’s guns to get to the Venator 1. It is in the fleet expressly for Intensify Firepower, the best and most reliable source of dice control for the Republic. That also means taking a large ship without a defensive retrofit, a risky proposition. To compensate for that relative fragility, I take the Tranquility title, allowing me to focus any potential repair commands on just recovering shields and not worry about shifting any around. Every shield counts when you have Tranquility. In contrast to the flagship, the Venator 1 is much more inclined toward flexibility. While I’ll dial up a repair command if I know I’m about to deal with bombing runs, I general prefer to navigate, or maybe even concentrate fire with this ship. I’m continually amazed at how well the ship can reposition at speed 2. So while the flagship is tanking, breaking, or opening the throttle, the Venator 1 is looking for openings. It can jump out ahead of the flagship to rush in. It can cut in hard while Captain Silver is putting the pedal to the metal. It is also geared out a bit better for direct fire compared to the Venator 2. Where the rainbow dice of the flagship are a bit harder to control, Tranquility here is much more straightforward. Between its native armament and Captain Zak adding dice to SPHA-T shots, this ship has the potential to throw out a solid amount of black dice. So Instead of LFC, this ship takes Ordnance Experts. A close range double arc from this ship is very rude. I've recently decided to give APT and XI7s a try on this ship, as I can already think of multiple circumstances where it would have helped delete a small ship faster. With Zak and SPHA-Ts, it's throwing at least two black dice out the side, with a high probability of locking down any pesky evades on ignition shots.
 |
| Example of Tranquility and the flagship trading positions mid-match. Tranquility positions in green, flagship positions in red. |
The Pelta is the quiet glue that holds everything together. It’s not there to bring amazing firepower to bear or dash in to save the day. It is the commensurate plodding support ship. It’s not going to win any beauty contests. That doesn’t mean it doesn’t serve two critical roles. First and foremost is the simple matter of transferring its Tarkin concentrate fire token to Tranquility. It doesn’t sound like much, but it makes the whole fleet sing. The second big thing the Pelta brings to the table is Projection Experts. Long an underutilized upgrade, I’ve been seeing it more and more in the current meta. For a 45 point ship with an engineering value of 4, Projection Experts is almost a no brainer here. This list is all about keeping those two Venators humming, so giving whichever one is ailing more shields is an obvious win. Worst case scenario, someone shoots the Pelta. You know what that means? They’re not shooting a Venator. The Pelta doesn’t disappear easily, so I can typically count on it for at least three turns, likely four. If it goes down, I’m not at a complete loss when it comes to keeping the SPHA-Ts singing. My typical choice is to just discard Intensify Firepower for one last use and then save the Tarkin tokens exclusively for reading SPHA-Ts. In both scenarios, either dying heroically or supporting from behind the line, the Pelta serves a major purpose.
The squadron wing was a longer trial and error than the rest of the list. I have made some minor tweaks to the ship upgrades even and there, but outside of changing out LFC for OE or something else similarly minor, I haven’t really messed with the ships. The squadron wing, by contrast, has seen three different iterations with substantial differences. I started with Plo Koon and three generic V-19s. These put out some decent fire, but tended to crumple quickly. At the suggestion of a few people, I tried out Kickback, Axe, and two generic V-19s next. It was better, but still seemed lacking. It could last decently well, but if it got tied down by, oh say, Shara, they couldn’t really fight their way out of the problem and properly cover the ships. This latest iteration is not one I would have expected to like. I am on record absolutely HATING how much generic Aethersprites ended up costing. I still think they’re at least one point overcosted, perhaps even two. On their own they do NOT work well, dying to a stiff breeze. I have to majorly credit Maturin here for showing me how to leverage them properly. The combination of two Aethersprites, Kickback, and Axe is a deceptively great little squadron ball. Between Dodge and Axe, you can end up mitigating a lot of damage. You just have to carefully manage your Axe positioning and the amount of incoming attacks the Aethersprites have to absorb. That’s where Kickback comes in. His ability to move around the fight, even while locked down and without squadron commands, can help subtly shape fights to spread damage between himself and the Aethersprites. It is a nuanced little ball of fighters that is a lot of fun to use. It perfectly suits the needs of this fleet, which needs some solid squadron cover, but can’t afford to invest a whole lot into it.
 |
| Don't die, don't die, don't die |
It’s all well and good to describe some abstract roles for the different parts of the fleet. It’s quite another to put it all together on the tabletop. While we often prize deployment advantage and flexible approaches as Armada players, there is room in the game for more standardized and regimented approaches as well. This fleet is definitely the latter, preferring a pretty standard formation to start the game. First of all, it doesn’t really tend to go straight at an enemy fleet. Rather, I like to refuse one flank and approach at an angle. This serves two purposes. First, I really don’t want to be taking fire from multiple sides. Allowing MSU to get around the flank with significant firepower is usually a recipe for disaster. Second, it allows me to disengage more easily if needed. ISDs these are not. They cannot charge headlong into a problem and plow their way through. They need to skirmish a little bit at long range before closing in for a close range finish. Depending on the fight, they might just want to engage at a distance altogether. The starting formation is what allows that. Speed can vary a little, but I prefer to start at speed two on all the ships. That ensure the Pelta can keep pace and the Venators have maximum yaw without additional navigate commands. The Venators are set up staggered. The flagship is set further back, but closer to the side likely to see the mass of enemy ships. Tranquility is set further ahead of the flagship, but on the “outside” position, further from enemy ships. The Pelta follow behind Tranquility, basically following it around the battlefield like a puppy. After deployment, things can get a little more fluid, as described in the above Venator 1 section. Objectives can help this formation flying work. The fleet is comfortable going either first or second, hence the relative lack of bid. However, the priority is concentrating the fight in one area as much as possible. Station Assault, Contested Outpost, and Doomed Station are its own preferred objectives. It’s also built to survive Surprise Attack and can probably flip Volatile Deposits if I manage the asteroid placement properly. By keeping the fight focused on a central location, the Venators are more easily able to control the fight and keep the enemy on one side.
 |
| Example approach to Contested Outpost assuming the enemy is coming mainly from the upper right |
I’ll finish up talking about how the SPHA-T placement shapes the whole fleet. They were one the reasons I expected this fleet to be pretty boring. I assumed it was “plop down token, go brrrrrrtt.” It is, instead, a bit more than that, and something I’ve started to enjoy quite a bit. The first big surprise was how big of a choice it is between using SPHA-Ts on the side or on the front. I assumed I’d rarely use it out the front and mostly use it out the side. Instead, I’m almost always taking a shot with them out of the front early in the game. With such easy token generation from Tarkin, I can comfortably bank concentrate fire tokens on the Venators for turn one and plop down SPHA-Ts after my turn one movement. That starts to shape the fight pretty aggressively. From there, SPHA-T placement depends on how I need to approach the enemy fleet. If I’m dealing with someone trying to kite me, I’m likely to continue to put down SPHA-Ts out of the front. If I’m plunging into the heart of an enemy fleet, then I’ll likely switch to side SPHA-Ts. I’ll likely be angling for a double arc, but they can also be a critical terrain denial tool. Nothing says “stay the hell away from my side” quite like a SPHA-T ignition marker daring that small ship to make a run. The third eventuality is that I need to kite for a little bit to weaken the enemy fleet before I can afford to engage closer in. In that case, I’m also using the SPHA-Ts out the side, but I’m likely turned into more of a broadside position with the Venators. The fact that I can fly the Venators in multiple ways depending on the tactical need is another major part of what I’m loving about this fleet. The fleet may not be as navigationally flexible as my Cracken or Raddus fleets of old, but it is still quite tactically flexible.
 |
| Some seriously nasty ignition covering the sides of each Venator |
That’s all for today. I intend to be playing this fleet for a good bit. I haven’t decided if it’s actually competitive. Heck, I’m not even entirely comfortable with the rhythm of the fleet. But I’m getting there, and I’ll eventually put it through some true stress testing. I’ll be sure to report back when I do!