
 |
| Jerjerrod is particularly unimpressed with you, Mutton Chops McGee! |
 |
| ...let me guess, the TIE pilots behind me aren't saluting, they're just bullshitting amongst themselves. *sigh* |
Admiral Chiraneau's effect is fairly straightforward. The main thing to keep in mind is his speed "overwrite" happens prior to any other additions, so if Admiral Chiraneau is on a Gozanti with the Vector title or a VSD with the Corrupter title, squadrons that are eligible for the speed boost would move as though they were speed 3.
Admiral Chiraneau has a new lease on life in Armada 1.5 now that Intel has been nerfed. His remaining issue is his extremely high points cost. It's fun including him on a Corrupter VSD or Vector Gozanti, like I mentioned above, for speed 3 squad moves while engaged, but it's more cost-effective to put him on a Squadron 4 ship like a Quasar or ISD to affect more total squadrons, even if they'll "only" be speed 2.
The speed 2 move isn't a lot - it's often not really sufficient to keep escaping from enemy fighters, much less to do so with your bombers while chasing after an enemy ship. This is to say Chiraneau alone isn't nearly sufficient a "solution" to enemy fighter squadrons in a fleet. He is a big help, however, as part of a more robust squadron plan. The obvious use is to keep popping your bombers out of engagement with enemy fighters, and that can work just fine - bombers keep moving right along towards their targets while your fighters stay behind and get to work, each doing what they want to do. That's far from Chiraneau's only use, though - some other fun tricks are:
- Hopping Mauler Mithel (preferably with an Escort squad) around, inflicting splash damage for multiple rounds.
- Attacking and then retreating with injured fighter squadrons, especially flimsier squadrons like TIE Fighters or TIE Interceptors.
- Bonus points for retreating to the space station to heal.
- Allowing Lambda Shuttles to keep up their Strategic shenanigans despite enemy squadrons.
- Don't overlook even mundane options for Chiraneau - being able to redeploy fighters even in a regular ol' dogfight can let you concentrate forces against small portions of your opponent's squad group, which can really add up.
In short, I recommend him, but primarily for moderate to heavy fighter investments where his high cost can pay off.
 |
| Montferrat trying out his best "you can't X if you don't Y" meme pose. |
- His effect only applies against ship attacks, not squadrons.
- It only applies when his ship is set to speed 3 or 4.
- Obstruction is binary - either you're obstructed or you're not. You can't be double- or triple-obstructed.
- Admiral Montferrat only gets discarded if the ship he is equipped to overlaps another ship during its movement. If another ship overlaps his ship, he's fine. It's just when he's in the driver's seat he refuses to wear a seatbelt.
Montferrat is a bit picky, though, so be sure to measure your desire to activate his buff (by being speed 3 or 4) versus your maneuvering needs versus your desire to avoid overlapping enemy ships to keep Montferrat from getting thrown out a window because he won't wear a seatbelt. It's a bit of a balancing act to be sure, but when used well, Montferrat can prolong his ship's life by a solid round or two, and that can make a big difference.
 |
| Admiral Ozzel singing David Bowie's "Changes" at a helpless subordinate. Ch-ch-changes! |
- Sorry, no using him with his commander version. He can only put on his officer pants or his commander pants, not both.
- The start of the first round is basically once everyone is done with fleet deployment and before the Command Phase, where command dials are set for the first time.
- The speed-1 maneuver otherwise behaves just like a normal speed-1 maneuver, which means:
- You use your ship's speed-1 column for determining your ship's yaw, just like with Engine Techs.
- You have a Determine Course step where you can trigger effects like Moff Jerjerrod to give you extra yaw.
- Fun fact about Moff Jerry: his effect wears off at the end of the ship's activation (see below), meaning his buff will remain through Officer Ozzel's ship's first activation as well.
- Effects that trigger after completing a maneuver, like Fighter Coordination Team, will trigger upon the completion of this maneuver.
- Even though the ship gets a maneuver, which is normally part of an activation, this particular maneuver is absent an activation, so effects that trigger on activation, like Squall, don't apply.
- Because very few other effects can possibly trigger this early, it's difficult to combine Ozzel's free move with any other shenanigans like Engine Techs (you won't usually have any nav tokens/dials yet) or fleet commands (they trigger at the start of the ship phase).
- That said, be careful to check other "start of round" triggers like Admiral Raddus to ensure players are doing these effects in the right order (first player, then second player) and keep them in mind before you go charging off right into a Raddus drop.
- There is one exception brought to my attention when it comes to Engine Techs: the objective Salvage Run would, in fact, give you a nav token in time to spend it for no effect except to trigger Engine Techs on the Ozzel move, which would give you a pair of speed 1 maneuvers prior to the game starting but would disallow that ship from resolving a navigate command during its normal activation.
 |
| I'm gonna clench my fist like daddy when he gets angry! Grr! |
It should be noted that because this happens at the start of the first round, the first Command Phase hasn't happened yet so your opponent will usually counter Titus' shenanigans by committing to a first-round navigate command on the ship Titus targeted. Thus effectively Titus reads "choose an enemy ship that has to navigate first round and doesn't get to save a token like it would prefer to." Is that worth 2 points? Sure, sometimes. It largely depends on your fleet and if you consider that inconvenience to be worth 2 points. This effect is generally stronger with:
- A speed-screwage subtheme in your fleet (like with Tractor Beams)
- Rift Ambush, which also lets you change a ship's speed by 1 either way. Stacked with Titus, you get to choose a ship to make a speed 1 move pre-game and then mess with its speed by 2. That's quite obnoxious and can't be fixed with a single nav command.
- Grav Shift Reroute and objectives with mobile obstacles. This increases the odds you can cause an obstacle overlap due to the speed change.
- Objectives that strand some ships away from others, especially Surprise Attack. Making those ships (or the ships coming to save them) faster or slower (or even speed 0) can cause some serious problems. Surprise Attack is extra good because it also produces raid tokens, which can make navigating back to the "right" speed impossible early on.
 |
| If I see anyone here with a name tag, they're getting a broadside from the old sideburns, all right! |
- His ability triggers against any unique squadron, even the Corellian Conflict unique squadrons that don't have defense tokens (like Rogue Squadron or Gold Squadron or the like).
- Because his ability is an add effect, it happens after you roll your initial attack roll. This allows you to see how your regular flak worked out and then add a die of any color afterwards. This comes into play particularly against scatter aces - if your original flak roll had an accuracy, it's probably best to add a black die for higher damage. If not, then it's probably best to add a blue to hope for an accuracy icon.
- On a side note, it bears mentioning that because Kallus is an add effect, you're going to run into trouble occasionally with him on a single-die flak ship as obstructed attacks will be canceled due to initially rolling zero dice.
If you find your meta has enough unique squadrons, then Agent Kallus can help. The main consideration is where exactly to put him. In general I'd recommend a Quasar-II, as the Quasar-II provides a long-ranged but inconsistent red die for its flak, which Kallus synergizes well with as it allows him to potentially reach out and slap more unique squadrons and it benefits the Quasar as Kallus can add a much more reliable die color to the unreliable red die. You've got lots of other good options as well, particularly the SSD, but any ship built to be a competent flak boat should strongly consider Kallus.
 |
| Hide and seek champion 2018-2020. |
Captain Brunson is somewhat similar to Admiral Needa and Minister Tua in that she's an Imperial officer that improves the defenses of your ship, but unlike those two, she's a bit trickier to get working due to the ship needing a somewhat-nearby obstacle to pawn objectionable dice off on. The upside is her effect can be extremely strong, especially when layered with other defensive tech.
Where Brunson really shines is larger ships, as they have the base sizes to frequently be at distance 1-2 of obstacles and several of them can stack defensive tech - the easiest example would be ISD-IIs or Kuat ISDs that come with a defensive retrofit slot that can pair a defensive retrofit upgrade with Brunson to keep your ship healthy. The strongest but more complex example that comes to mind is the oft-maligned Interdictor Cruiser - Brunson can be combined with Targeting Scrambler to tear apart previously-potent dice pools after a reroll and one-die removal. The combo gets stronger if the Interdictor is also using Grav Shift Reroute to position obstacles fortuitously for the Interdictor (both for using Brunson as well as potentially providing obstruction) and with the Interdictor title, which can allow it to unexhaust either the Targeting Scrambler or Brunson to be used again later in the round against a different activation.
With her points cost increased 80% to 9 points in Armada 1.5, she's tough to justify on most ships. That's not to say she's completely binder fodder, but her use has narrowed significantly down to mostly expensive Christmas Tree flagships with lots of upgrades where 9 more points spent on keeping it all on the table doesn't seem like such a bad call compared to other options.
 |
| "Vader said asteroids didn't concern him, but they very much concern me." |
In general, you'll find Captain Needa on ships where he can replace a contain token with an evade token (like an ISD, Arquitens, or Interdictor), given that while contain is an okay defense token to have, it is generally the worst defense token and evade is usually superior. With the Arquitens in particular, going from one to two evade tokens can also make Turbolaser Reroute Circuits a lot more appealing.
 |
| Commandant Aresko knows how to make the intimidating clenched first pose. Take note, Titus. |
 |
| Becky with the good eye. |
- Per the FAQ, Beck doesn't quite work the way her card says she works when it comes to the command. Effectively she produces a "phantom command token" that is immediately spent, but there's a window to also add a dial if you want the dial+token effect.
- That means you can also use Piett to boost her command.
- After you resolve that command, you get a raid token of that same type of command.
- Because raid tokens prohibit you from resolving commands, that means Becky can't do those same commands again in the future until you wipe those raid tokens.
- Becky can't help you wipe raid tokens with her ability either. All she does is resolve commands with a fake token, she doesn't provide actual tokens.
- That said, you can discard a dial to wipe all your raid tokens and then use Becky right after to start resolving commands again.
- Commander Beck is one of the few cards that can resolve multiple times per activation. In case you're having trouble keeping track of what commands she's helped with so far that activation, I'd recommend putting the corresponding raid token on her card and then shuffling them onto the ship card or base once the activation is over.
- Gozantis. A Comms Net Gozanti isn't prohibited from doing its primary job of taking a token and passing it to a friend by raid tokens (as raid prevents resolution of those commands, not having those tokens) and Becky allows them to still do other things (especially navigate to change speed) without really compromising that. When you get a bit of breathing room, wiping all the raid tokens with a dial isn't unappealing on a low-cost ship. You can also use her on a squadron-focused Gozanti to do other commands as needs be.
- Arquitens. Arqs love to concentrate fire. They want to navigate and repair, but they usually stick with what they love. Becky lets them get in the occasional 2-point repair (to regenerate a shield or move 2 shields around) and small speed change while they focus on concentrating fire. The main issue is there are already some excellent officer options for Arquitens, so you need a good plan for her there.
- Raiders. Raiders also tend to oscillate between non-squadron commands as they want to concentrate fire for the extra die, navigate for the speed change, and repair to move shields around (no redirect token hurts). Becky can help with that. Just be careful not to clog up your navigate command when you may otherwise really need it.
- Interdictors. Another ship that likes doing many things simultaneously, plus you can use repair tokens for 3 engineering points, which is pretty swell. The main issue is dropping a dial to clear the raid tokens later and giving up the officer seat that usually goes to a defensive officer.
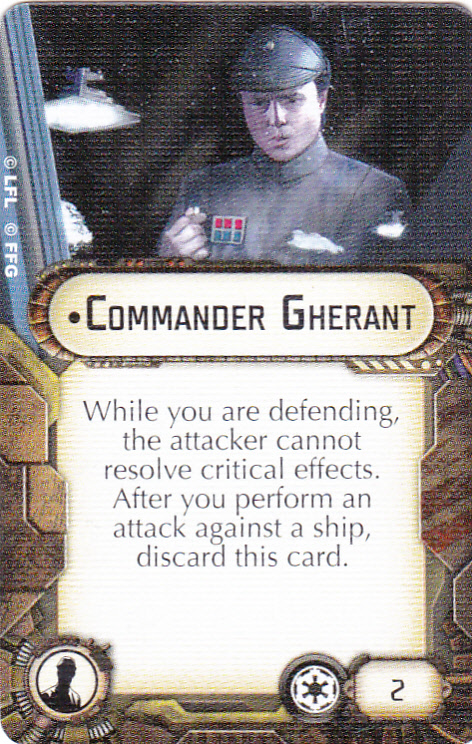 |
| Gherant practices his Clenched Fist Imperial Power Pose with his reflection, but he's still bad at it. Like everything he does. |
All that said, Gherant is terrible. I see what they were trying to do with the SSD - you assume that the SSD will be out-activated and therefore may be taking some fire before it gets to fire back, so Gherant will keep it safe for a little while. The SSD has 3+ officer seats, so Gherant won't take up too much space, right? The problem is Damage Control Officer on the SSD does that job so much better over the course of an entire game, rather than just one round, so the question then becomes "are there any other ships without access to 2 contains that might want Gherant even when the SSD doesn't?" The answer, sadly, is "no, not really." The benefit is so uncertain and the restriction so onerous on most Imperial ships that it's not worth it. If your opponent isn't relying on crit effects, Gherant is wasted where a proper defensive officer isn't and defensive officers provide a benefit all game long. The best-case scenario that comes to mind is on a Slicer Tools Gozanti where the intention is to flak squadrons and slice ships and avoid throwing dice at ships, but the benefit is fairly minimal given if and when crits actually connect to a flotilla (by getting through the scatter and evade token), the flimsy flotilla is likely to be on its way out regardless.
In short, Gherant is binder fodder. Leave him at home.
 |
| Commander Vanto Call Him Benedict Cumberbatch |
All that rules stuff aside, Vanto is pretty great for token economy and is extremely flexible with what type of token he can provide. He produces an immediate comparison to good ol' Wulff Yularen, his 7-point wave one Imperial officer competition for token economy. In my experience, Wulff is superior if you just want to keep spamming the same token (usually to feed a fleet command or to keep triggering a command-triggered upgrade). Vanto is superior if you want a more general-purpose buffet of tokens to choose from.
 |
| "Stop it with the 'Where's Woldar?' jokes, I'm tired of them." |
Woldar prompts immediate comparison to the Rebel officer Toryn Farr and I've got bad news: he's basically a crappier Toryn for 3 less points that sits on a more expensive flotilla without access to the Bright Hope title. Woldar does have the noted upside of being able to reroll one die of any color, which has its benefits on black dice (like with Decimators or TIE Bombers when they're stuck dogfighting) or red dice (like with Zertik Strom or I suppose Mandalorian Gauntlet Fighters if you lost a bet). Unfortunately, Woldar can't help your squads against ships like Toryn can (when they roll blue dice) nor does he provide the insane flak bonus Toryn does when your ships attack squads. In short, Woldar kind of sucks.
All moping aside, if you're determined to use him, Woldar does provide some welcome support for generally-overlooked squadrons that don't mind dogfighting but would like a bit more reliability, such as TIE Advanced, TIE Defenders, and TIE Phantoms as well as all the Imperial rogue options, including the bounty hunter aces. In particular, he loves anything with non-Swarm Counter so he can use his ability more often, so try to include Dengar and/or use him with Decimators or Aggressors.
Woldar generally wants to be on a flotilla to keep his total cost cheap but disposable should he be required in the thick of it and such flotillas like to have the Suppressor title and/or Slicer Tools to be extra annoying if you can spare the extra points. If it turns out there aren't any enemy squadrons, at least on a Gozanti, Woldar isn't taking up as important a seat as if he was elsewhere.
 |
| Vader drinking imaginary wine while staring at people swallowing, like a totally normal person does. |
- Officer Vader's effect is resolved during the Resolve Attack Effects step, which means you can use him in whatever order you like, preferably after adding dice to maximize the value of your reroll. It also means if you're going to choke out an officer that helps during that attack, like Intel Officer, it's important to trigger those first before they get choked out (Intel Officer in particular has a very narrow timing window).
- He only works against ships, so no amount of the choking game will help your anti-squad attacks.
- It's important to note that officers that modify your ship for fleet building (specifically Tua) or swap tokens around on the first round (specifically Needa) do their effect the once and then they're done. The game doesn't "keep checking" on them to ensure they're around to vouch for that defensive retrofit slot or evade token they provided, and can be choked out by Vader with no adverse effect.
- In short, choke out Needa and you still have an evade token. Choke out Tua and the defensive retrofit she gave your ship remains just fine; ensuring you have the right slot for the right upgrade matters during fleet building but not afterwards.
The best recipient ships are often the kind of ships that don't get easy access to dice control, so ships without a Leading Shots slot (let's be honest, ion cannons on big ships are usually Leading Shots) like Arquitens or VSD-Is or Cymoon ISDs. The best officers for those types of ships if you're planning on milking Officer Vader are cheap officers that provide a one-use effect but don't discard themselves. There are a number of 2-point Imperial officers that do this, like Officer Ozzel, Captain Needa, Minister Tua, and Admiral Titus. When in doubt, you can always use Skilled First Officers as 1-point Vader Chow, but I'd rather spend the extra 1 point to get an officer that does something and then gets choked rather than has to choose between using their inherent discard-to-use ability or get choked. There's nothing wrong with choking out more expensive officers that have outlived their usefulness, however, like choking out a Damage Control Officer if your opponent didn't bring special crits, Agent Kallus if your opponent didn't bring unique squads, Director Krennic if you need to stick that close-ranged attack he doesn't work on (don't choke on your aspirations!), or an Intel Officer on a crucial super-attack.
Don't forget Vader can also choke out your commander, but obviously that kind of thing should be done only when absolutely necessary, your commander is about to get shot down regardless, or when your commander has run out of whatever resource they consume to do their commander thing (say, Tagge after both his token regeneration rounds or Thrawn once he's used his last dial).
 |
| Sure her card is terrible but at least we know about poliosis now, right? |
Director Isard has a neat effect but unfortunately her utility is limited without a good combination card to really utilize the information you gain. Presently, you could make an argument for using her in a fleet with a Slicer Tools Gozanti so the Gozanti has a better idea as to whether a particular ship is a high- or low-priority hacking target, but the argument is a bit of a stretch. If and when the Imperials get access to some kind of effect that allows you to punish an enemy ship when you correctly guess its top command, Director Isard will finally have a home. Until then, I have a hard time recommending her.
 |
| "Dice farming, really? A man of your talents?" |
- Because you must resolve a con fire command to get Krennic's effect, that means a few things:
- The entirety of the con fire command must be resolved first. This means both dial and token if you chose to resolve it that way.
- Because you can only resolve each command once per activation, Krennic is also restricted to being used once per activation.
- Note that all of Krennic's reroll shenanigans stack, so if you spent a dial and a token, you would be able to reroll any number of red dice and then reroll up to 2 more red dice afterwards (or the other way around, I guess, if you wanted).
- Because con fire dials and tokens are spent in the Resolve Attack Effects step, you get to see your initial roll first before committing to resolving a con fire command. That means if you're getting two attacks this round and your first attack doesn't need a reroll, hold on to your con fire dial and/or token for the second attack to apply your reroll where you may need it the most.
- Note that Krennic only works at medium to long range. He does nothing at close range.
- Krennic works on a single anti-squadron attack you concentrate fire in as well, provided it has red dice involved and is at medium to long range.
Specifically, any ship that lobs a lot of red dice at medium to long range, wants dice-fixing, and has a means of getting con fire commands done consistently is happy to have Krennic provided there's not a more pressing officer demanding the chair. Two very specific ships come to mind with these qualifications: the Arquitens Light Cruiser and the Cymoon ISD, although additions can be made to the list for other ships built to the right specifications. In either case, you'll want to prioritize turbolaser upgrades that add additional red dice and a means of either doing con fire commands yourself (Arquitens, generally) and/or getting con fire tokens (Cymoon, generally) while meeting your other needs. That said, an Arquitens con firing with Slaved Turrets for 5 rerollable red dice without any assistance from Vader (commander or officer) is pretty considerable, as is a Spinal Armaments Cymoon keeping its Gunnery Team while being able to get up to 7 rerollable red dice at long range.
Speaking of Gunnery Team, there's synergy there in Armada 1.5 - both upgrades don't work unless triggered by a concentrate fire command, so if you build a token- or dial-feeder apparatus into a ship to get Gunnery Team working reliably, then Krennic is an easy add as well as he'll happily piggyback off the infrastructure you've already got.
Don't overlook the effect of Krennic with just con fire tokens, though. A Comms Net handing off con fire tokens produces a one-die reroll (any color) followed by a two-red-dice reroll, which is in my experience absolutely enough for even a Cymoon under most circumstances.
 |
| "Commander Cody, execute order 67: ready the annoying cardboard-flipping mechanism." |
 |
| Okay okay whatever you want, Big Papa Palpatine. |
Officer The Senate comes in a pretty cheap package, the only real restriction being you can't use him with Commander The Senate (yes, I'm running The Senate jokes into the ground, just accept it). He's best in an officer seat on a ship that's going to attract fire, typically the SSD but also great on an ISD. If you can use Reactive Gunnery or Local Fire Control on his ship, combining his effect with salvo can also be fun, forcing an opponent to spend a defense token and then attacking them afterwards. Combining him with other defense-token-screwage tech like a Suppressor Gozanti, Intel Officer(s), or Admiral Sloane can further turn the screws on your opponent's poor defense tokens.
If you're looking to really make ace squadrons sad, Officer the Senate is one of the few situations where I'd seriously consider Quad Laser Turrets on his ship for Counter 1 against squadrons - ace squadrons will ideally be getting their tokens spent, hitting Counter 1 (which can encourage spending the scatter if they have it and is extra good if you're an SSD also packing Agent Kallus) and then getting flakked normally. Make sure to particularly enjoy the pain suffered by aces getting additional attacks through Adar Tallon or Colonel Jendon as they keep spending those defense tokens.
 |
| Guess who's back, back again.... |
Governor Pryce is back, and she's.... slightly less mean! Once per activation (which means both yours for regular attacks and your opponent's for Salvo ones), you can spend a shield to change a die to any face. Free double hits on your red, all for the low low cost of 1 shield! Free accuracies! Free hit/crits on your black dice! Annnnd you're now flying a near shieldless ISD, good jorb.
In essence, she's easy to understand (trigger crits, get accs, improve damage, combo with Quad Turbolaser Cannons for a free double red accuracy) but the trick to her is making sure your shields remain up; if I'm shooting you in a shieldless zone, you can Salvo all you want but you can't Pryce a dice. Hence, you're going to want her on ships that can have friends either tossing them shields with Projection Experts or engineering tokens (possibly both). Realistically, because of her expense and need for spending shields, she's on a large or huge base. Onagers for extra crit damage from range, ISDs with Romodi for getting REALLY mean shots at red, or Super Star Destroyers with the aforementioned QTCs. Either you naturally roll a red accuracy OR you force her to give you one and get a free one for the trouble. I reiterate, again, that you want to make sure you keep your shields up. In the words of a famous ex-Jedi, "It is unwise to lower your defenses!" Good card, expect to see her on some beefier lists helping (or attempting to help) murder your ships. And watch out, small bases, your Evade is about to get locked down (he says, having had this happen to me like 4 times in one game).
The one upside for non-Imperials slash downside for those Impos is that if she's driving the ol' space-bus, then Intel Officer, Tua, or whoever else isn't in there, and 7 points makes for a more expensive ship if/when it dies. Watch out for that, especially as you keep spending shields for her ability.
 |
| "Where is Spain? Why does everyone ask if I'm from there? It's so unexpected!" |
- The line "when an enemy ship... changes its speed" is a little more nebulous than I'd like, but has since been clarified in an FAQ to mean "This card’s effect resolves when the value on an enemy ship’s speed dial is changed," which means the Grand Inquisitor will trigger when an enemy ship's speed changes against its will from effects like Tractor Beams.
- Remember that you can't premeasure with the maneuver tool until your ship gets to its Determine Course phase, so when the Grand Inquisitor triggers you don't get the benefit of putting your maneuver tool down to see what your options are at a different speed like you do with a navigate command.
Okay, so when would you want to use the Grand Inquisitor over a more reliable officer that can help you change your speed? A few situations come to mind:
- On ships using Quad Battery Turrets, the Grand Inquisitor can be quite helpful as he allows you to slow down during your opponent's turn, prior to your attack with the Quad Battery Turrets. Given that heavier enemy ships are often slowing down to avoid the extra blue die when the dice start flying and lighter enemy ships are often speeding up to get out of your front arc, the Grand Inquisitor often has ample opportunities to trigger and can assist you with getting your speed into the "just right" category where you'll be able to use your QBTs and also navigate as you prefer.
- With a speed-screwage subtheme, usually with Tractor Beams. So long as an opponent's ship speed dial changes its number, the Grand Inquisitor works. So temporary speed reductions like G8 Experimental Projectors won't work, but Tractor Beams will do the trick. Plus your opponent will usually be navigating more to try to overcome said speed screwage, so your Grand Inquisitor has a lot of opportunities to trigger.
 |
| Easily Iden-tified as well-Versio-ed in commanding a Raider. |
Iden is a godsend to those of us who love Raiders and I'd consider her primarily for the top half of her rules card. She's obviously got her uses with other Imperial ships with evades, but you get an awful lot more mileage out of her on a ship with two evade tokens, both in terms of more possible uses as well as making it less likely that your evades get locked down due to duplication. It's important to note that she does nothing extra at medium range, so you'll generally want your Raider at long range or close range. Once you figure you've gotten as much mileage out of her as you're likely to, she can jump ship with a squad command to annoy an opponent's ship with a raid token. Sweet.
It's important to note that generally Versio is best against numerous smaller attacks, which makes her Raider very resilient against squadrons. If a horde of Y-Wings goes after Versio's Raider, they're going to find that they've picked a fight with an even more annoying Admonition when their single-die bomber attacks keep getting braced or removed entirely, and Versio can use her effect 4 times in a single round at best, so it keeps on happening (by double-spending both evades). Just be careful and don't assume she makes her Raider immortal - you still don't want to try tanking big blasts from large ships.
 |
| Stop watching Youtube and go instruct someone, you slacker! |
In short, have a plan for Goran and make sure your plan is worth the officer slot and the points. It is fun getting your Interceptors up to Counter 5 with a Swarm reroll and obstructed (if you use everything in that Stronghold combo blob) but you better have a plan for "what if my opponent didn't bring squads or what if my squads need to fight away from my Quasar buff bubble?" because that's an awful lot of points going towards doing all that.
 |
| Good luck not accidentally calling her Walex Blissex at least once. |
Lira is generally not a good officer, because you need all of the following to be true to use her:
- An officer slot not better used on something else.
- Easy access to as many repair tokens as she could possibly want without cramping the ship's desire to hold onto other tokens.
- A ship that expects to not only take some crits here and there but also might overlap asteroids too.
 |
| Cha cha real smooth! |
Minister Tua is pretty amazing, allowing you in most cases to add a defensive retrofit to a ship that normally doesn't have one for a 2 point fee in addition to consuming the officer slot. She's got obvious uses on VSDs, Interdictors, and ISDs without defensive retrofits but there's also good arguments to be made for her on clutch small ships, usually Demolisher.
That's not to say Tua is an auto-include, though. Spending points on her in order to spend more points on her defensive retrofit can be unpalatable on cheaper ships where those extra points add up fast; conversely, having her sitting in the officer chair can be tough on more expensive ships that want a more conventional officer. If you can fit her in, however, the increased durability available to her ship can be pretty impressive compared to its usual capabilities.
 |
| In her spare time, she builds elaborate K'Nex shield batteries. |
- An already-exhausted token.
- An attack coming at a hull zone with at least 1 shield left on it.
- She's readied, so she can exhaust to do her trick.
If not, then she doesn't do anything. So ideally you consider her on a ship with a lot of shields and some duplicate defense tokens or a defensive retrofit slot. Alternatively, you can at least guarantee the first requirement by spending your own defense tokens with something like Turbolaser Reroute Circuits or Commander Vader. She's a lot of fun with different defensive retrofits for different reasons:
- Electronic Countermeasures helps ensure you get to spend a single high-impact token (usually brace) and Reeva later helps you ready it before you get hit by a later attack that hopefully won't have an accuracy.
- Advanced Projectors is great for keeping shields facing your opponents healthy while you redirect to hull zones that aren't under threat, which keeps Reeva triggering more reliably.
- Reactive Gunnery allows for spending defense tokens to salvo back, and Reeva is happy to refresh them for you so it's less of a hassle for that ship.
Reeva is most easily put on a Super Star Destroyer, given it's a laser magnet and has lots of shields and duplicate defense tokens, but she can also be productively used on Imperial Star Destroyers
with defensive retrofit slots. A fun trick with her on the SSD that
takes advantage of the extra officer slots is pairing her with other
defense-token-linked officers like Expert Shield Tech and/or Damage Control Officer to get a third guilt-free use of one of those types of tokens when it would be handy.
Just be sure to lean into using repair commands fairly regularly (or use other means of regenerating shields like Shields to Max or Projection Experts) or else you'll find enemy attacks keep targeting shield-less hull zones and Reeva won't have a chance to trigger.
 |
| The Empire created an evil clone of Dick Tracy and then promoted him to Taskmaster. |
- Remember to set his favorite command after deploying fleets. It can be easy to forget.
- This can also influence your choice of command, depending on what ends up in Grint's neighborhood.
- Grint only triggers when you reveal a command matching his favorite token, so effects where you gain command dials (like Thrawn) or count as resolving a command (like the Pursuant title) don't work with him.
- If you have any other uncertainties about the command structure of Armada relating to Grint and revealing commands, please see my article about it.
- On a ship that intends to keep using the same command the majority of the game, such as a Quasar that intends to command squadrons nearly all the time. In these cases, you're augmenting the command you're doing all the time with an extra "free" token.
- This is especially appealing if you have a way to get your other incidental commands (usually navigate, sometimes repair) met with tokens provided by a Comms Net Gozanti or Tarkin or you've got spare command dials coming in from Thrawn, etc.
- On a Comms Net Gozanti that intends to keep feeding tokens to a fleet command upgrade and that Gozanti can make full use of the command dial for itself.
- The easiest example of this would be an Assault Carrier (red die) Gozanti using concentrate fire dials while feeding concentrate fire tokens to an Intensify Firepower ISD - the Intensify Firepower effect will even out the Gozanti's own dice and with two red dice at long range, the Gozanti can still contribute to combat.
- This is another benefit over Wulff in that Wulff can't save tokens that are discarded or removed, only those that are spent. Grint doesn't care.
- Grint can be a discount Wulff on ships that mostly want to recycle command tokens to trigger upgrades linked to specific commands, like a Gladiator using Engine Techs.
- To continue that example, Grint would give an extra token to allow navigate dials to either function as a 2-speed change (fake Ozzel) kind of effect or you could spend the dial one round and the token the next to keep using Engine Techs back-to-back rounds while freeing up your command dial stack for some other commands.
- This is only appealing over Wulff if you still want to use the dial function at least every other round, though.
 |
| It's tough being an intelligence officer stuck very unintelligently on the first Death Star. |
Wulff is a good, if expensive, officer and he has a lot of potential uses. I primarily find him helpful as an officer for two basic setups:
- On a ship that has a command-triggered upgrade. Specifically what comes to mind is a Gladiator (or any ship, really) with Engine Techs, which can be triggered every turn by having Wulff constantly respawning your navigate token. This is also the case on an Interdictor with Projection Experts, where Wulff can keep boosting your repair commands every turn with an infinite repair token.
- Feeding a fleet command upgrade all game without any need for additional token-feeding mechanisms (like the oft-mentioned Comms Net Gozanti).
Hi, I just wanted to say a massive thanks for your site and its fantastic content. I bought into Armada really early on but have only got it to the table a handful of times.
ReplyDeleteYou've helped reveal the depth in the game, analyse many of the upgrades and ships I don't have (yet!) and have basically made me want to get along to more meets to push some ships around!
You're most welcome! I'm glad to hear John and I have been helpful and sparked a renewed interest in Armada! It's a great game and we're obviously pretty excited about it overall ;).
DeleteDoes the Station trigger Brunson's ability?
ReplyDeleteIt does, given that it is an obstacle, although a friendly one. Even if it otherwise does not obstruct or heal like in Contested Outpost, it is still an obstacle.
DeleteThe instructor is going to be useful soon with the Intel nerf...Stack with dengar...
ReplyDeleteGoran definitely improves with the Intel nerf. Whether he's worth bringing over other squad-helper officers... we'll see. But he's definitely much improved when Intel no longer turns him off.
DeleteThis is just a thought a had, I’ve never tried it, but would Commander Gherant actually work on a Quasar Fire, seeing as that ship does not often attack the enemy directly but needs protection?
ReplyDeleteThat or a Gozanti are probably the best bets for him. That said, the opportunity cost of using Gherant instead of another officer (even just a Skilled First Officer on a Quasar, but obviously stronger more expensive alternatives exist as well) is too high for me.
DeleteA dedicated Anti-Starfighter Raider would love to have Gherant on board.
DeleteI **strongly** discourage running Raiders built only to flak because you're far better off putting those points into conventional fighters plus enemy squadrons can avoid a flak Raider far better than a flak Raider can chase them down by itself. Plus you have no way of knowing if you're hitting a squadron fleet or not.
DeleteGunnery Chief on her union break?
ReplyDeleteGunny V is not an officer, she's a weapons team. Therefore, she's in the Imperial-specific upgrades article instead.
Deletehttps://cannotgetyourshipout.blogspot.com/2020/12/imperial-specific-upgrades.html
This came up today:
ReplyDeleteWhen a small ship is defending against a large ship at close range and discards an evade token to affect 2 dice, does Iden Veriso allow two dice to be cancelled, or is it just once cancel and one re-roll?
That's an excellent question. Consulting the rules reference guide it says (under evade, in the defense tokens section):
DeleteWhen a ship spends an [evade] token while defending against a ship of a larger size class, it may cancel or reroll one additional attack die, as appropriate for the attack’s range. If it does, discard the spent token, whether it is readied or exhausted.
Because Versio modifies the effect of spending the token at close range, you'd cancel an additional die.
Thanks for the reply and answer. As an Imperial player, I like this a lot. My Rebel playing companion, not so much... :-D
DeleteIn regards to Vanto... If you are doing a dial/token combo, does the token resolve before Vanto's ability activates? For example, you flip a squadron dial and have a squadron token, you would activate the requisite number of squadrons, clear the token and tap Vanto for another squadron token?
ReplyDeleteYes, you spend both the dial and the token, then you resolve the entire command. Then you have the window to activate his ability and get a token.
DeleteI tried to post this the other day and it said there was an error, so I’m trying again. Sorry for the repeat. Anyway, I’d like your thoughts on whether Lira Wessex can protect a ship against the effect of Boarding Engineers. Lira’s effect can trigger “When you are dealt a faceup damage card”. Boarding Engineers look at a ship’s facedown damage cards and flip one or more of them up. If what Boarding Engineers do is considered “dealing” a faceup damage, then I think Lira could put it facedown again without resolving the effect. But if it’s not considered “dealing” the faceup damage, then I guess the ship would have to just take the nasty faceup effect, wouldn’t it? I appreciate your thoughts on this. By the way, your site is great. I’ve learned a ton from it, and its just fun to read too.
ReplyDeleteThat's weird - at least it came through this time!
DeleteLira won't work in that circumstance because the card(s) in question aren't being "dealt" to the ship, they're simply being flipped over. They're only "dealt" when they are en route from the damage card deck to the ship (as you're "dealing" the cards from the deck to the ship). I can understand the confusion, though, the term is a little nebulous.
And thanks for your kind words!
A bit late to the party here, but I've found what I think to be the only real good use for Becky with the good eye. I've had a lot of fun running her on a Victory 2 with Harrow, using her to power both gunnery teams and engine techs at the same time as often as you like. It doesn't have much survivability, but with disposable capacitors throws out more consistent firepower than a Cymoon for around 110pts, and is bizzarely maneuverable for a vic. A lot of fun and unexpected by many opponents!
ReplyDelete