
 |
| Yup, this is why we're all in this game: A CR90 fleeing some unknown ship of some type or another |
So let's start with some pictures of what we're talking about.
 |
| Are they Corellian? Are they Alderaanian? Who cares, they're AWESOME! (Guitar solo) |
They both have 4 HP, and 2 shields across everywhere but the rear. With no brace tokens, and just one redirect token, this is a ship that does NOT like taking damage. Its engineering of 2 also isn't ecstatic about FIXING damage, as you'll need to have a token and a command to get rid of any faceup damage.
Luckily, they have 2 evade defense tokens to let them try to not take damage, and they have a 1-command stack. The ability to change what they need to do (Engineering! Concentrate Fire! Navigation!) on a dime lets them fill many roles in many fleets. Their squadron value of 1 isn't good, but it.... exists. Again, there's 3 better commands for them, use those instead. The A version has a Turbolaser Slot and some red dice, and the B version has an Ion Cannon Slot and only blue. Other than that, identical.
Basic Usage Recommendations
Use their nav chart, navigate often and as your default command. At speed 2 with a command dial, they're equivalent to Raiders, and at speeds 3 and 4 they're much better than Raiders, with an extra click at the end there. Plus, with the dial used at the right spot, that's potentially TWO spots you can have 2 clicks at, which can put you right where you need to be. What CR90s do has often been referred to as Kiting; "to kite", in which they throw their dice and flutter away from your ships like a kite in the wind. THAT, do that. You can't handle sustained shots, and you REALLY don't want to be in the front arc of ISDs, so don't be there. Shoot, then scoot. Fire, then flee. With that great navigational chart, they can dance in and out of danger as they rack up hits on your opponent.
Generally, start them at speed 2 or 3, and move them later in the turn if you can. You're going to want to end turn X at (preferably) red range or further from your opponent's ships. When your opponent moves in to your range at turn X+1, fire, and repeat. See the pictures below for an example of what I'm talking about. This holds true for the CR90A. CR90B's have a similar idea, but it may require getting in closer.
 |
| The CR90 started outside of the ISD's arc, so it was unable to be fired on at that time. The ISD had to move in closer in order to fire on it. |
 |
| Pulling a Nope and getting out of there after firing on the ISD. |
 |
| Like I said, about 45 degrees there. Use that as a basic guide for getting the arcs right on your patterns. |
Titles
There are 4 titles that the CR90 has, although competitively there's one main one you'll see. Let's start with that one:
 |
| Stuck between a rock and a hard place. Yes, I'm proud of that pun. |
 |
| The Pride of West Yavin 4! Go Wildcats! |
Is it a great title? Competitively, no, as you can get a similar effect on an MC30 with APTs and that's ADDITIONAL damage that doesn't require you to give up everything you've rolled. The Pride does allow you to trigger on both attacks you make, though. It's a fun title that isn't incredibly overcosted (cough cough VSD titles cough cough) so throw it on if you want to. Jaina's Light is a better choice though. I've heard of Profundity bombs kicking one of these out, and it's.... again, fine. It sets up the MC75 shot, and it's fine, but I can't claim it's AMAZING. More often than not, I'd rather have 2 and 3 damage to a ship as opposed to 2 to a hull, but that's a call you'll need to make.
 |
| I'm liberating you from needing a Pelta. |
 |
| Titles I swear exist, Volume 2. |
 |
| I think he choked on his aspirations. |
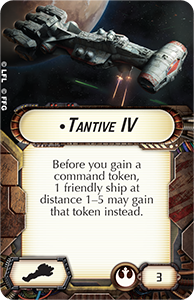
1) You reveal a command. Raymus Antilles says "Here, have a token."* Tantive IV passes it to someone else.
2) You resolve the command, taking it as an actual command, or taking it as a token. If you take it as a token, again, the Tantive IV passes it to someone else (if desired. Maybe you want to keep it for yourself!).
The reason I have that * in there is that if you have Ahsoka Tano in there, she would want to change the token to something else HERE if you wanted to pass the tokens to the same ship (say an HMC80). I like the idea of the title, but finding 10 more points on TOP of a basic CR90 build (below) is not an easy thing to find, especially when I can get the same double tokens passed for 40 points (2 basic GR75s with Comms Nets) which ALSO gives me 2 ship activations as opposed to the Tantive IV's 1 activation. The Tantive DOES have better firepower than the 2 together though, and it works better under Ackbar and in Corellian Conflict.
The thing about the title is that it's basically a Veteran Captain in Title form.
 |
| My name is Placeholder Montoya, you killed my father, prepare to receive a token! |
The title also works with Hondo and his tokens, and can result in you effectively passing two tokens to the same ship, if that helps.
CR90A
This is the basic CR90 that you see pretty often. This one flies as I said before. Kiting away at most signs of trouble. With the decent maneuvering, you're going to want to double arc things as much as possible. The reason you'll want to double arc is because of the standard upgrade found on it:
Common Upgrades and Usage
Turbolaser Reroute Circuits (TRCs)
CR90A
 |
| "Size matters not" |
Common Upgrades and Usage
Turbolaser Reroute Circuits (TRCs)
 |
| Scourge of the Imperial Navy! |
There's one upgrade found on CR90s most of the time, and it turns them from minor annoyances to murderous little jerks. Red dice are the most fickle dice, so being able to manipulate one and turn its side to a double hit can just cause angering amounts of damage. Rolling out the side, if the blue dice gets a hit, the red dice makes it 3 damage out the side. 3 damage that needs to be redirected or braced and just like squadrons, 3 damage getting braced goes down to 2 and it is frustrating to deal with. Now imagine them in swarms with several CR90s using these! Possibly even with Intel Officer!
TRCs turned CR90s ON when they showed up. The basic ability to guarantee minimum 2 damage from a red dice and fix any blanks you roll is such a pain to deal with. The damage comes in such small amounts that it's hard to use defense tokens effectively.... just like squadron fighting! These upgrades are so commonly seen on CR90As that they'll often be referred to as TRCR90s. It's 51 points of great support that'll plug into most lists and does a job very well. They add in damage on ships either early in the turn, forcing them to consider spending defense tokens or leaving unshielded parts of the hull, or they add in later when your other ships have gone, causing the unshielded opponent ship to take more damage.
Every other (non title) upgrade usually found on CR90As is just for doing what it does better with those TRCs.
Officer:
Either the aforementioned Intel Officer and Raymus Antilles, Hondo/Sabine because you have the slot, or potentially Lando if the CR90 is your flagship. It's a squishy ship that does not want to take sustained fire, so make sure you're dodging what you can of it. The downside of Intel Officer is that you need multiples to be sure that the damage "sticks" to your opponent, but it's not a BAD idea. Just, make sure you get 7 points worth of use out of it.
Support Team:
Engine Techs. Or FCT if you HAVE a plan for it (not just because you have the slot). Auxiliary Shields Teams SEEMS good but their engineering value is too small in order for this to be really worth it. Engine Techs lets you get EXACTLY where you need to go with your ship, and there's something to be said about a potential Speed 5.
Defensive Retrofit:
Usually nothing. You CAN take Reinforced Blast Doors, but it's not strictly necessary. The other Defensive Retrofits aren't really something you get significant mileage out of over multiple turns to be worth equipping onto your ship. Potentially you can use Reactive Gunnery, but you may want to change from TRCs to LTTs for the ability to reroll and "fix" more red dice shots. You're trading a guaranteed 2 from one shot for a chance at more individual packets of one damage. Your call if that's worth it to you or not.
Builds:
Bog Standard (53 points)
Jaina's Light
Turbolaser Reroute Circuits
This is the most basic CR90 used, and it keeps finding its way into nearly every Rebel fleet I play. The ship works great with literally any admiral, and it can operate independently if needed too. The only reason to not include this is that you just don't have the points for it.
Ackbar Support (61 points)
Tantive IV
Raymus Antilles
Turbolaser Reroute Circuits
I needed a second example here, and it basically amounts to putting this in an Ackbar list over a Comms Net flotilla, depending on if you need the token for who and when. Notice that TRCs are still on there, but it provides both support and firepower. I call it Ackbar support mainly because I'm always running points-tight with him more than other admirals, but it works for almost anyone. Again, just make sure it's worth the 9 more points (and lack of Jaina's Light title!). The cheaper version here cuts TRCs for powering up Intensify Firepower! on a Pelta (using one of the con fire tokens you pass!)
CR90B
So I've seen a few people (not as many as Eric's Raider Haterz!) complain that CR90B's are not good/useless. First, no. Second, still no. They don't act the same as CR90As, but they act similarly. Kiting, moving from into range to out of range/not getting shot in the front arc from ISDs, etc. However, because they're firing blue dice, they need to be at a range that can lead to problems. Eric mentioned before in the Victory Article that the difference between blue and black range isn't much. You may want to shoot ISD-Is in the side arcs... keep range in mind when you're rolling up in their sides, as those black dice can HURT. And with you in short range, your evade tokens don't work as strongly as at long range (reroll may be reduction, may be just changing a crit to a regular hit). Careful is the watchword, and careful is how you can keep them alive. How do you make them worth it, though? The Ion Upgrade slot:
Common Upgrades and Usage
Officers:
The same as the CR90A.
Support Team:
Engine Techs. Or FCT if you HAVE a plan for it (not just because you have the slot). Auxiliary Shields Teams SEEMS good but their engineering value is too small in order for this to be really worth it. Engine Techs lets you get EXACTLY where you need to go with your ship, and there's something to be said about a potential Speed 5.
Defensive Retrofit:
Usually nothing. You CAN take Reinforced Blast Doors, but it's not strictly necessary. The other Defensive Retrofits aren't really something you get significant mileage out of over multiple turns to be worth equipping onto your ship. Potentially you can use Reactive Gunnery, but you may want to change from TRCs to LTTs for the ability to reroll and "fix" more red dice shots. You're trading a guaranteed 2 from one shot for a chance at more individual packets of one damage. Your call if that's worth it to you or not.
Builds:
Bog Standard (53 points)
Jaina's Light
Turbolaser Reroute Circuits
This is the most basic CR90 used, and it keeps finding its way into nearly every Rebel fleet I play. The ship works great with literally any admiral, and it can operate independently if needed too. The only reason to not include this is that you just don't have the points for it.
Ackbar Support (61 points)
Tantive IV
Raymus Antilles
Turbolaser Reroute Circuits
I needed a second example here, and it basically amounts to putting this in an Ackbar list over a Comms Net flotilla, depending on if you need the token for who and when. Notice that TRCs are still on there, but it provides both support and firepower. I call it Ackbar support mainly because I'm always running points-tight with him more than other admirals, but it works for almost anyone. Again, just make sure it's worth the 9 more points (and lack of Jaina's Light title!). The cheaper version here cuts TRCs for powering up Intensify Firepower! on a Pelta (using one of the con fire tokens you pass!)
CR90B
 |
| "Adventure, excitement. A Jedi craves not these things. You are reckless!" |
Common Upgrades and Usage
Officers:
The same as the CR90A.
Defensive Retrofit:
Again, usually nothing here. If you DO go for a Ramming build below, Reinforced Blast Doors is more often seen here as opposed to the CR90A.
Support Team:
Engine Techs if you can, but not mandatory.
The main spot these differ from the CR90A is the Ion Cannon slot, and there are 3 main ones seen.
SW-7 Ion Batteries
Every dice roll is a damage, no matter what you roll. Lando and Targeting Scramblers do nothing against this, as the best you can get is "not a crit." 44 points and a concentrate fire dial for 6 total damage is mean.
Ion Cannon Batteries
With all the changes and necessary tokens in Armada 1.5, this card has had its stock increased. At the worst case, if the crit doesn't have a token to eat, it's a free shield zone damage. But if it CAN eat the token, you can alter all sorts of fun things. Especially boarding teams! You're giving up the reliability of SW7s for the chance to wreck someone's plans that required a token. That's your call if it's worth it or not.
Heavy Ion Emplacements
The fanciest choice of critical upgrades you can equip to your CR90, and it does a HECK of a lot of damage. One crit does THREE damage, and it packs a wallop. The critical exhausts of course, but does it HURT. You can nearly wipe out an entire ISD's shields zones with a good shot into the face from this. Ensuring the crit ain't easy, but with Toryn, con-fire tokens, Leia rerolls, and a LOT of luck.... again, you wipe and ISD's face. That ain't nothing.
With all of these Ion criticals, mainly focusing on HIE, MS-1s, and ICB, the important thing to remember is (to steal from Ard; thanks for writing my article for me!) "If you're looking for a platform for the critical, the CR90B works well, but in those cases the ion is part of a larger fleet strategy, not looking for something to make your CR90B better." Keep THAT in mind and you'll be off to a better start. Just don't use Overload Pulse.
Builds
Black Betty (49 points)
SW7s
Reinforced Blast Doors
This is a slightly chonky build for an initial 39 point ship, but this little bugger is a NIGHTMARE if you're not ready for it. Usually seen under Rieekan MSU, Black Betty runs into the face of an ISD at the end of the turn. And by runs into, I mean it literally navigates into it, blocking its movement. Start of next turn, it discards the Reinforced Blast Doors, concentrates fire into the front of the ISD for 3 from the side and then its usual 3 from the front, annnnd rams the ISD again. The ISD attempts to blow it up (else it will do it again next turn), but Rieekan says "no, it's alive for the TURN." So the ISD rams it again as it attempts to leave. And then gets STUCK there because it didn't navigate around where the ship WAS.
Let's calculate that all! 3 total ram damage (2 from the CR90B on 2 turns, 1 from the ISD hitting it) and 6 damage that IS damage because who cares what the blue dice roll? Plus an ISD stuck in place, which means your other ships start moving towards it and smell the blood in the water. If you're not ready for it, this thing is a holy terror. People HAVE spammed these, but even just one both clocking a ship for that much damage AND pinning it in place for a turn are VERY mean to see. Watch out for this one, and try to bring it down from range.
Libera me From Hell (54 points)
Heavy Ion Emplacements
Liberator
All Fighters Follow Me!
This is one I've been trying in a few different fleet builds, and it seems like the best command for Liberator to have for that one turn it needs use. The HIEs of the CR90 combined with the squadrons your other ships are commanding should be wiping out shields near immediately, and then you get to go faster into that delicious hull damage.
 |
| Wedge blew up the Second Death Star! And I helped! |
As much as I joked at the beginning of the article about how the CR90 is everyone's first ship, it is a pretty great building block for most lists. Cheap to upgrade, works well with most commanders, and self-reliant enough that you don't need to worry too much about supporting them, they're a great way to finish out a list and add in one more ship that can deal great supportive damage.
Hi guys,
ReplyDeleteI found your Armada blog just the other day and it's a great source of inspiration for me as I find my way back into the game.
One point I may add to this otherwise excellent summary of the CR90's capabilities is mentioning Leia Organa as an officer upgrade. Cheap enough to be still squeezed into a list she is invaluable to help out less responsive ships. It doesn't matter if your battle plan just went horribly wrong or slicer tools got the best of you, the princess just saves the day!
Cheers,
Marc
Thanks for reading! I've used Leia to decent effect on the GR75, but really she's great on any Command 1 ship that wants to help out a Command 3 friend. I talk about why I like her on a GR75 more than a CR90 HERE: http://cannotgetyourshipout.blogspot.com/2017/06/rebel-officers.html
DeleteWhat about listing a "Raddus Express" flagship? Do you think the A or B is the better model, and how to fit it out? Do you want to fill it up - Jaina's Light, Engine Techs, Derlin or Lando, ECM, and TRCs/SW7s? Or go cheap as chips so you can spend more points on your bomb? Or somewhere in between with Jaina's Light and Lando?
ReplyDeleteI feel like going with the -A and filling it out would be good; you can drop a black dice ship almost anywhere you want at distance two of a CR90 with ET, and that way it can actually contribute meaningfully from a distance on the bomb's turn. But that's just theorycraft, as I can't seem to make TTS work with my lousy connection.
Personally I think either should work for delivering the Raddus ship but you're playing a dangerous game relying on a CR90 staying alive. Especially with Raddus where you won't often have a lot of activations to wait it out consistently to zoom in and drop your ship at the start of the next round. I'd recommend an MC30 (especially with a title and/or defensive retrofit) as a much more durable alternative if you want something that zippy. An Engine Techs LMC80 can do all right too.
DeleteYeah, I'd say either use another large base as a Raddus flagship, an MC30, or if youre determined, an Engine Techs Jaina's TRC (move wherever you want, rocks are for others). Be reeeeeal careful though, as the Evade change helped but not enough for me to be comfortable diving my commander into the front of an ISD shot at range. Any points you spend on your flagship and keeping it alive are tending towards reasons towards putting him on a better, not as squishy flagship to begin with, where those will get more mileage.
DeleteJust a possible editing point, under the CR90B section you say that " in short range, your (non-Mon Mothma) Evade tokens don't work". Except that I thought they did work at close range after 1.5 (or am I missing something?)
ReplyDelete