
 |
| Uncle Ben taught us that with unlimited power comes... unlimited responsibility? |
 |
| Admiral Ozzel singing David Bowie's "Changes" at a helpless subordinate. Ch-ch-changes! |
- Sorry, no using him with his commander version. He can only put on his officer pants or his commander pants, not both.
- The start of the first round is basically once everyone is done with fleet deployment and before the Command Phase, where command dials are set for the first time.
- The speed-1 maneuver otherwise behaves just like a normal speed-1 maneuver, which means:
- You use your ship's speed-1 column for determining your ship's yaw, just like with Engine Techs.
- You have a Determine Course step where you can trigger effects like Moff Jerjerrod to give you extra yaw.
- Fun fact about Moff Jerry: his effect wears off at the end of the ship's activation (see below), meaning the speed-1 yaw will remain buffed through Officer Ozzel's ship's first activation as well.
- Effects that trigger after completing a maneuver, like Fighter Coordination Team, will trigger upon the completion of this maneuver.
- Even though the ship gets a maneuver, which is normally part of an activation, this particular maneuver is absent an activation, so effects that trigger on activation, like Squall, don't apply.
- Because very few other effects can possibly trigger this early, it's difficult to combine Ozzel's free move with any other shenanigans like Engine Techs (you can't possibly have any nav tokens/dials yet) or fleet commands (they trigger at the start of the ship phase).
- That said, be careful to check other "start of round" triggers like Admiral Raddus to ensure players are doing these effects in the right order (first player, then second player) and keep them in mind before you go charging off right into a Raddus drop.
- There is one exception brought to my attention when it comes to Engine Techs: the objective Salvage Run would, in fact, give you a nav token in time to spend it for no effect except to trigger Engine Techs on the Ozzel move.
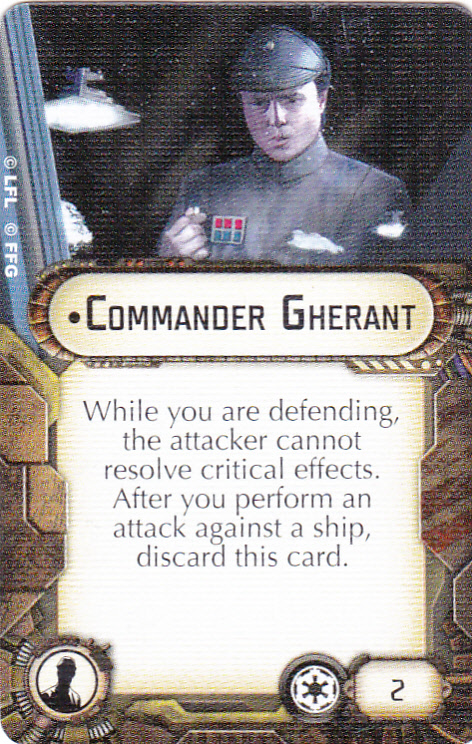 |
| Gherant practices his Clenched Fist Imperial Power Pose with his reflection, but he's still bad at it. Like everything he does. |
All that said, Gherant is terrible. I see what they were trying to do with the SSD - you assume that the SSD will be out-activated and therefore maybe taking some fire before it gets to fire back, so Gherant will keep it safe for a little while. The SSD has 3+ officer seats, so Gherant won't take up too much space, right? The problem is Damage Control Officer on the SSD does that job so much better over the course of an entire game, rather than just one round, so the question then becomes "are there any other ships without access to 2 contains that might want Gherant even when the SSD doesn't?" The answer, sadly, is "no, not really." The benefit is so uncertain and the restriction so onerous on most Imperial ships that it's not worth it. If your opponent isn't relying on crit effects, Gherant is wasted where a proper defensive officer like Brunson, Montferrat, or Tua isn't, and Brunson, Montferrat, and Tua provide a benefit all game long (unless Monty crashes, because he refuses to wear a seat belt). The best-case scenario that comes to mind is on a Slicer Tools Gozanti where the intention is to flak squadrons and slice ships and avoid throwing dice, but the benefit is fairly minimal given if and when crits actually connect to a flotilla (by getting through the scatter and evade token), the flimsy flotilla is likely to be on its way out regardless.
 |
| Commander Vanto Call Him Benedict Cumberbatch |
All that rules stuff aside, Vanto is pretty great for token economy and is extremely flexible with what type of token he can provide. He produces an immediate comparison to good ol' Wulff Yularen, his 7-point wave one Imperial officer competition for token economy. Vanto, in my opinion, is overall superior due to his flexibility, but if you want to ensure a particular type of token that gets regular use sticks around, Wulff is likely a bit safer of a choice and doesn't require spamming the command periodically like Grint does (at a cheaper cost).
 |
| "Stop it with the 'Where's Woldar?' jokes, I'm tired of them." |
Woldar prompts immediate comparison to the Rebel officer Toryn Farr and I've got bad news: he's basically a crappier Toryn for 3 less points that sits on a more expensive flotilla without access to the Bright Hope title that's basically stapled to Toryn. Woldar does have the noted upside of being able to reroll one die of any color, which has its benefits on black dice (like with Decimators or TIE Bombers when they're stuck dogfighting) or red dice (like with Zertik Strom or I suppose Mandalorian Gauntlet Fighters if you lost a bet). Unfortunately, Woldar can't help your squads against ships like Toryn can (when they roll blue dice) nor does he provide the insane flak bonus Toryn does when your ships attack squads.
All moping aside, Woldar does provide some welcome support for generally-overlooked squadrons that don't mind dogfighting but would like a bit more reliability, such as TIE Advanced, TIE Defenders, and TIE Phantoms as well as all the Imperial rogue options, including the bounty hunter aces. In particular, he loves anything with non-Swarm Counter so he can use his ability more often, so try to include Dengar and/or use him with Decimators or Aggressors. For extra fun, you can use him with Bossk to reroll Bossk's guaranteed blue accuracy die when you'd rather go for raw damage (assuming he didn't blank on his black dice) or with TIE Advanced Darth Vader (preferably with Dengar for Counter and/or Flight Controllers with more dice) to produce some devastating and consistent damage against squads.
Woldar generally wants to be on a flotilla to keep his total cost cheap but disposable should he be required in the thick of it and such flotillas like to have the Suppressor title and/or Slicer Tools to be extra annoying if you can spare the extra points. The fun option is putting him on a Raider with a bit of extra flak oomph so the combined power of squad-versus-squad rerolls and flak does a number on enemy squads, but like all Raiders built in such a way, don't be surprised when your opponent says "nah, I'll go elsewhere" and leaves you sitting there with upgrades you don't get to use.
 |
| Vader drinking imaginary wine while staring at people swallowing, like a totally normal person does. |
- Officer Vader's effect is resolved during the Resolve Attack Effects step, which means you can use him in whatever order you like, preferably after adding dice to maximize the value of your reroll. It also means if you're going to choke out an officer that helps during that attack, like Intel Officer, it's important to trigger those first before they get choked out (Intel Officer in particular has a very narrow timing window).
- He only works against ships, so no amount of the choking game will help your anti-squad attacks.
- It's important to note that officers that modify your ship for fleet building (specifically Tua) or swap tokens around on the first round (specifically Needa) do their effect the once and then they're done. The game doesn't "keep checking" on them to ensure they're around to vouch for that defensive retrofit slot or evade token they provided, and can be choked out by Vader with no adverse effect.
- In short, choke out Needa and you still have an evade token. Choke out Tua and the defensive retrofit you gave your ship remains just fine; ensuring you have the right slot for the right upgrade matters during fleet building but not afterwards.
- Another item of note is Pryce has been ruled to have her entire trigger at the start of the game and then she's done, so you can have Officer Vader choke her out and nothing changes (for good or for ill) as her ship will still call in sick on whatever round she chose and go last.
The best recipient ships are often the kind of ships that don't get easy access to dice control, so ships without a Leading Shots slot (let's be honest, ion cannons on big ships are usually Leading Shots) like Arquitens or VSD-Is or smaller ships like Raiders and Gladiators that aren't using Ordnance Experts for whatever reason. The best officers for those types of ships if you're planning on milking Officer Vader are cheap officers that provide a one-use effect but don't discard themselves. There are a number of 2-point Imperial officers that do this, like Officer Ozzel, Captain Needa, Minister Tua, and Admiral Titus. When in doubt, you can always use Skilled First Officers as 1-point Vader Chow, but I'd rather spend the extra 1 point to get an officer that does something and then gets choked rather than has to choose between using their inherent discard-to-use ability or get choked. There's nothing wrong with choking out more expensive officers that have outlived their usefulness, however, like choking out a Strategic Adviser when you no longer need the activation padding, a Damage Control Officer if your opponent didn't bring special crits, Agent Kallus if your opponent didn't bring unique squads, Director Krennic if you need to stick that close-ranged attack he doesn't work on (don't choke on your aspirations!), or an Intel Officer on a crucial super-attack.
Don't forget Vader can also choke out your commander, but obviously that kind of thing should be done only when absolutely necessary, your commander is about to get shot down regardless, or when your commander has run out of whatever resource they consume to do their commander thing (say, Tagge after both his token regeneration rounds or Thrawn once he's used his last dial).
 |
| "Dice farming, really? A man of your talents?" |
- Because you must resolve a con fire command to get Krennic's effect, that means a few things:
- The entirety of the con fire command must be resolved first. This means both dial and token if you chose to resolve it that way.
- Because you can only resolve each command once per activation, Krennic is also restricted to being used once per activation at most when used with a concentrate fire command.
- Note that all of Krennic's reroll shenanigans stack, so if you spent a dial and a token, you would be able to reroll any number of red dice and then reroll up to 2 more red dice afterwards (or the other way around, I guess, if you wanted).
- Because con fire dials and tokens are spent in the Resolve Attack Effects step, you get to see your initial roll first before committing to resolving a con fire command. That means if you're getting two attacks this round and your first attack doesn't need a reroll, hold on to your con fire dial and/or token for the second attack to apply your reroll where you may need it the most.
- Note that Krennic only works at medium to long range. He does nothing at close range.
- He may, however, work on an attack against a squadron if you're using red dice in flak at medium to long range. Not super common, but conceivable.
Specifically, any ship that lobs a lot of red dice at medium to long range, wants dice-fixing, and has a means of getting con fire commands done consistently is happy to have Krennic provided there's not a more pressing officer demanding the chair. Two very specific ships come to mind with these qualifications: the Arquitens Light Cruiser and the Cymoon ISD, although additions can be made to the list for other ships built to the right specifications. In either case, you'll want to prioritize turbolaser upgrades that add additional red dice and a means of either doing con fire commands yourself (Arquitens, generally) and/or getting con fire tokens (Cymoon, generally) while meeting your other needs. That said, an Arquitens con firing with Slaved Turrets for 5 rerollable red dice without any assistance from Vader (commander or officer) is pretty considerable, as is a Spinal Armaments Cymoon keeping its Gunnery Team while being able to get up to 7 rerollable red dice at long range.
Don't overlook the effect of Krennic with just con fire tokens, though. A Comms Net handing off con fire tokens produces a one-die reroll (any color) followed by a two-red-dice reroll, which is in my experience absolutely enough for even a Cymoon under most circumstances.
 |
| "Commander Cody, execute order 67: ready the annoying cardboard-flipping mechanism." |
 |
| Okay okay whatever you want, Big Papa Palpatine. |
Officer The Senate comes in a pretty cheap package, the only real restriction being you can't use him with Commander The Senate (yes, I'm running The Senate jokes into the ground, just accept it). He's best in an officer seat on a ship that's going to attract fire, typically the SSD but also great on an Avenger ISD for the obvious synergy there (attack Avenger and then become weaker against Avenger? Boo.). Combining him with other defense-token-screwage tech like a Suppressor Gozanti, Intel Officer(s), or Admiral Sloane can further turn the screws on your opponent's poor defense tokens.
If you're looking to really make ace squadrons sad, Officer the Senate is one of the few situations where I'd seriously consider Quad Laser Turrets on his ship for Counter 1 against squadrons - ace squadrons will ideally be getting their tokens spent, hitting Counter 1 (which can encourage spending the scatter if they have it and is extra good if you're an SSD also packing Agent Kallus) and then getting flakked normally. Make sure to particularly enjoy the pain suffered by aces getting additional attacks through Yavaris, Adar Tallon, or Colonel Jendon as they keep spending those defense tokens.
 |
| Easily Iden-tified as well-Versio-ed in commanding a Raider. |
Iden is a godsend to those of us who love Raiders and I'd consider her primarily for the top half of her rules card. She's obviously got her uses with other Imperial ships with evades, but you get an awful lot more mileage out of her on a ship with two evade tokens, both in terms of more possible uses as well as making it less likely that your evades get locked down due to duplication. It's important to note that she does nothing extra at medium range, so you'll generally want your Raider at long range or close range. Once you figure you've gotten as much mileage out of her as you're likely to, she can jump ship with a squad command to annoy an opponent's ship with a raid token. Sweet.
It's important to note that generally Versio is best against numerous smaller attacks, which makes her Raider very resilient against squadrons. If a horde of Y-Wings goes after Versio's Raider, they're going to find that they've picked a fight with an even more annoying Admonition when their single-die bomber attacks keep getting braced or removed entirely, and Versio can use her effect 4 times in a single round at best, so it keeps on happening (by double-spending both braces). Just be careful and don't assume she makes her Raider immortal - you still don't want to try tanking big blasts from large ships.
 |
| Good luck not accidentally calling her Walex Blissex at least once. |
Lira is generally not a good officer, because you need all of the following to be true to use her:
- An officer slot not better used on something else.
- Easy access to as many repair tokens as she could possibly want without cramping the ship's desire to hold onto other tokens.
- A ship that expects to not only take some crits here and there but also might overlap asteroids too.
How does Vader choking Motti work? Do ships simultaneously combust if they would be taken down to zero hull points, or does Motti give all you ships hull points at the beginning of the game, and therefore choking him is free?
ReplyDeleteMotti has a continuous effect, so choking him out is normally a bad idea.
DeleteI look forward to games where Motti is choked and the imperial fleet just spontaneously vanishes.
Delete