Friday, March 31, 2023

Armada World Championship Recap: Biggs - Or "How I Learned To Stop Worrying and Love the Crab Bucket"

 Long time no see, huh?

Fun fact, I wasn't supposed to go to Worlds.  I had Shmitty's "extra ticket" from winning 2019 GenCon, and figured it wouldn't even be honored, and that I'd just be showing up to hang out and watch some Armada games.  But, the ticket was honored and I was off to play Star Wars Armada on the big stage.  Garm Bel Iblis and the Dumpster Fire that Shmitty and I came up with earned me the ticket, so in the spirit of "dance with the one who brought you" I resolved to bring a Dumpster Fire to Worlds and see how well I could do.


I remember joking just prior to the tournament starting: "I shouldn't be here, and I'm going to make it someone else's problem."  Oh, how right I was.

My List


Garm Fire: The Final Dumpster - 397/400

Assault Objective: Marked For Destruction
Defense Objective: Asteroid Tactics
Navigation Objective: Infested Fields

Modified Pelta-Class Command Ship (60)
- Intensify Firepower! (6)
- Disposable Capacitors (3)
- Ahsoka Tano (2)
= 71 points

[flagship] Assault Frigate Mark II A (81)
- Garm Bel Iblis (25)
- Boarding Troopers (3)
- Electronic Countermeasures (7)
- Ezra Bridger (3)
- Linked Turbolaser Towers (7)
= 126 points

Nebulon-B Escort Frigate (57)
- Yavaris (5)
- Skilled First Officer (1)
= 63 points

Hammerhead Scout Corvette (41)
- Slaved Turrets (6)
= 47 points

1 Lando Calrissian (23)
1 Shara Bey (17)
1 Tycho Celchu (16)
2 A-Wing Squadron (11)
1 Gold Squadron (12)
= 90 points

A classic Biggs style Dumpster Fire build, with an AFIIA as the flagship, with LTT for extra flak powers, Boarding Troopers to punish anyone who gets close, and ECM to keep it alive.  I had included Ezra Bridger as extra insurance against Interdictor related shenanigans.

I just like a D-Caps Command Pelta vs an Assault Pelta, though I feel like the Pelta was often in a better position for flak than it was for commanding squadrons.

Yavaris was a new entry into my Dumpster Fire.  It did give my squadrons a little more punch, but it was often the primary target of any opponent.

The Slaved Turret Hammerhead punches way harder than you expect a Hammerhead to punch.  10/10 no comments.

My squadron ball is my favorite squadron ball.  "Medium-Well" point cost, punchy for it's price with A-Wings, the A-Wing aces, and Lando, plus Gold Squadron could punish anyone who went with no squads, and should be able to trade up against anyone that brought 134 of squads.  At least that was the plan going into the games.

For objectives:  Marked for Destruction is an objective no one ever seems to take, gives me dust clouds to hide behind, and involves Purrgil which opponents don't quite understand.  Even at a high level, it gives me a good advantage against someone not expecting it.  I expect to play this objective the most because other than the novelty factor, it doesn't explicitly benefit my list much.  Asteroid Tactics and Infested Fields let me win squadron fights, which let me win games, simple as that.


Round 1: Daniel Wolf - Germany - Table 2


MC30c Torpedo Frigate
- Lando Calrissian
- Ordnance Experts
- Assault Proton Torpedoes
- H9 Turbolasers
- Foresight

CR90A
- General Dodonna
- Turbolaser Reroute Circuits
- Jaina's Light

CR90B
- Dodonna's Pride

GR75 Transport
- Adar Tallon
- Boosted Comms

GR75 Transport
- Toryn Farr
- Quantum Storm

Squadrons:
Hera Syndulla (Ghost)
Dash Rendar
Corran Horn
Norra Wexley
YT-2400
Rogue Squadron
Gold Squadron

Daniel came in at 400 points, and that meant I got to hand him my objectives.  He quickly decided on Asteroid Tactics

I had set up to have my smaller ships catch his MC30 with my squadrons, and set up a kill box if it tried to cross over.  He gunned up to speed 4 in an attempt to double arc my Yavaris, but just missed the double arc, and instead got Foresight eaten for his troubles.  Unfortunately for me, other than Corran Horn and Foresight, his other ships were much to fast and his squadrons too punchy for me to put much more of a dent in his fleet.  I lost a few squadrons squadrons, Yavaris, and the Hammerhead in the exchange.  Unfortunately the game was called on turn 5, and swung on him getting just enough to kill one of my A-Wings.  He got a small MOV win, 148-141, giving me a 5-6 loss but a respectable number of tournament points.

Round 2:  Przemyslaw Niedzielski - Poland (I hope I spelled that correctly) - Table 21


Recusant Support Destroyer
- General Grievous
- Rune Haako
- Boosted Comms
- Reserve Hangar Deck
- Linked Turbolaser Towers

Recusant Support Destroyer
- Tikkes
- Flight Controllers
- Boosted Comms
- Reserve Hangar Deck
- Linked Turbolaser Towers
- Patriot Fist

Gozanti Cruisers

Squadrons
- DBS-404
- Phlac-Arphroc Prototypes
- DIS-T81
- Droid Tri-Fighter Squadron x5
- Vulture Droid Fighter Squadron x2

I had the bid once again, and chose 2nd player, and he chose Marked for Destruction.  We both deployed cagy, with me in a similar deployment to my last game, my ships angling to the right.  We began to punch one another, trading ships and squadrons.  I got one of his Recusants, and a decent number of squadrons, while he got everything but the AFII, and most of my squadrons.  Ultimately, the score was 248-194, in another 5-6 loss for me.


Round 3 - Silvio Gollnick - Germany (Table 21)


Starhawk Battleship Mark I
- Krysta Agate (commander)
- Walex Blissex
- Ezra Bridger
- Point Defense Ion Cannons
- Linked Turbolaser Towers
- Amity

Pelta Command Ship
- Adar Tallon
- Projection Experts

GR-75 Medium Transports
- Toryn Farr
- Comms Nets

Squadrons:
- Lando Calrissian
- Corran Horn
- Shara Bey
- Dutch Vander
- VCX-100 Freighter x2

 Well, that's not what I wanted to see.  With a bid of 396, Silvio was able to choose 2nd player for himself, and with that I knew I was out of luck.  I was not build to take out an Agate Starhawk, especially not one with projection experts feeding it more shields.  I had a choice of Advanced Gunnery, Fire Lanes, and Doomed Station.  Both Doomed Station and Fire Lanes were just inviting him to have free points (120 and 270 respectively), so my only hope in winning, and salvaging any sort of points from the match were to take Advanced Gunnery, hope to win the squadron fight...

... and run.
Top of Turn 2, Running


I gave my AFII Advanced Gunnery, the plan being to have it dance into the squadron fight just long enough to snipe a few squadrons with LTTs, and then bail out.  The other ships would just run for the edge and avoid the Starhawk entirely.  From there, my squadrons could win the squadron battle netting me a 6-5, or a 7-4 if I was lucky.  It wasn't a good plan, but the only one I had that could reasonably give me a win, and it nearly worked.

Nearly.

The AFII did manage to get into range of the enemy squadrons, and flak some of them down.  But the Starhawk turned in and added it's own flak, and chased the AFII away from the fight.  Ultimately he had squadron commands for his squadrons, and I did not.  More annoyingly, his Lando escaped death on 1 hull, which let him eat my Lando instead.  The part of the plan that worked?  Not a single shot was taken against a capital ship the entire game.  Shara was left alive to escape to fight another day, but I had only managed to kill Corran and Dutch.  73-38, for another 5-6 loss.


Round 4: Nathanial Beaver - North America(?) - Table 24


ROGER ROGER SWAWC

Munificent Star Frigate
- Mar Tuuk
- Wat Tambor
- Projection Experts
- Electronic Countermeasures
- Point Defense Ion Cannons
- Linked Turbolaser Towers
- Sa Nalaor

Munificent Star Frigate
- Projection Experts
- Electronic Countermeasures
- Point Defense Ion Canons
- Linked Turbolaser Towers

Recusant Light Destroyer
- Tikkies
- Veteran Gunners
- Assault Proton Torpedoes
- Swivel-Mount Batteries
- Patriot Fist

Hardcell Transport
- Hondo Ohnaka
- Engineering Team
- Parts Resupply

Going in to this game, at 15 Tournament Points, I knew I needed a 10-1 or at least a 9-2 to claw my way into a Day 2 position.  With this in mind, I shifted to a new plan: Table the Opponent, fast.  Now, a Dumpster Fire is not build for this plan, but you've gotta try with what you've got.  With this in mind, my plan going in was to take 1st player, my opponent's red objective, and try to win the joust.  Seeing no squadrons, I thought I had a decent enough shot at it, as I could do bombing runs on his fleet without worry.  So I took his Rift Assault, and hoped for the best.

Again, it was a plan that nearly worked.

We both deployed aggressively, and he drove his flagship forward too quickly, trying to cut off my AFIIA which was cutting in fast and hard from the right flank.  The AFII then jumped in front of his entire deployment with my final activation, jumping in front of his flagship, and then Garm Tokened himself, and activated first the next turn, raiding Mar Tuuk's Brace and Redirect.  From there it was a matter of mopping up the crippled Muni.  Unfortunately, that was the last thing that really went well.  I would eventually bag the Hardcell with my squadrons, but the combined Patriot Fist / Munificent were too much for the rest of my fleet, and my AFIIA limped away with 3 hull as the only survivor that wasn't a squadron.  Token scoring was 4 vs 3, primarily because my AFII was way, way out of position as the rest of our fleets fought in the obstacles.  Final Score:  222-255, for yet another 5-6 loss.


Takeaways:


Worlds has always been an amazing time to have some good games of Armada, and 2023 Worlds was no different.  I could not imagine having more fun losing 4 really close games against some amazing opponents.  Every single opponent I played deserved to be in Day 2, and I like to think that playing me knocked them out of it.  (In the case of Round 3 and Round 4, that is almost certainly true, Silvio missed the cut by 1 or 2 spots.)

Does this mean the Dumpster Fire is viable in 2023?  Maybe?  With a few tweaks and a player who's had more than a handful of games since COVID started?

But more than any of that, Worlds continues to be where the community comes together to make Armada something truly special.  Until next we meet, all of you!


Monday, March 20, 2023

Armada Worlds Updates! Shirts! Food! Drinks!

 We continue our series of posts, as John tries to pull out every stop he can.

I'm going out with Hamilton gifs and Muppet jokes, just like you all expected from me.

Monday, February 20, 2023

Thursday, February 16, 2023

Worlds Shirts Update!

Well we're 2 days in and we're accumulating orders! So far 27 of you have responded saying you want one of these bad boys.  However, I've heard from several of you that brown is "kinda ugly" or "kinda bland" or "I don't want it in brown."
Did you really expect a Kinky Boots joke today? Well, congrats.

Tuesday, February 14, 2023

Worlds Shirts 2023

My name is John Zuidema. I'm the.... author here for Rebel and GAR articles. I'm speaking to you from my house in Northern Kentucky.  We are, at this moment, in control of the blog.

How many seconds a day do you think they think about us? No more than 12...

Sunday, November 13, 2022

GAR and CIS Starters!

In the realm of "better late than never", I decided to craft a post for the GAR and CIS beginner player, for how to get into the game for Under $250, just like the previous Rebel and Imperial articles.  This article has the benefit of both coming as a result of those AND allows me to make some edits and thoughts based on what I've learned from those articles, AND we're able to combine those articles into a way of "what should I run as a starter fleet with this faction?" I ran into this instance last week myself, as we had a new guy who I had to cobble a fleet together for him on the fly, and I'd prefer not needing to do THAT anymore! Onwards with the article!

Kelorn Day 2! Return of the Guest Post!

geek again, letting Kelorn take the wheel ONE MORE TIME! Enjoy the AAR, I'm working on another article myself currently....


Kelorn Guest Post Golden State Games (part 1)!

Hey, we still exist! And we have a guest post from Kelorn about his weekend at Golden State Games! I'll just let him hit everything after the jump, enjoy!

-geek

Tuesday, September 6, 2022

C-ROC CIS Gozanti

Geek again, in my traditional blue. I've been able to get noted podcast host Fox "Left Foot of Space Cthulhu" Omega to write up the C-ROC Gozanti article.  He will be appearing below in orange, and anything I add will be in my blue, as always. On with the show!
The finest of Wookieepeedeeeaa searches
If you were one of those people who was screaming “Separatists deserve another small!”: Firstly, please stop shouting, and secondly, look no further than the C-ROC Gozanti-class Light Cruiser! A welcome addition to the CIS armada thanks to Rapid Reinforcements I. The basic stats of the chassis are essentially the same, but there are also some significant differences that allow you to build some wacky things, so we will touch on that in a bit. Onward!

Thursday, September 1, 2022

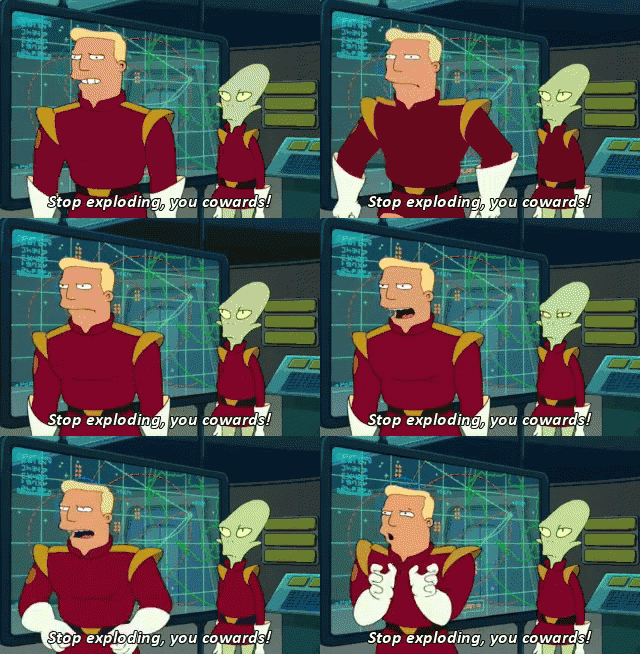
Keep Exploding You Cowards: Trials and Tribulations of a Grievous Fleet


Hey everyone. Your friendly neighborhood Truthiness here, back again to break down another one of my crazy fleets. Despite our “latest” podcast saying otherwise, I won’t be taking Yularen to the NOVA Open. In the month it took to edit and publish that podcast (yeah…sorry about that), I burned out on the Yularen fleet pretty hard. While absolutely deadly, it requires a precision of play that wears you down after a while, with a single mistake compounding quickly. I might pick it up again some time, but for now I’ve moved onto a different fleet. While I had my Hera X-Wings in my back pocket, I didn’t really want to fly another squadron heavy fleet. They’ve been all the rage in the meta again lately, and lord forbid I ever do something that’s popular. After some solid input from FoxOmega and Formynder, I settled on what has become an incredibly fun Separatist fleet. 


I’ve mentioned this in a number of places at this point, but I’ll say it one more time: Grievous is the most thematic card in the entire game. I think the reason a lot of people don’t care for him is because most competitive Armada players are pretty conservative. The focus of a great many players, especially of late, is on castling and preserving points. Grievous, plain and simple, doesn’t work like that. Using him as a commander requires you to lean heavily into the ol’ cyborg’s persona. You have millions of droids and your opponent has underestimated how little you care for their lives. March your droids single file into their weapons until they become clogged with debris. Throw wave and wave at your enemy until that enemy hits their pre-programmed kill limit (no John, I will NOT stop with the Zapp Brannigan references). While I first won a smaller tournament with Grievous over a year ago, that version of the fleet wasn’t particularly well rounded. It was only a three round tournament, and I benefited a good deal from luck and matchups. The process of refining the fleet into something more optimized has been a long road. My goal today is to walk you through the stages of how this fleet came together, and the reasoning for each part.


Angry Eggs are coming for you


TRCells

The initial core theory of this fleet was using Grievous to enable TRCs on Hardcells. While Linked Turbolaser Towers (LTTs) seem to be the most popular turbolaser these days, and there is no doubt they are very well rounded, I have always preferred the certainty of Turbolaser Reroute Circuits (TRCs) for the same cost. Unless you have two evades, though, you end up compromising your defenses. Arquitens, Nebulons, Hardcells, and the like all have difficulty justifying TRCs because of that. With Grievous, however, the theory went that by bringing defense tokens back, I could afford to spend evades freely for both defense and offense on Hardcells.


This aspect of the fleet worked quite well from the outset. There’s something immensely satisfying about using TRCs, then discarding the evade to cancel or re-roll up two dice, then getting that evade back as squadrons explode. I initially paired it with Intensity Firepower (IF) to create a floor of three damage, but ultimately found IF to be more of a luxury than a necessity. The Hardcells typically roll three to four dice depending on if they need a navigate or have the luxury of using a con fire command. With three dice, I found myself only really needing to correct one die, making IF superfluous. With four dice, two blanks would crop up from time to time, but they were also fairly frequently offset by a natural double damage. The result was that I could often count on three damage on four dice. TRC pushes that to five, which typically triggers the use of a brace. The difference between five damage and six damage against a brace is zero. That realization helped loosen what I felt were the requirements I needed in the fleet, leaving three Hardcells with TRCs and Reserve Hangar Decks (RHDs) as the core of the future fleet. Throughout every iteration of the fleet, those three ships have been the best and most reliable part of it.


Roger Roger, baby

Vultures

The Hardcells themselves, however, wouldn’t really be able to do what they do without disposable squadrons exploding left and right. The fact that I needed cheap squadrons around wasn’t something that was ever really up in the air. It was the exact type of squadrons and the appropriate support elements that was a bit harder to nail down. I started off with three Vulture droids and alternated between the Tri-Fighter Aces. These worked fine enough in getting Grievous procs, especially with objectives like Asteroid Tactics and Infested Fields which would eat my own squadrons. 


However, I found my squadron often just getting eaten quickly by heavy squadron wings. This was a two fold problem. First, with so few squadrons in terms of raw numbers, I couldn’t cover that much ground, leaving me unable to cover my ships as I’d like. I came to the conclusion that two Vultures was more valuable to me than either Ace, both in terms of offensive firepower and sheer numbers. Second, I didn’t have much of a plan for pushing the squadrons I had. How my initial fleets were set up, I could only dedicate a single command to get my Vultures into their initial positions. After that, they would just sit around, tying things up and exploding. I tried supplementing with TI-99, but that created a limited bubble for protection as well. I eventually realized that I needed to tool my flagship to be a dedicated squad pusher.


Hey! I found him!

The Search for a Flagship

As discussed earlier, the initial fleet was led by a Providence class carrier so that I could get access to IF. I have largely soured on the Providence for a number of reasons. I found both playing with it and against it that you can often force it into a sub-optimal deployment and force it out of the critical turns of a game. Its short range armament combined with its high cost made it ill suited to my needs. In addition, it struggles a bit as a dedicated carrier due to its more limited navigation chart at speed three.


The next ship I tried was a Munificent, which I’ve found to be just as tough as a Providence, but at a significant discount. The cost savings even allowed me enough room to put in a Hardcell Transport with Slicer Tools. However, I found the value of the slicer to be hit or miss. The Munificent was certainly tough, but since I was leaning on the Star Frigate variant so I could have access to Thermal Shields, it wasn’t any better of a carrier. I could have switched over to a Comms Frigate, but I wasn’t comfortable with a speed 2 flagship that didn’t have a way to brace against Onager shots. I also felt I was lacking a flexible piece that could finish off ships that had made it past my Hardcells.


That’s where a Recusant Support Destroyer came in. It turned out to a best of all world solution to my problems. With the Patriot’s Fist title, it was a nasty gunship from long and medium range. That satisfied the finisher role I felt I was lacking. The Support Destroyer also has two offensive retrofit slots and one weapons team slot, allowing me to use Boosted Command and Expanded Hangar Bays in combination with Flight Controllers to not just satisfy, but significantly boost my Vultures. With Tikkes in the officer slot, I could guarantee commanding up to five Vultures in a given turn. Let me tell you, 40 points of Vultures able to spit out TIE Defender levels of anti-squadron attacks with swarm punch well above their weight. The ability to flex to a blue die with AI also gets you a surprisingly reliable accuracy against scatter aces. The native evade of the Recusant also leaned into the same TRC/GG synergies I was going for with my Hardcells. It was such a natural fit that I’m kind of embarrassed it took me so long to try it. The only real downside was it could be fairly fragile if forced into a bad deployment and forced to fight more than one ship at a time.

This is an accurate depiction of my Hyenas

Hyenas

The selection of the Recusant left me in an awkward place for points. It was cheaper than both Providence and the Muni/Slicer combo, but not enough so that I could fit in another ship. I initial tried Reinforced Blast Doors on the Hardcells, but that was hit or miss. The solution came when I included two Hyenas for a trial run. It was by this point that I noticed I sometimes struggled again squadronless or squad light opponents. While Asteroid Tactics and Infested Field helped, they couldn’t quite get enough juice out of Grievous to justify what were essentially wasted points in the Vultures. If I was forced into first player against a squadron light player, I was at a noticeable disadvantage.


The Hyenas proved dangerous even without a Bomber Command Center to help them. The had to be dealt with by squadron heavy fleets, which meant more explosions for Grievous. Against squadronless or squadron light fleets, it provided an absolutely brutal extra punishment. I’ve come to view them as a combination Walex and red-dice External Racks. If they only attack once, that’s fine. They’re there to throw two red dice and then blow up. Anything extra is just gravy. This was also about the same time I realized that the Tri-Fighter Aces weren’t really pulling their weight. The final piece of the fleet fell into place when I realized I could squeeze out an extra deployment if I replaced the Tri-Fighter Ace with a Vulture and a Hyena, which where the exact same cost as the more expensive of the two Tri-Fighter Aces. That left me with eight deployments, a significant advantage in the current meta. It allowed me to place Patriot’s First last, giving it as much protection as I could. 


With the Hyenas firmly in place, I also reconsidered my objectives. Those bombers were proving a far more effective punishment against light squadron wings than Asteroid Tactics or Infested Fields. Instead, I shifted over to point-generating objectives. Volatile Deposits was a natural fit for my Large plus Multiple Small Unit (LMSU) structure. Contested Outpost, though typically thought of as a deployment tell, was well suited to the fleet as well. Because of the significant amount of long range firepower, the fleet can hold down the station with different pieces throughout the game, all while still taking advantage of its eight deployments.


All Together Now

That brings us to the final product. This is the version I'll be using at the NOVA Open. It might not look like much, but it has it where it counts. Wish me luck!


Keep Exploding You Cowards! (73/399/400)

========================================


Recusant-class Support Destroyer (90 + 50: 140)

· General Grievous (20)

· Tikkes (2)

· Flight Controllers (6)

· Expanded Hangar Bay (5)

· Boosted Comms (4)

· Turbolaser Reroute Circuits (7)

· Patriot Fist (6)


Battle Refit (52 + 10: 62)

· Reserve Hangar Deck (3)

· Turbolaser Reroute Circuits (7)


Battle Refit (52 + 10: 62)

· Reserve Hangar Deck (3)

· Turbolaser Reroute Circuits (7)


Battle Refit (52 + 10: 62)

· Reserve Hangar Deck (3)

· Turbolaser Reroute Circuits (7)


3 x Hyena-class Droid Bomber Squadron (3 x 11)

5 x Vulture-class Droid Fighter Squadron (5 x 8)


Ion Storm

Contested Outpost

Volatile Deposits


Sunday, August 7, 2022

Imperial Venator (Jotto Otts Guest Post)


As mentioned in my previous post, I'm turning over the Imperial Venator to Jotto Otts, who makes our fancy ship cards, helps manage the Chicago Armada group, and also a knowledgeable guy in his own right. Everything he wrote will be in purple, below, and my comments will be in my geek standard blue.

Imperial Venator Star Destroyer


A long time ago, we used to be friends.....

The Imperials get a relic of the past to bring into battles with Rapid Reinforcements I. A Venator II-class Star Destroyer kitted out with massive ordnance bays. The Imperial Venator is a mighty force to be reckoned with if used correctly, but like many imperial ships there are a few drawbacks.

Friday, July 29, 2022

Hey Look Updates!

Imperial Venator incoming later this weekend, but hey look, Defender Vader! After the jump because Daddy needs his clicks.

Thursday, July 28, 2022

New Blogger Added!

I've been busy, and we haven't written in about 2 months! What's been keeping us from finishing those articles for the CIS Gozanti and the Imperial Venator?

Saturday, June 4, 2022

Dumpster Fire the Faction: Musing on Building Republic Fleets

We here at CGYSO and Blissfully Ignorant Gaming have talked a bit on the blog as well as on the podcast about the relatively lower opinion of the Grand Army of the Republic (GAR) in the larger Armada community. By now, you’ve probably heard all the usual complaints: they lack dice fixing, the Jedi squadrons are overpriced, their nav charts are terrible, their admirals are lackluster, they need a bunch of token management, etc. A lot of those notions have some truth, but the whole picture is greater than the sum of the individual parts. At the end of the day, GAR is a very different faction that just does not play like the other three factions. It is not a faction designed for flash, dramatic maneuvers, or big alpha strikes. I’ve found GAR as a faction to be a spiritual successor of Biggs and Shmitty’s infamous Garm “Dumpster Fire” fleet that won GENCON a few years back. It is a grinding, plodding, and ruthlessly efficient faction. It has seemed to work best for geek and I by going for a death by a thousand cuts and a fairly minimalist approach to fleet building. We’ve started to have some good success with our fleets, so today, I’m, WE’RE, geek is here helping too! going to share some of our lessons learned.

Live footage of geek "helping"


Fear the Reaper Pelta

Let’s start with possibly the craziest realization: the Pelta is the Republic’s best ship. Stop laughing. I’m being serious. No, really, stop laughing. Look, I get it. The Pelta is notorious from its time as the Rebel’s only source of Fleet Command. It has a lot of detractors. It’s a slow ship at a time when closing the gap on Onagers is a prime concern. What the GAR Pelta has, though, that the Rebel Pelta does not, is an absolutely bonkers level of efficiency. The base chassis is a sub-50 point ship with a brace, evade, and an engineering value of 4. The first time I had Demolisher, formerly one of Armada’s most feared bogeymen, just bounce off a Pelta like it wasn’t even there, I was in a bit of awe. Here was one of the most maligned ships in the game, getting hit with a hit/crit (which would have triggered APTs from Demolisher) and three hits on Demolisher’s black dice. One evade and one brace later, it was just two damage, which the Pelta proceeded to repair in its entirety with the very next activation. The ratio of toughness to cost on the Pelta’s base chassis might very well be the best in the game. It is MUCH harder to kill one of these buggers than it might seem at first glance. 

The Pelta has two very solid titles, and it brings the all important Fleet Support slot for maximum token shenanigans. I think the most critical choice, though, is in the Support Team slot, as it provides two important options for supporting your fleet. And you know what the best part is? Neither choice involves Engine Techs. That’s right, me, Truthiness, the speed demon himself, is telling you to forgo any more speed on GAR Peltas. That’s because both Projection Experts and Fighter Coordination Teams provide something better for your fleet overall. Projection Experts helps you export the Pelta’s native toughness and efficiency to the rest of your fleet. The native engineering of 4, combined with Parts Resupply giving a steady stream of tokens, means the Pelta can reliably hand out 2 shields every turn without losing any of its own. It’s a great way to make the Pelta’s presence felt despite its slow speed. This Parts Resupply and Projection Experts build is probably the default loadout I would consider for a Pelta. That said, Fighter Coordination Team is a solid choice, especially if you are bringing ARCs and/or Ahsoka in her squadron form. ARCs need a bit of help getting to the fight and repositioning, and FCT just does the job better than Hyperspace Rings. With Ahsoka, FCTs allow you to use a somewhat cheesy tactic of generating extra shots outside of Ahsoka’s actual activation. It’s nowhere near the level of Moralo, but it’s still a cute little tactic that can be hard to shut down when you use obstacles to prevent Ahsoka from getting tied down.


Ahsoka and Anakin, the perfect team

You might be tempted to start loading up the Peltas with upgrades like a Christmas Tree. After all, a Pelta with the TB-73 title, Projection Experts, a Defensive Retrofit, and a Fleet Support has to be good right? Not exactly. Once you start sinking upgrades into the Peltas, that efficiency starts to drop. That’s something I’ve noticed that is actually pretty common across all GAR ships and brings us to our next point.


Only Take Upgrades You Absolutely Need


GAR has some wonderfully efficient base ships. Beyond the Pelta, the Consular is a very cheap skirmisher, the Acclamator is probably the best or second best value for a medium ship in the game (the CIS Muni has a solid claim for first), and both Venators are solid value for their cost. The problems start when you load them with upgrades. Take a good hard look at that Venator 2 you loaded up with XI7, SPHA-Ts, Zak, Ordnance Experts, Thermals, and the Tranquility title. Ask yourself: “is this thing going to contribute its equivalent points?” At the end of the day, that SPHA-T Venator is probably only marginally less effective without Zak, XI7, and OE. Save the points to invest elsewhere.


Upgrades are like Crypto for GAR: an illusion of usefulness

You can find examples of this all over the fleet. An Acclamator 2 with nothing more than a Defensive Retrofit is an incredibly efficient hull, bringing just as much front arc firepower as the Venator, but with a huge discount. A naked C70 Charger supported by IF has an amazing navigation chart and flexible battery alignment. It can kite and broadside to avoid closing if needed, and then zip in for a solid double arc when the opportunity presents itself. This ties into Truth’s statement about the efficiency of the Pelta. The most efficient GAR ships have minimal upgrades and let you win the game through sheer force and exerted firepower and not crazy upgrade wombo combos. A big part of this loss of efficiency when stacking upgrades comes from the faction’s relatively poor options for dice control. They have a lot of rainbow batteries (meaning red, blue and black all in the same arc), making color based options like Ordnance Experts unappealing. They have no Ion Cannon upgrades to speak of, so Leading Shot isn’t a choice. Buying Linked Turbolaser Towers on every ship adds up way too fast and only helps a single die. Rather than just making GAR a bad faction, though, I think it just means you need a different approach. Speaking of force and firepower…


Death by Papercut


Armada can often be a game of haymakers throwing big dice pools. Demolisher and Avenger used to be the embodiment of that. The Onager and Patriot Fist are two of the current boogeymen. It can lead to the conclusion that you need a haymaker to be effective. GAR just doesn’t do haymakers. Because of their inefficient sources of dice control (and the fact that it would require several high cost-upgrades at a minimum to get them there), GAR doesn’t get nearly as much out of their investment in a haymaker approach. It needs to use the second, less traveled path of success: death by paper cut. The reason I like to compare this faction to Shmitty’s old dumpster fire approach comes down to this approach to dealing damage. The dirty secret of Armada is while you can throw a lot of points at mitigating or powering through defense tokens, they’re actually pretty useless if a ship is taking damage from lots of different sources all at once. Squad heavy fleets are successful largely because of this fact. A brace is useless if you’re only taking one damage at a time. It’s not even all that great when you’re taking 2-3. Redirects burn out quickly when you are dealing with the small amounts of plink damage. This is the first part of what I mean if you hear me say “embrace the grind” with GAR. Persistent damage in small chunks while leaning into the raw efficiency of your ships pays dividends over the course of the game.


Grinding gets you wonderful things like coffee! Everyone loves coffee!

There are generally two approaches I think you can go to implementing this maxim. The first is leaning on the Venator 1 with Intensity Firepower. You’ll generally want to do this if you have a more ship heavy approach. Plain and simple, Intensify Firepower is the most efficient means of dice control available to GAR. It’s a method that also likes to leverage as many smaller dice pools as possible. That means double arcs, small ships like the Pelta and C70, and it means just accepting a “good enough” on larger pools like the Acclamator and Venator. Yes, there will be some frustrating whiffs, but the goal is to leverage the efficiency of your hulls to just bring more dice and more things your opponent has to kill to make the pain stop. If you lose a small ship, oh well, you’ve only invested 45-55 points. You’ve got more of them. The relentless tick of damage that comes from Intensify Firepower is a great way to play GAR and leans into their strengths. The Venator-1 DEFINITELY isn’t a brawler like a Kuat, so you’re going to want to lurk back with it and use the native red dice until it’s time to zoom through, hit them with the black dice once, maybe twice if you’re lucky, and then keep on trucking out of there before your Venator explodes.

The second approach is a more traditional squadron-focused one. There are a number of ways to do this, including Plo, Luminara, or Yularen, but they all attempt to leverage the traditional strength of squadrons in overloading defense tokens. Again, though, GAR is a little different. You don’t have any fast bombers, with the mighty Y-Wing being your fast at a whomping three. Your really nasty bombers are the ACR-170s, which I absolutely adore, but need additional help getting to the fight. Neither choice reacts well to needs for rapid repositioning, so you need to be methodical in your approach. Use obstacles to keep them from getting locked down, spread out where you can, don’t be afraid to take some hits on the way in. You have the hull to slug through.


Aethersprites and V-19 belong together.

In either approach, squads or ships, that efficiency and grind will allow you to fight and beat some of the tankiest combos in the game; Agate Starhawk or Wat Tambor Prov can take one shot, yes. But what about the other 4-5 ship shots coming right afterwards or the other 6 squadrons you’re slinging? You aren’t going to one shot anything. But over 2 rounds of applied, persistent pressure onto a target, it will die. Persistence is the name of the game. Even the much maligned Aethersprite (which I actively hated when it was released), has a place. However, there is one squadron that I think you should always take, and that is….


He is the Chosen One


Anakin Skywalker, Jedi Knight. Let me first start by saying I am not really a fan of playing Armada without squadrons in the modern game. There was a time I was a hardcore squadronless players. Today, there are too many very dangerous squadrons in the game, and some brutal combos that harshly punish players that forgo squadrons. It was always a fringe way to play, but it is especially hard now. The good news is a squadron screen is more viable than ever to slow down opposing squadrons and possibly kill some important ones in the process. Until recently, GAR struggled to make light or medium screens that could really justify their investment. Kickback and Axe together are a solid combo for slowing down incoming damage and prolonging the squadron fight. What GAR lacked, however, was offensive anti-squadron firepower that could remove key pieces of an enemy squadron wing.


Is this the obvious picture to put here? Yes. Do I care? Nope.

Then we got Rapid Reinforcement 1, and with it, the monster murder ace that is Anakin Skywalker in a Aethersprite. We have a lot of nicknames for this version of the Chosen One, from “Splashakin” to “Deltakin” to “Murder Ani” to “Little Orphan Ani”. I go with Danni vs Yanni, but I’m also me. The real take away, though, is this new Anakin fills that offensive gap in GAR squadron wings. There are a lot of different combinations of GAR squadron wings that I like, but Anakin is in every single one of them. At the lower end of the points spectrum, such as Anakin, Axe, and 2 V-19s, Anakin fills out that lower end squadron screen very well. If you want a little more investment, you can add in a second Aethersprite alongside Anakin. Anakin and Ahsoka in particular pair extremely well. You can’t trigger Anakin’s splash ability more than once in the turn, but Ahsoka bouncing around to get Anakin to take additional shots synergizes well with his Adept 2. Finally, on the high end of the points investment, you can take that smaller screen and just tac on some bombers of your choice. My current preferred approach is Anakin, Kickback, Axe, a generic Aethersprite, and four generic ARC-170s for exactly 134 points. It’s a nasty, durable ball that can punch back quite hard. I’ve been running Danni, Ahsoka, Axe, and Kickback for 80 in several fleets of my own. Anyway, the point is Anakin is a phenomenal new tool that is useful in every single Republic fleet. Use him.


Gold? Nah, Go for Silver


I don’t have a clever segway to introduce this one (you’re off the blog now then), so I’ll just state the thesis right up front: Clone Captain Silver is the best officer available to the Republic. Period. End of story. There is no competition. He might not look like much, but Silver provides something that GAR largely lacks: flexibility. The most obvious benefit to Silver is the ability to leverage Surprise Attack as first player. Throw him on your flagship and it doesn’t matter that you had to deploy at a reduced speed. Caught in an Interdictor’s G-7X Grav Well? Stuck it, Imps, speed 3 here I go. Surprise Attack is a pretty common red objective these days, so being able to disregard one of the major downsides is pretty nice. Just put him on your flagship and you’ll never have to fear Sam Simon’s double Interdictor speed zero trap ever again.


Use Silver and you can make this happen. Don't you want to blow up Interdictors?

The less obvious benefit to Silver is just the natural command flexibility he brings. I have often found myself wanting to adjust speed while doing other commands on many ships. Silver lets you do just that at least twice in a game. You can even go all the way down to zero with absolute confidence that you can jump all the way up to speed three on a dime. First player and don’t feel like moving into that kill pocket? Pump the brakes and stay put knowing full well you can activate it first in the next turn. I especially love him on a squadron-focused Venator, adjusting speed on the fly, while still pushing a ton of squadrons. 


Build for Your Admiral


Biggs and I have had some disagreements in the past about how to approach incorporating your commander in fleet building. He likes to build the core of the fleet, and then look at what commander best fits it. I’ve always approached it as starting with the commander, and building out from the strengths of that commander. While Biggs’ method has its virtues (especially with Separatists I think), GAR absolutely needs the latter approach. All of GAR’s commanders are quite specialized, requiring you to consider their needs from the start. Plo fleets must commit to winning the squad fight, or at least finding a way to keep their squadrons moving and bombing. Luminara fleets must build around forcing multiple shots into the same ships. Yularen fleets must be built to leverage both the bonus to squadron tokens and the ability to repair friendly squadrons. Tarkin must be built to leverage his fleetwide token generation. The only real generalists are Bail and Obi Wan, but I think both of these work best in very specific fleets as well. Bail likes to have fewer ships so that you can leverage his limited amount of bonus dials in more important spots. Obi Wan, meanwhile, probably wants a good number of ships so that he can maximize his damage mitigation. The point is, GAR needs to consider the needs of their commanders. There is no plug and play option if you want to be successful. 

Good fleet-building is one of the hardest aspects of the game; and our articles are very general with respect to this; “bring ships with a redirect with Obi-Wan!” Thanks, John, great help. But focus on the efficiency we’ve talked about and what those commanders are doing and how to best leverage their ability to help you win games. Keep building and keep trying and you’ll get the list to a state where it’s getting there. It will also give you practice with GAR, which is also important to winning with them. All 6 of the GAR Commanders have worth and we’ve made good lists for all of them, so it isn’t a matter of the commander being bad so much as your list needing refinement. Speaking of list refinement….


Deployment and Objectives Have Extra Importance


Last but not least, are deployment and objectives. To say these are important is a rather obvious statement. After all, these considerations are always important in Armada. To say they’re especially important to GAR is a bit like saying “water is important to life.” The thing is, some life can go without water longer than others. In this analogy, GAR is the fish flopping around on the deck desperately trying to get back to the water and the other factions are camels. That’s because of the one indisputable fact about GAR: they absolutely suck at steering. They’re what happens when an engineer looks at the Victory and says “yes, that is the perfect amount of yaw.” Exhibit A is the Acclamator, which has a single joint of yaw at any speed. Exhibit B is the Venator, which only has the luxury of two joints of yaw at speed two, one at each joint. Exhibit C, the Pelta, has the same speed two chart as the Venator, but can’t go as fast. The newly arrived Victory adds Exhibit D as it brings the OG terrible navigation into a new faction. The only ship that can steer worth a damned is the Consular (which, to be fair, has an absolutely amazing chart).


Want a good nav chart? Great! Oh...you wanted durability too? Nah, can't do that.

Rather than trying to make your navigation experience better by strapping expensive Engine Techs to Peltas, or taking Bail to go crazy on navigate commands, geek and I have found it better to just embrace that horrible navigation. This is the second part of what I mean when I say “embrace the grind.” Your navigation is going to suck. Accept it. Once you accept that reality, you can adapt in other ways. Deployment is the most critical way of compensating, which can often be aided by objectives. Short answer: do not take any objective where your opponent controls the entire battlefield of deployment. Long answer, read on! This can, and is a whole article in and of itself. Luckily, Snipafist did a write up on the Deployment aspect of the game, which has remained very relevant. I highly encourage you to read it. Objectives help by allowing you to concentrate the fight on your terms. Surprise Attack, Contested Outpost, Doomed Station, and Capture the VIP are some examples of objectives that allow you to force the fight to a certain point on the board. This allows you in turn to avoid some of the pitfalls of your terrible nav charts. As first player, under no circumstances should you be picking objectives that give your opponent a significant deployment advantage. Don’t even think about touching Solar Corona or Superior Positions, no matter how much you think you can leverage them or avoid their downsides. The initial positioning for GAR is immensely important.

Related to that, this is not us saying “never navigate” but understand WHY you’re navigating and where you’re navigating to. Your sides are solid, even without SPHAT, so getting a double arc is very helpful for keeping GAR ships trucking on the damage output. Speed 2 is a great spot for using a navigate once or twice with a Venator, but you should definitely be repairing more than you think with GAR.  Their shields and hull are fine (Rebel larges win the award for best shields, Imps for best hull, but second place in both of those isn’t bad I swear!) but where GAR really wins is tankiness.  They have several upgrades (Implacable, the aforementioned Projection Experts) that will allow you to regenerate shields quickly.  Combine that with great Salvos and your opponent may not WANT to shoot these ships you’re bringing, resulting in you actually living longer than you think. Position them well and you can keep your ship navigating and engineering right where you need to the whole game.


Oops, sorry, wrong Grand Army of the Republic. What were we talking about?

So there you have it, geek and I’s attempt to make a “bad” faction into something fun and competitive. We hope that helps you address some of your GAR problems. Once we got deeper into this faction, it really did become enjoyable in a way distinctly different from the others. Hopefully this gets on the path to that same kind of enjoyment. Until next time, happy gaming!

Imperial commander review: Moff Jerjerrod

I've been flirting with this article for a while but its time has finally come: the Moff Jerjerrod (Jerry to his friends, and we're all friends here, right?) review!

Slow your roll Vader, some of us haven't had an article yet!