
The first release of wave 10 (in the States anyways), the Providence-class Dreadnought offers the Separatists a dedicated multi-role flagship.
 |
| It also kinda looks like a long-necked turtle. |
 |
| A pair of Providence-class Dreadnoughts on the move. |
I promise I'm done talking about turtles, but for real: it looks like a turtle.
 |
| Still not a fan of the new card layouts but we'll have some fun alternates below. |
Both variants of the Providence have a lot in common:
- Total durability a bit under an Imperial-class Star Destroyer, for a bit less cost.
- 5 shields in front is superior to the ISD's 4, but 2 less hull points and only one redirect can cause problems.
- Identical points cost of 105 for both variants.
- Pretty standard "wave 2 large" profile of Command 3, Squadron 4, Engineering 4. The Squadron value stands out a bit (as most larges vary between 2 to 4), but Separatists need those higher squadron values to push their cheap fragile squads en masse.
- 5/6/3 dice batteries are somewhat reminiscent of a Rebel MC75's 5/5/2, although the ranges are more standardized between front and sides compared to the 75's.
- Speaking of which, the Providence is a bit weird in that it's very front-shield-heavy but its side hull zones are its most potent offensively.
- Very similar dice loadouts - the only difference between their battery armaments are the Dreadnought replaces a blue die on each side with a red die. Otherwise, they're identical in terms of their batteries.
- A "Clone Wars design" style nav chart. By which I mean it's similar to the Republic Acclamator in that you can go speed 3 if you have to, but your yaw is terrible. This is definitely superior to being stuck at speed 2, but your total yaw at speeds 1 and 2 is double that of your yaw at speed 3.
- Brace, redirect, contain, and salvo is a pretty solid 4-token suite. The main issue being that the only tokens that directly interfere with enemy damage hitting your hull are brace and redirect. Contain is helpful but not a "full" defense token and salvo with 3 dice is welcome but it's not going to keep you alive any longer except in the rare circumstance it dissuades a weak ship from attacking you.
Basic usage recommendations
Like most large ships, the Providence invites immediate comparison to medium-sized combat ships in the same faction - what's the benefit of spending more points on one big combat ship compared to fewer points on a medium combat ship if they're similar in several respects? In this case, the comparison will be with the Munificent. The Providence is capable of going to speed 3 unlike the Munificent, but the Munificent has equivalent to superior dice batteries at long and medium range. The Providence is tougher (3 more hull points and 1 more front shield and a contain token), but not substantially so. For a 50% base price hike, what does the Providence bring to the table?
The Providence offers the most durable, flexible, and customizable large ship the Separatist fleet can field. It's not a specialized long-ranged sniper like the Munificent or a run-and-gun heavy (but fragile) torpedo boat like the Recusant. It can, however, perform well enough at all ranges and take more punches than any other Separatist ship can. This makes it an excellent candidate for flagship for a fleet and it can work well with a variety of other ships.
How to use the Providence will largely depend on the rest of your fleet, which variant you are using, and the associated upgrades. Generally, I don't recommend running it at speed 3 for long - speed 2 is just around the sweet spot and a navigate command can shift you down (into double-click of yaw and "sticking around" mode) or up (into "pounce" or "GTFO" mode) as necessary. It's also not exactly a one-arc powerhouse like many other large ships. It lacks a specific strong-battery hull zone and much prefers to double-arc enemy ships. In this regard it's got good company in nearly every other Separatist ship. To get significant mileage out of it, you'll generally need to get in for a close-ranged 6+5 double arc at least once per game, where it can finally out-muscle the medium-based workhorse Munificent Cruiser. Just be careful - you need to weigh the benefit of getting your full battery against your desire to keep the Providence safe and well-supported: if you're too reckless, your opponent will gang up on your Providence and destroy it (no duplicate braces or redirects can add up fast); if you're too passive, you might've been better off just running a Munificent. You need to thread that needle of being just aggressive enough.
Once you've committed the Providence to a fight, be aware of your weak-ish side arcs: you want to bring those 6 dice to bear whenever possible but it frequently means your opponent can choose to shoot right back at your mediocre 3-shield side hull zone. With only one redirect, consistent pressure on that side hull zone can add up fast and result in damage cards hitting the hull earlier than you'd expect, all while your front hull zone has shields to spare. Well-timed repair commands and/or a friend with Projection Experts can help regenerate new shields or move shields around to the side that's taking fire to keep you healthy for longer.
When in doubt, Squadron 4 and an offensive retrofit slot can make the Providence an excellent carrier (whether you choose to specialize it into a carrier, issue the occasional squadron command, or just go with something like Hyperwave Signal Boost to milk your Squadron 4 without using an actual squadron dial is up to you). In terms of raw squadron-command muscle for the points cost you're still better off with Munificents, but Squadron 4 gets more squadrons activated in one go than anything else the Separatists can field.
Titles
I'd don't feel as though a Providence must take a title, but all three titles serve to specialize the Providence further into a given role. This usually comes with the risk of also making it into a Christmas Tree of upgrade cards, so if you want to keep your Providence cheap, you may or may not be interested.
 |
| I can't wait for some nerd to paint theirs up in the blue/yellow/black scheme from the Invincible comics/Amazon Prime series. Send me pics! |
You may not believe me but I actually enjoy it when I don't need to use rules bullet points for things. Invincible is very straightforward: it gives you an extra defensive retrofit slot. So you'll have a total of two on the Carrier variant or one on the Dreadnought variant. Like all other upgrades that change/add upgrade slots, discarding it in-game doesn't do anything.
Invincible is an expensive but good title for either variant - it makes your Carrier very tanky and patches up your Dreadnought's lack of a defensive retrofit. The main issue with Invincible is the expense - it looks like a 5 point title but in reality it's 5 points plus the cost of whichever additional upgrade you take. Even modestly-costed defensive retrofits like Reinforced Blast Doors at 5 points become a 10 point upgrade with Invincible. So you better be really sure you value that extra defensive retrofit at whatever its base value is plus 5 points. It's tough to argue with a Carrier sporting both Electronic Countermeasures or Thermal Shields plus Early Warning System (usually applied to the side hull zone) for a very tanky Providence, however. It's just that it comes out to a whopping 17 (Thermals) or 19 (ECMs) points. In short, I tend to view Invincible as the kind of title I like to use on a Christmas Tree upgrade-heavy Providence: it's already expensive and probably over-upgraded, may as well lean into it and put another layer of defenses on my Christmas Tree.
 |
| Incoming meme, sir! |
 |
| This is what happens when you let a guy with a Masters in History write your articles. |
Invisible Hand is not so lucky and gets a whole bunch of bullet points for its rules. Here we go:
- Invisible Hand can't load squadrons until the ship itself is deployed ("if you are in the play area").
- You can effectively deploy Swarm squadrons to the Invisible Hand (just put them on the upgrade card is my recommendation) instead of deploying them like normal.
- I'm gonna reiterate they have to be squadrons with the Swarm keyword.
- That means Vultures and Tri-Fighters.
- NOT HYENAS PLEASE FOR THE LOVE OF GOD STOP TRYING TO DO THIS.
- When you begin resolving a squadron command, before you actually command any squadrons, you may deploy up to X squadrons from the Invisible Hand storage within distance 3, where X is the number of squadrons you're about to boss around.
- You don't need to command those squadrons at all if you don't want to and can instead activate other squadrons. Dropping the squads off doesn't commit you to anything or use up squadron command "points."
- The "no moving" and "AI+1" elements of Invisible Hand only apply to activating those squadrons during the activation they're dropped off. You can command them in a later activation without the move restriction but also without the AI bonus.
- "Within" distance 3 means "the entire base of the squadron must be outside of distance 2 and completely within the distance 3 range band." Whether this is intentional or an oversight of what should have been "within distance 1-3" is presently unclear. But for now, we need to play it as it's written.
- You can't do weird shenanigans with Rapid Launch Bays to deploy RLB squadrons from Invisible Hand or vice versa. The set aside area is for each card separately, which is why I recommend putting the squadrons on the card that is storing them. It makes things easier.
- That said, you can also launch squads from RLBs while dropping squads off from Invisible Hand. It will be more squads than you can possibly command in one go but you can. We'll talk about that very soon!
Invisible Hand appears to be a 9 point title but, like Invincible, it's a little sneaky. You see, if you're using Invisible Hand then you really want the much improved ability to actively threaten enemy squadrons with a big ol Swarm alpha strike that you gain by equipping Flight Commander so you can drive up and dump out a bunch of angry space robots rather than hoping your prey obligingly comes to you. That means Invisible Hand will effectively run you 12 points and consume your officer and title slot. All that said, I feel like if you're in for a penny you should be in for a pound and use Invisible Hand with a Dreadnought Providence designed to be a carrier and using Flight Controllers
for a total of 3 extra dice per squadron. It also helps you get some extra staying
power, as while the Invisible Hand bonus die wears off after the big robot tsunami, the regular AI and Flight Controllers bonus dice do not. You're also going to want either a squadron token by the time the big activation rolls around or Expanded Hangar Bays, depending. Expanded Hangar Bays helps consistently command a lot of squads and give maximum value from Flight Controllers and works very well with Flight Commander (as you can move into range to command squads if you threw them too far away last round), but it may not be your cup of tea. It's easy to see how this build gets expensive and many of your other upgrade choices become prescribed, though.
So is Invisible Hand worth it? That's something of an open question. Under ideal circumstances, Invisible Hand keeps your fighter squadrons safe from enemy attention until it jumps into the fray and disgorges 5 squadrons who all go nuts and clear away enemy fighters in a big alpha, making it safe for your Hyenas to come in afterwards and go after ships. Under poor circumstances, you spent a lot of points to get a big alpha strike combo against a fleet that didn't bring any/many squads at all or whose squadrons are adept at avoiding the Invisible Hand alpha or your opponent is good at pressuring you into dropping squads early by threatening your Providence with destruction or with title removal through the Darth Vader boarding team (which traps your squads off the table for the rest of the game, destroying them). The final big things to look out for are anything that can stop you from commanding squadrons when you really need to, like anti-squadron raid tokens or dial-screwage effects like Slicer Tools.
If you're going to get maximum value from this title, it really should be in a squadron-heavy fleet where an investment in a big fighter alpha can pay off more strongly. If your opponent also goes heavier on squadrons, you need their fighters dead ASAP to clear the way for your potent but fragile Hyena Bombers. If your opponent didn't, then the Invisible Hand upgrades combo pile is almost certainly overkill but you still have a capable carrier and your Hyenas can go after ships more easily, hopefully making up the value that you lost in going overkill on the Invisible Hand. Don't forget you don't need to load squads into the Invisible Hand if the matchup doesn't really encourage you to do so - you can use your Swarm fighters to buy deployments on the table like usual, deploy the Providence later, and just waste the title. It doesn't feel great, but it's sometimes the right choice.
Okay, so assuming you're set on using the Invisible Hand, should you also use Rapid Launch Bays to potentially launch 9 squadrons from your one ship in a single squadron command?
 |
| Force lightning optional. |
I get that it seems like a really neat thing to do: it's nine squadrons from one ship. It's very cinematic and cool. You can launch 5 fighters and then 4 bombers right behind them: it's an entire fleet's squadrons from one ship and all in one place. There are several issues with this, though:
- You run into serious deployment problems. You need to deploy the Invisible Hand before you can load any squadrons into it and the Rapid Launch Bay squadrons don't count as deployments at all. You have to deploy the Providence very early and your opponent gets to counter-deploy immediately afterwards. This can make it very difficult to get good use from the Invisible Hand in the first place.
- You can't command all those squadrons in one go. You're probably counting on dropping off the RLB squadrons when you drop off the Invisible Hand squadrons and then having another ship command them afterwards. That's fine, but what was the point, then, of even using the RLBs? Those Hyenas (most likely) could just follow along behind the Providence within range of other ships that can command them later. If the Invisible Hand plans to use its own title on round X and then use RLBs to drop off bombers on round X+1, who is commanding the squadrons it dropped off initially? Getting in a big alpha helps a lot but you're unlikely to kill every enemy squadron right away. It'll take some clean up work for at least another round. Maybe two (or more).
- You don't necessarily want those squadrons together anyways. Your Hyenas would prefer to avoid being near a big dogfight if possible but if they're glued to the ship that's gunning to start a furball that's rather difficult.
- It's a ton of eggs in one big basket. All the things your opponent can do to mess with Invisible Hand work to mess with Rapid Launch Bays and it makes the Providence an even bigger target than it would be with just Invisible Hand. You'll easily have around 250 points worth of models between the Providence and the squadrons inside.
In short, don't combine Rapid Launch Bays with Invisible Hand. Please. Or if you do, realize it's for the memes. Which is fun, but not necessarily the smartest move.
 | |
| Cannot Get Your Ship Out's winner for "wave 10 upgrade card that people are most likely to forget they have equipped to their ship." |
Lucid Voice is effectively a big Modification upgrade that's not actually a Modification: it messes with the printed battery dice on your ship's card and cardboard. I'm serious about the joke text below the picture, though - it changes a few things and it's easy to look at the cardboard on the ship and just roll those dice only to later realize "oh crap, it was Lucid Voice!" So do your best to remember. Heck, lay the card on the back of your ship's base to remind you. Whatever works.
The most obvious takeaway from Lucid Voice is "hey, this makes my salvo much better," which is true. It's tempting to see the blue die changing to a black die on each side as a downside to help "pay" for improved salvo, but the truth is it's a stealth buff that opens up options for your ordnance upgrade slot. With side arcs of 3 black dice, you go from a 43.8% chance of triggering a black critical upgrade to a 57.8% chance. With Leading Shots (Carrier, improves to 82.2%) or Ordnance Experts (Dreadnought, improves to 76.3%) involved, it gets even better.
As I've said with all the Providence titles so far, be aware that the title is more expensive than it first appears because of upgrades that come stapled to it: with a 3-red-dice salvo, Linked Turbolaser Towers goes from "this can be nice" to "you absolutely need to put this on your ship." There are some fun Lucid Voice builds and we'll get to one of them later.
Providence-class Carrier
 |
| You thought I forgot about my promise to show you something nice? |
We're covering the Providence-class Carrier first because of alphabetical order, given both variants are the same cost. That said, in my opinion we're also getting to the good stuff first because for the most part I consider the Carrier to be the superior variant. Access to a native defensive retrofit and fleet command slot are both excellent on a natural flagship. I can't understate how much Separatists love having access to a fleet command - usually Intensify Firepower, but they can all be handy in the right builds.
Upgrades
Like most Separatist ships, you'll want to keep your Providence as cheap as you can. It's tricky to do, however, given it has many excellent upgrade slots. It's on the cheap-ish side for a heavier large ship, so your upgrade mileage won't go as far as it would on something like an ISD or a Starhawk. It's not always easy to go light on the upgrades, especially with the upgrade-hungry titles, but do what you can to resist the urge to just fill every slot with expensive upgrades or else you'll wind up with a bloated points piñata.
Officer
Many of the Separatist officers work just fine here:
- Passel Argente is the darkhorse candidate here but if you don't mind running through the full command dial roulette by round 4, he makes the Providence into an excellent multi-role battle carrier from round 3 on (as you assign a squadron dial for round 3 and then use Passel to give you bonus free squad dials from round 4 on, as needed).
- Rune Haako is happy to provide two command tokens and vacuum up other command tokens (especially if Tikkes is nearby) to keep powering upgrades and/or for general use.
- Shu Mai is excellent if you can time her for the round(s) you'll be double-arcing. A 3-die reroll is excellent on each attack, and works on your salvo attacks, too.
- Tikkes is good for providing tokens to feed a fleet command easily. The main issue is using Tikkes all game means you will effectively be setting your entire command stack round 1, as you'll be slotting in commands 1,2, and 3 for rounds 4,5, and 6, respectively.
- Wat Tambor is always a good choice for maximum tankiness. If you're planning on repairing a lot to keep your Providence sticking around you can get up to ludicrous durability, especially on an Invincible Carrier with two defensive retrofit slots.
Otherwise, I'd consider Intel Officer from the generic officer pool. Your Providence wants to double-arc whenever possible and going after your opponent's brace with Intel Officer ensures it only gets used once against your two attacks.
Defensive Retrofit
In general I'd recommend considering either Electronic Countermeasures for deluxe brace assurance or Thermal Shields for discount brace assurance - in most cases your Providence will be the preferred target for large dice pools so keeping it safe from other larges helps. If neither of those appeal, Early Warning System can help keep your side hull zones safer. Worst case Reinforced Blast Doors is an easy 3 more hull for a low cost.
Fleet Command
It's Intensify Firepower, accept your destiny. Separatists are a faction with a good amount of both red dice and salvo but only middling amounts of dice fixing. Intensify Firepower does an excellent job of evening out your dice rolls. Otherwise, I'd consider Entrapment Formation (Take Evasive Action really depends on the fleet - a lot of Separatist ships naturally get one or two clicks at the final joint of their preferred speeds so TEA isn't always very effective). Shields to Max can be fun in a janky fleet using a lot of Projection Experts.
Offensive Retrofit
It largely depends on how much you want your Providence to be a dedicated carrier. If so, you have your usual carrier-style upgrades. Even if you don't want to be a dedicated carrier, it's still worth considering Reserve Hangar Decks or Hyperwave Signal Boost to provide a little support to the squadrons you did bring (and are presumably usually commanding from other ships for the most part). This is one of those slots that's easy to ignore, though, when you don't have anything particularly interesting planned for it.
Ordnance
Most of the time this will be External Racks or Ordnance Pods. You don't have enough inherent black dice to rely on black dice crit upgrades and adding extra black dice through Modifications gets very pricey very fast; I wouldn't recommend it for a ship that's not a dedicated close-ranged brawler. An argument can be made for Flechette Torpedoes on the Carrier given your double black dice flak but it's tough to rely on getting a crit symbol without any method for rerolling the dice. I'd rather stick with Ordnance Pods for anti-squad duties there. The good news is both of these upgrades are cheap and not too difficult to slot in.
Ion Cannon
Incoming heresy: in most cases I wouldn't use Leading Shots. The Providence just isn't throwing enough dice to really need it in most circumstances. In most cases, you need to reroll 2 or more dice to really benefit from giving up the blue die for Leading Shots and at close range with a side arc (throwing 6 dice) that's still only going to happen around 26% of the time. Considering you should probably also have at least Intensify Firepower helping your dice out, it's even less necessary. The only time I'd recommend it is if you really want insurance for your External Racks activation or if you're doing a Lucid Voice black crits build. In those cases you'll either have enough dice that you're more likely to have 2+ of them turning up blank or you'll be fishing for black hit+crits.
You also don't have enough blue dice to really justify blue crit upgrades (unless Kraken) or SW-7 Ion Batteries either. So for the most part it's Point Defense Ion Cannons or nothing. Your call.
Turbolaser
If you're tight on points there's nothing in the turbolaser slot I consider to be mandatory but there are some nice options that are worth considering:
- H9 Turbolasers are pricey but with blue dice all around, it guarantees an accuracy on every attack if you need one.
- Linked Turbolaser Towers helps with salvo and red dice control but it's not strictly necessary unless you're going with Lucid Voice. You've got around a 60% chance of rolling a blank or accuracy on your 2 red dice in your front and side arcs and it doesn't hurt to have the option for a reroll if you're not using Intensify Firepower.
- XI7 Turbolasers are still one of the preferred options for double-arcing ships as you're hopefully hitting the same hull zone twice in a single activation so minimizing the value of a redirect can make a difference. They are more appealing if you also take Intel Officer to go after the brace.
Builds
As a reminder, I only include the upgrades I consider to be fundamental to what the build is trying to do. You're welcome to add more upgrades from there to fill empty slots if you like. I'm also going to break my turtles promise. Sorry not sorry.
Tanky Turtle
Invincible, Wat Tambor, Thermal Shields, Early Warning System, Shields to Max, Point Defense Ion Cannons
The Tanky Turtle is intended to be the centerpiece of a fleet running Projection Experts on other ships and using Shields to Max to top off ships that have some missing shields to keep the Projection Experts party going. Early Warning System and Point Defense Ion Cannons are already annoying enough for squadrons, but you can be extra annoying with Ordnance Pods and Quad Laser Turrets if you want to really rub it in.
Snapping Turtle
Lucid Voice, Reactive Gunnery, Intensify Firepower, Linked Turbolaser Towers
The Snapping Turtle is designed for optimal salvo boating - you've got your native salvo defense token and Reactive Gunnery allows for a second salvo past that. With three red dice with LTTs and Intensify Firepower there to fix your dice, you've got reliable salvo damage coming back. I would strongly encourage you to add Leading Shots and either Assault Proton Torpedoes or Assault Concussion Missiles to take advantage of the extra side black dice side-grade from Lucid Voice but I barely don't consider it mandatory. Barely.
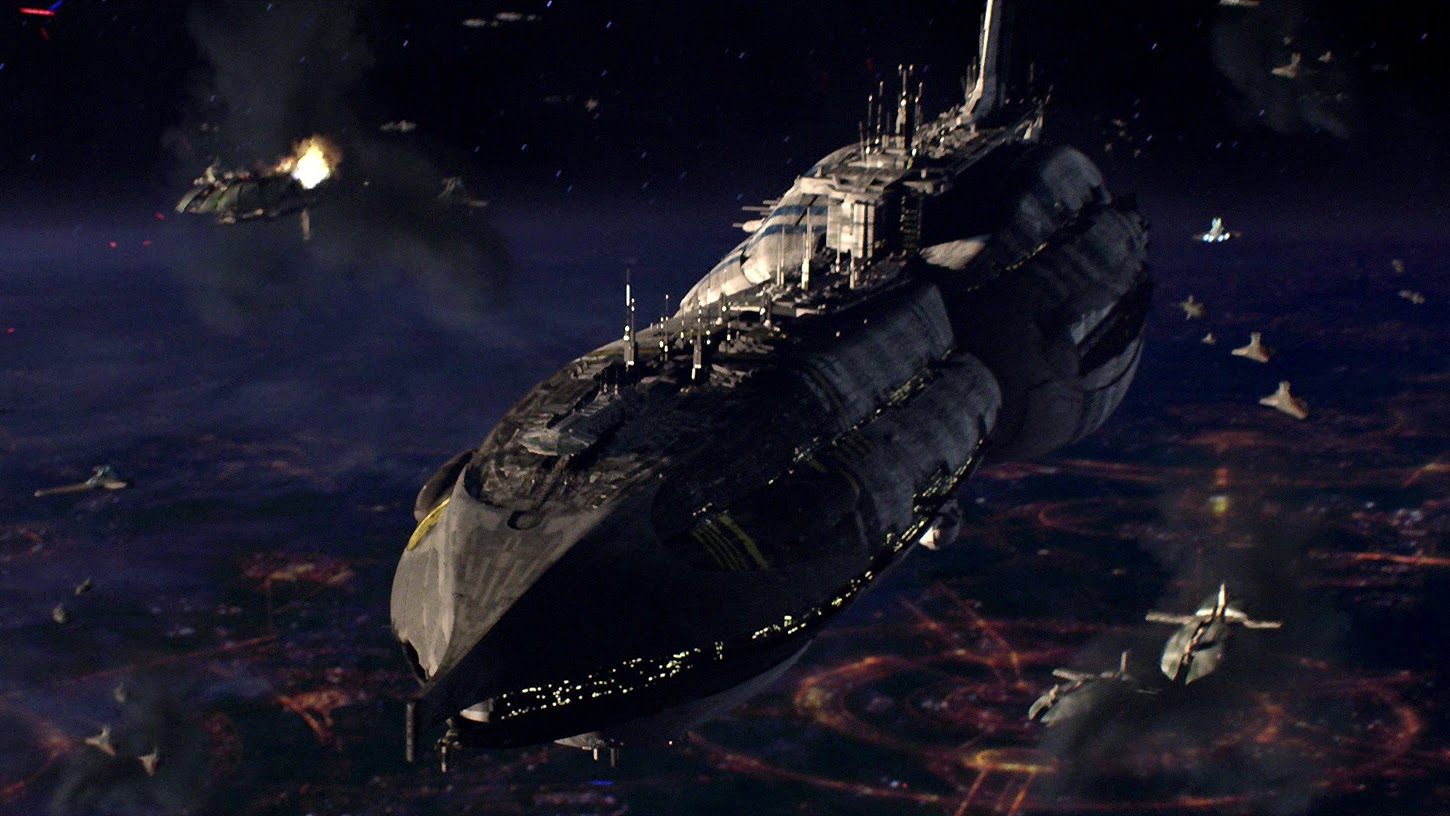
Providence-class Dreadnought
 |
| So pretty. |
As I mentioned earlier, I'm generally not as keen on the Dreadnought variant as I am on the Carrier variant - giving up both a defensive retrofit slot and a fleet command slot for a weapon team and a second turbolaser slot doesn't really impress me. Upgrading to 3 red dice in the sides is nice, but you're also downgrading to 1 blue flak die from 2 black flak dice so the overall deal is a little underwhelming. The lack of a defensive retrofit in particular concerns me for a ship that wants to get into close range at some point most games. There are some definite uses though so let's get to the positive stuff.
Upgrades
The two variants are so similar that my comments above for upgrades on the Carrier hold here for the Dreadnought variant as well and I'll just note where I feel differently otherwise.
Weapon Team
A second turbolaser slot is not, for the most part, much to write home
about. It's typically a trap to over-upgrade your ships when it's
available (not apologizing to Cymoons or Liberties, I said what I said).
So if we're going to get good mileage out of the Dreadnought compared to the Carrier we need to look to the weapon team.
Just to get this out of the way early: I feel whoever named these Providence variants screwed up because the Dreadnought makes the superior carrier due to having a weapon team slot for Flight Controllers. Having Flight Controllers available to AI squadrons is amazing. There are other good options here too but if you're set on the Dreadnought I'd definitely consider Flight Controllers first and foremost. The other options I'd recommend are:
- Ordnance Experts. Largely with the Lucid Voice title and black crit upgrades.
- Ruthless Strategists. Particularly with Grievous if you want the option to nuke your own squads. I wish the Dreadnought had more than a single blue die for flak, but you can still get work done with Ruthless Strategists with it.
- Weapon Battery Techs. How do you like the sound of guaranteed blue crits even though you only have one blue die in every arc? Weapon Battery Techs, H9 Turbolasers, and your choice of blue crit ion cannon make it a reality.
- Boarding Troopers. If you're not using your offensive retrofit slot otherwise, Boarding Troopers are an excellent choice to use prior to a double-arc. The temptation to burn tokens is strong when you've got at least 11 total dice coming at you and with Squadron 4 you can exhaust an awful lot of tokens.
- Local Fire Control. For salvo builds, which we'll talk about soon.
Turbolasers
The same list from above, only I like Linked Turbolaser Towers more with 3 red dice in the side arcs. As I said before, it's generally a trap to fill in both slots as it gets pricey, but you can get some fun combinations if you're willing to shell out a lot of points:
- H9 Turbolasers + XI7 Turbolasers: guaranteed accuracy for the brace + "your redirect sucks" is rough on a lot of heavier ships counting on brace and redirect to stay alive.
- Linked Turbolaser Towers + Heavy Fire Zone: turn your blue flak die red and get a reroll on it from LTTs, making it not only longer ranged but more reliable damage than a regular blue die.
Builds
Beehive
Invisible Hand, Flight Commander, Flight Controllers, Expanded Hangar Bays
It's fairly bare-bones but still all-in on Invisible Hand. You're welcome to add other upgrades if you like - you can also get some extra squad hate with Ordnance Pods, Heavy Fire Zone (before you pounce your squads or enemy squads who stay out of range... for now), and Linked Turbolaser Towers if you like, or you can build it into more of a general-purpose battle carrier.
Ion Express Delivery
Weapon Battery Techs, Ion Cannon Batteries, H9 Turbolasers
Guaranteed blue crits. Any ship with a turbolaser, ion cannon, and weapon team slot can do this and it's fun if not super competitive. I chose Ion Cannon Batteries because it can be used on both attacks when you're double arcing but Heavy Ion Emplacements isn't a bad choice either.
Salvo on the Half Shell
Local Fire Control, Flak Guns, DBY-827 Heavy Turbolasers, Linked Turbolaser Towers
If the Carrier variant is the better Lucid Voice salvo build, the Dreadnought variant is the better Flak Guns build so you can bring both LTTs and DBYs, and DBYs are mercifully cheap. You get your two salvos here through Local Fire Control rather than Reactive Gunnery. This isn't quite as long-ranged a salvo as Lucid Voice, but Flak Guns will get your red and blue dice out to long range and your black dice out to medium on a salvo, and with LTTs giving you a red die reroll and DBYs letting you set a salvo die face to a crit side (usually the black die for a hit+crit), you're reliably salvoing back for 3+ damage and frequently 4. This ship would benefit from Invincible for some extra defenses but it brings the cost up quickly, so be careful.
So I think the idea with Invisible Hand and Rapid Launch Bays is that you can use IH to intercept the alpha strike, and then be able to place the bombers outside of it since you then know where the furball is. That said, I don't really think even that's a good idea, not just for the above reasons but even in general. It's a rare game that doesn't penalize you for giving the other player na initiative advantage, and relying on their alpha strike is exactly that.
ReplyDeleteThat said, I think you could make an argument about putting General Grievous as your commander on this ship, and then using Vultures as a combination fighter screen and token reset fodder, since Providence only has the brace and redirect to rely on most of the time. I'm not sure how well IH would help with this, but it's something, right?
As an aside, am I the only guy that prefers the new ship card layout? It actually answers all the complaints I had with the old layout >.<
H9 and QBT's are now both modifications, so can't be paired right?
ReplyDeleteGood catch! I had a brain fart and was remembering pre-1.5 H9s where they weren't a Modification. I'll fix that right up.
DeleteMost welcome.
DeleteLooking forward to your next article
If I may, I found excellent results from a local tournament using an Invisible Hand + RLBs setup. It was an 11 squadron list (7 dedicated fighters, 4 bombers), with the providence carrier and two supporting Hardcell Transports.
ReplyDeleteThe thing I found helpful about the combo was that you don't necessarily try and deploy/activate all 9 stored squadrons on the same turn. The IH alpha-strike is there to go first and clear the way (or at least gum up the majority of enemy squadrons), and the RLB "second wave" as I like to call it is there for if you can wipe most of the opposing squadrons out, and/or if the Providence, while slipping past the initial furball, can close the distance to an important enemy ship and then deploy the bombers without needing to include DFS-311 for the Intel. I played this list at a tournament and the one-two punch was very effective in not only mauling an Onager list, but also a heavy-squadron GAR list (which did have Clone Commander Wolf for the raid threat). I placed third out of eight (only losing in the second round against one Mr. Schmitty, who I think people have heard of ;P ).
This said, I don't recommend it as a strategy for beginners or people who have trouble countering raid tokens or slicer tools. The development process for the list was rife with pints of blood, gallons of sweat, and kegs of tears as the double fighter-storage providence would, as you said, get targeted for either destruction or shenanigans. For people who learn it though and prep for contingencies of counter-play, it's definitely a build people don't expect.
Maybe the name Invisible Hand is a joke at the expense of capitalism?
ReplyDelete"Lemme show you what really influences the market."
So I did some back-and-forth googling out of curiosity, and I have a possible answer for this.
DeleteThey're not clear on the dates, but: the Providence-Class Dreadnought was originally used by the Trade Federation, but was folded into the Separatist fleet. Based on the wording, this implies that they were in use before the Separatist Crisis, when the Trade Federation still operated under the Republics' Capitalist model. The Invisible Hand was originally Nite Gunray's flagship; Grievous demanded it after the Malevolence was sunk. So, it was most likely named such when Gunray was still onboard for venture capitalism, and was never rechristened even after they converted to the Separatist mercantilism model.
Dear, Eric and geek19, i am new to Armada, those separatist ships just hooked me cause it's by far my favorite star wars faction. I really look forward to annoy my enemies with angry droids under the command of greedy Neimoidians! I love reading your postings and they really help me out to prepare for my first long-time tournament in the capital of germany! You spread out nice details and made me reconcider many cards and lists, very helpful! Keep going guys and pray with me for more separatist ships comming out (i want a Lucrehulk-class droid command ship!!!!)! :)
ReplyDeleteI'm not convinced it's "good" but spinal-turbos + lucid voice on the dreadnought makes the ship a giant red dice hedgehog where literally no arc fires less than 3 dice and does 7 dice double arc out the rear at long range
ReplyDeleteIt's expensive and bizarre, and not all that different from a spinal mc80. But it's definitely a "fun" idea, lol.
"Invisible hand" for when you want rapid launch bays but don't want to give up deployment advantage.... But still have to place your big lumbering ship early anyway... Kind of defeats the purpose, lol. But at least it's flavorful
ReplyDeleteAfter months of practicing using the Providence I am still amazed at how much it needs to keep its nose on point due to being a double arc ship with ZERO side coverage from its nose arc. It just feels bizarre that it needs to point towards the enemy more than an ISD to double arc.
ReplyDelete