
Hey there, ladies, gentlemen, and assorted others. It’s GiledPallaeon, kindly taking over an article for your regular Cannot Get Your Ship Out guys for my Atlanta Regional wrapup. I hosted three of Chicago’s finest Armada players down here in Atlanta for our Regional this past Saturday 2/2, and we had a spectacular turnout of 39 players, the biggest that I know of so far this season. We went for four rounds of high quality Armada and a hard-fought cut for our top 2. Eric kindly offered to let me write something up and host it here on CGYSO so it will “not get eaten by the ever-hungry forum gods”. (Besides, as a Falcons fan, I need something else to think about tonight than another [redacted] New England Patriots [redacted] Super Bowl win. Yes I’m still salty, and I probably always will be. F*** Tom Brady.)
Let’s start with a little recap. Prior to the arrival of Wave 7 a little over a year ago, I was a strong proponent of dual Imperial-class Star Destroyers. I took one such fleet to fourth of 19 at the Atlanta Regional last year, which attendance was badly marred by snowfall. (Hush Yankees, snow down here means ice the next morning, and there was enough I was concerned too.) Since then I’ve struggled to find a fleet I really like. I took twin Kuats under Motti to third Thursday of Adepticon last year, and an early version of the list this article is about, then known as “Hood and Prince of Wales” to something middling on Saturday. (That year not being Worlds meant there were two entirely independent Armada tournaments, and I was fortunate enough to play in both.)
But to be frank, I’ve been a bit lost and I’ve struggled to find my footing ever since the wave arrived. I flew a Thrawn/Chimaera LMSU for a long while, one of the first fleets to seriously include the component parts of many popular Imperial lists today. It had a Kuat, mine particularly being Chimaera, a title I adore, Demolisher because what’s an Imperial list without Demolisher, a Needa/TRC Arquitens, a staple from my earlier dual ISD list, and two Gozantis. I earned a second and third place at two different Store Championships with that list, so it obviously wasn’t terrible, if boring and rote to play. I’ve also experimented with all “heavy smalls” Imperial MSU under a variety of commanders (at least three of a combination of Arquitens and Gladiators, sometimes four, with Raider and Gozanti support), and a list I call two-ship-adjacent, with an Interdictor, a Quasar (shock and surprise, Squall), a BCC Gozanti (that might actually engender a little surprise in an Imperial list), and a variety of Defenders, Bombers, and appropriate aces (Maarek, Jendon, and Rhymer). That list ended up being my Vassal World Cup list, and while it had done fine locally, it failed (in my view) in that environment, and I was searching for a list I had confidence in.
This brings us to my bugbear that had been driving a lot of that list-searching. A large part of the reason I shifted to that Thrawn LMSU list rather than some new iteration of dual ISDs is the arrival of Raddus. Now others have claimed that dual ISD is relatively strong against Blue Fish, claiming the durability of those ships give it strength against Blue Fish. I strongly disagree. The fundamental way to defeat dual ISD is to get out of one, preferably both front arcs, and force one or both ISDs out of the fight. Raddus does this via maneuver more or less automatically. ISDs excel at cutting off opponents trying to run wide around them. What they can’t do, even when JJ enabled, is cut around to get their primary weapons back on target against a maneuvering adversary that is already past their guard. Their only option is to cut, run, and pray to the dice gods they aren’t gutted as they do so. That countermaneuvering gets easier against a Liberty drop (easier than impossible being really really g****** difficult), as has been popularized by some strong showings at NOVA and online; that was not the Raddus that took off in Atlanta.
The Raddus that took off in Atlanta was a radically different list. It was twin MC75s, with the drop ship being Profundity, carrying a Hammerhead, sometimes Garel’s Honor, with a certain asshole Twi’lek, some External Racks, and occasionally an officer of some expendable nature. That’s a sub-50pt package of Crippled ISD, served with glee and aplomb. It was frequently helmed by one of Atlanta’s best Rebel players, Jamie Nasmyth, otherwise known on the forums and Discord as jamie.nasmyth (or some such). That bloody list sank so many ISDs I am quite certain you could have rebuilt the Death Star from the battered wreckage of the ships and my pride.
“Well Giled,” asks the useful audience member rhetorical device, “if you couldn’t beat them, did you try joining them?” Yes I did. One of the lists I experimented with and left out of my previous listing was in fact a Raddus list, with a Liberty, Mon Karren on a Battle with Spinals, XX-9s, Intel Officer, and Caitken & Shollan to be specific (and Engine Techs, obviously). My Raddus was personally on a fairly heavily armed Admonition because I was terrified of Raddus assassination, even in those pre-two-ship days. Its first three games and my first three games with Raddus were the Store Championship for Quest Comics and Games in Carrollton, and I annihilated everything before me. I put it away after that.
Let me be inescapably clear. Raddus is not an auto-win admiral. I have seen Raddus lose, and I have played Raddus lists that lost to me. However, go reread my phraseology there. I said I played Raddus lists that lost to me. I did not beat them, they allowed me to win. There’s a difference. I did not overcome them as a player with my own skill, they defeated themselves. That’s not fun to me. I don’t enjoy that, frankly I think it’s bull. As many comments as I make about how “It’s Regionals season now, the gloves come off”, I hate winning that way. I want to match blades with you, have you do your best, and I overcome you through my own powers at the table, not the powers I picked before game start. That’s not fun to me, that’s not a game I enjoy, and it’s why even after the thrashing I got in the Orlando Regional (literally all I will say about that tournament other than that Crabbok was a gracious and wonderful host) I did not resurrect my creation.
Now, Jamie was long since committed to being Atlanta’s TO for our Regional. I knew all along I did not need to know how to beat his list, at least not in his hands. The damage to my pride and confidence were done though. I needed to play something else. I had tried all varieties of double ISDs, whether superheavy I-2s, Cymoons, a Sloane dual ISD creation, and all sorts of other tricks. I still wanted battleships though, and far and away in my book the best Rebel admiral for Large ships after Blue Fish is Red Fish.
Ackbar battleships, two of them. I already knew that that’s a worthy use of him. If Fish Farm can drag all the value it needs out of one armed ship, I’m certain I can get it with two. The Doom Pickle I more or less straight lifted from those lists, with only a couple minor changes. The question now is picking a second battleship. I said when I wrote my screed on dual ISDs I thought there was a chance the MC75 could become the Rebel ISD in ways the Liberty and the Home One MC80 could or did not. With the benefit of hindsight/experience, I believe I was both right and wrong. The MC75 is uniquely suited for diving into combat, hurling dice left and right, and driving its opponents before it. It is a fearsome warship. In that regard it is easily the equal of its Imperial counterpart, especially in its ability to retain formidable power in close quarters combat off its nose, something neither other Rebel Large does particularly well. I’ve never had an ISD one-shot a Liberty. My MC75 has. Not one activation, one singular shot. (For those trying to work out the secret sauce at home, the Liberty in question had been rammed so “single shot” is a teensy bit misleading. The rest of the recipe is a front arc shot into the side of the hapless battlecruiser, with two accuracies, a ConFire black, and External Racks, of which there was only one not-hit/crit among my blacks, itself a hit.) However, it is not the equal of the ISD in durability, and other than the forthcoming Super I don’t think anything, with one exception I already noted, ever will be. I still needed an anchor though, and the MC80H is a powerfully durable ship. That should complement the raw brutality of an MC75 quite well.
I now had my warships, one lethal bruiser that played line leader and a deadly long-range artillery piece that was as difficult to kill as they come. I’m going to go ahead and throw up my full list now, and we can go over some of my more controversial details.
Name: Task Force 63
Faction: Rebel
Commander: Admiral Ackbar as Admiral Willis Lee
Assault: Advanced Gunnery
Defense: Capture the VIP
Navigation: Intel Sweep
MC75 Armored Cruiser (104) as USS South Dakota BB-57
• Lando Carissian (4)
• Gunnery Team (7)
• Early Warning System (7)
• External Racks (3)
• Leading Shots (4)
• XI7 Turbolasers (6)
= 135 Points
MC80 Assault Cruiser (114) as USS Washington BB-56
• Admiral Ackbar (38)
• Strategic Adviser (4)
• Engine Techs (8)
• Electronic Countermeasures (7)
• Early Warning System (7)
• Leading Shots (4)
• Quad Battery Turrets (5)
• Home One (7)
= 194 Points
GR-75 Medium Transports (18)
• Leia Organa (3)
• Comms Net (2)
= 23 Points
GR-75 Medium Transports (18)
• Ahsoka Tano (2)
• Comms Net (2)
= 22 Points
Squadrons:
• VCX-100 Freighter (15)
= 15 Points
Total Points: 389
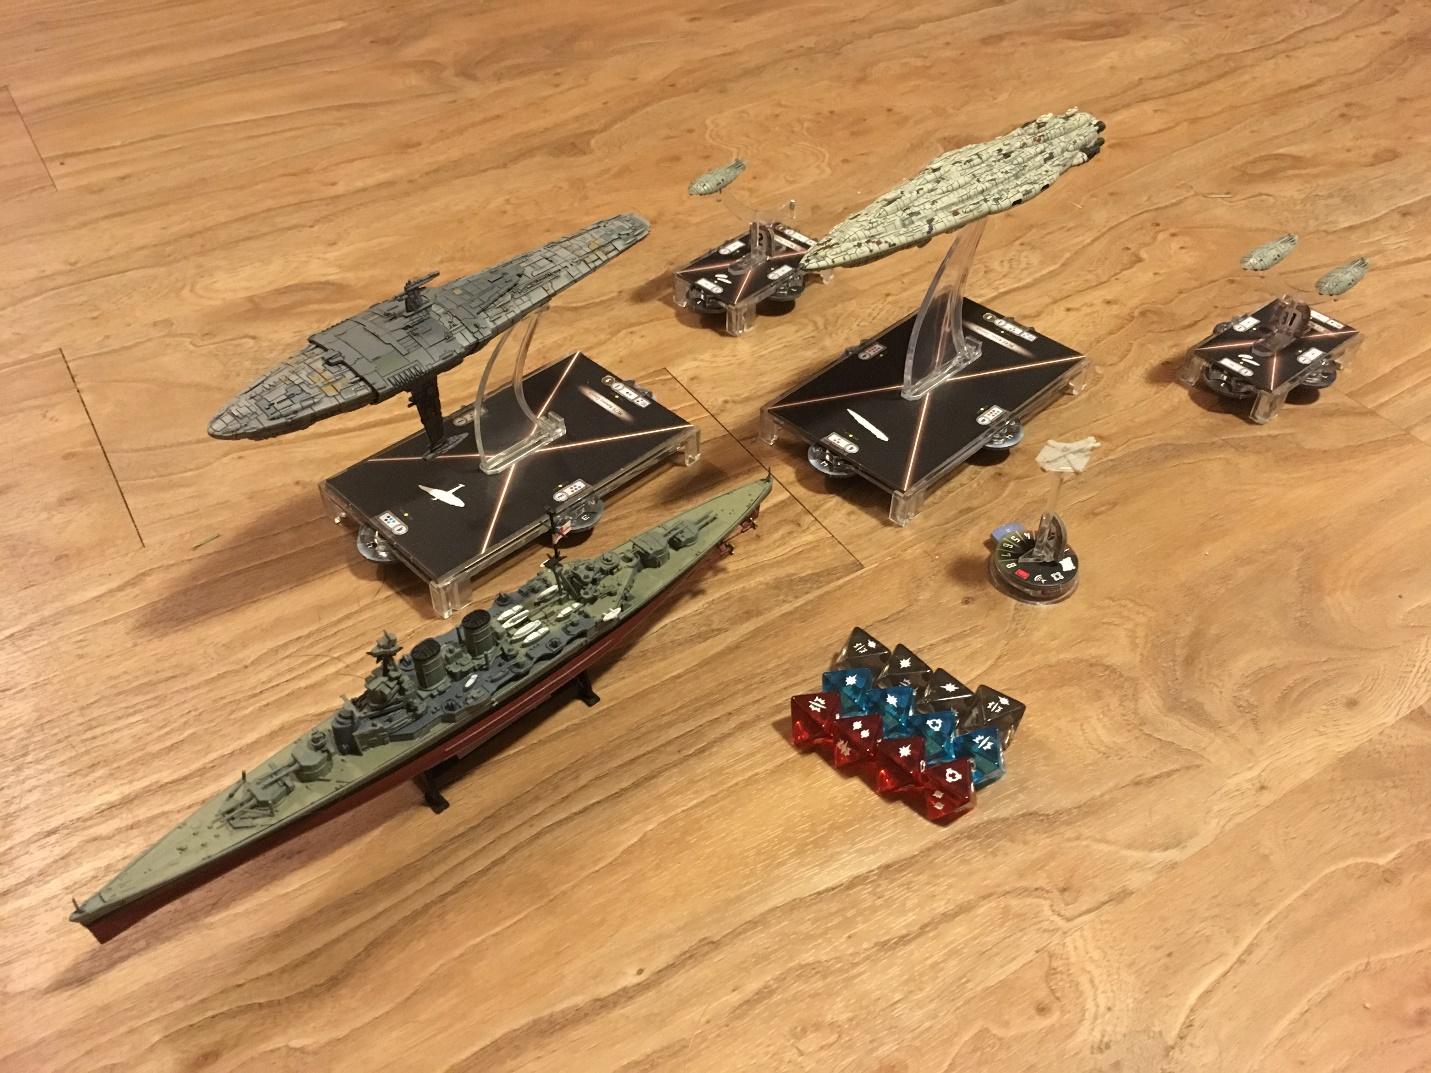 |
| Task Force 63, in formation with its original namesake HMS Hood, as well as the spoils of victory (CANDY DICE!). |
Starting from the top, the first comment I always get is “Why Lando over Bail?” I have a couple reasons. First, I have not had the practice nor possess the skill to include Bail in a meaningful way. Unlike his Imperial counterpart Governor Pryce (opinion incoming), it is much easier to outplay Bail and make his use a crippling mistake. I simply was not confident in my ability to leverage him in a way that would make him worth it over improving the defense of the surprisingly-fragile MC75. Second, Lando is a Raddus defense. The 75 is the obvious target, and you have not known pain until that Garel’s I mentioned rolls perfect against you and just smacks you. He’s necessary insurance for that weak defense token suite I feel.
Similarly in the Weapons Team and Offensive Retrofit slots, I’ve tried the usual suspects. I’ve included, in various combinations, Caitken and Shollan, Boarding Troopers, and Hardened Bulkheads in addition to or instead of Gunnery Teams. While C&S is effective, I find that for the 130-odd points I’ve invested in my MC75 I’d much rather get more out of both it and Ackbar with Gunnery Teams to alleviate the need to slash and Leading Shots for my dice fixing. Similarly with Boarding Troopers and Hardened Bulkheads, while both can be effective, I found that the single-use nature of BT and the requirements of both to get the 75 into extended close-quarters combat for maximum use for their points tended to put the ship in rather lethal danger. You don’t win games of Armada by losing ships, you win games of Armada by making the other poor sorry player lose his.
In that vein, I included EWS on my MC75. I expected a fair amount of squads (I ended up facing two squad heavy lists and two no-squads lists), but I was also testing a theory proposed somewhat recently by Truthiness on the Armada Discord. He posited that an Ackbar MC75 fighting at longer ranges would probably get as much efficient use out of EWS as it would ECM, particularly because the MC75’s token suite is so thin and so easily overheated. I am happy to report that his theory, at least for me personally, was correct. There was a critical juncture in three of my four games where the MC75 was left on one hull, in my first game requiring another shot to bring it down permanently and in the others keeping it alive for the rest of the game, and I am quite certain the six to ten dice it blocked each game were critical to that end.
Of the rest of my ships, I don’t think there’s too much that’s that controversial. I went with Home One over Defiance for a couple reasons. The first is that the synergy with Gunnery Teams is actually pretty strong. Even with Leading Shots rerolls, I pretty consistently either had an accuracy or a blank red, and Home One made up the difference. Had I chosen Defiance, my Advanced Gunnery objective would have been much more intimidating, and I probably would have used XI7s instead of QBTs that I did bring to enable long range rerolls (and thank God for it because more than once that saved my hide), but that would have hurt the power of the MC75 a lot, and for various reason I’ll get into in the battle report, Home One’s guaranteed accuracies were crucial to victory all day.
The MC80 also has Strategic Advisor because this is a post-Wave-7 world and as much as we all moan and groan, it’s the standard for a reason. Without that activation I would have been in more trouble every game I played. Similarly for the flotillas, Comms Net, Leia Officer, Ahsoka Tano put in work every game. I had at one point considered Hondo (obligatory “A friend to all!”), and I think in each of my four games, I had a different set of officers I would have preferred, but I’m not sad about the choices I did make and go with.
The final trick up this list’s sleeve is the solo VCX. One of the big issues that battleship-heavy lists face is the objective suite. The red is rarely the issue, but for that reason, your yellow and blue have to be much stronger and you have to genuinely gain from their use. Advanced Gunnery and Hallway Fight (Blockade Run) speak for themselves, but the others all have tradeoffs. Contested Outpost is straightforward and denies the station to enemy squads, but you also telegraph your movement plan pretty heavily and is not that hard for the other guy to score on. Similarly, Dangerous Territory helps your maneuver plan a bit, but it’s child’s play to cut down to only a few points of margin. Solar Corona is boring, and doesn’t score, and while Planetary Ion Cannon does add a few dice to my net armament, again it doesn’t score and it’s not impossible to outfly, especially with Strategic.
I knew I wouldn’t have the points to run a stiff squadron screen, so here the VCX is pretty expendable and only crucial round 1. I don’t have to have an extended battle with another heavy Strategic list (go away, John, you have your own article to write) to grab either the VIP or the first Intel Sweep token and haul all available butt out of there. This gimmick was pretty unhelpful all day, but that gets into some matchup things I”ll detail when we get there.
One last thing before I get into the games, the title of this article and the naming convention for this fleet is probably bothering the most of you that did not spend their youth on detailed military history. Like I mentioned a while ago, the original name for this fleet was Hood and Prince of Wales, a reference to HMS Hood and HMS Prince of Wales, two British battleships (arguably a battlecruiser and a battleship respectively) sortied in May of 1941 to defeat the Nazi battleship Bismarck and her cruiser escort Prinz Eugen. While an accurate name (two dissimilar heavy warships, one of which traded speed for protection and vice versa), it’s not exactly auspicious. At the Battle of Denmark Strait, after only a handful of salvos, HMS Hood was hit by an extremely lucky shot from Bismarck that appears to have detonated the ship’s magazine and obliterated the famous warship, leaving only three survivors of 1418 aboard. Prince of Wales was forced out of the action shortly thereafter, and Bismarck and Prinz Eugen broke out into the North Atlantic, the former later sunk by the combined action of every Royal Navy capital ship within 2000 miles. Prince of Wales herself was sunk less than eight months later trying to relieve the British base at Singapore from Japanese air attack. Like I said, inauspicious.
The only other famous battleship pair I know of (that did well) was Task Force 63 in the Second Naval Battle of Guadalcanal. The relevant details here are thus: for much of 1942 the US Navy and the Imperial Japanese Navy fought relentlessly over a Southern Pacific island called Guadalcanal. Many extended surface actions took place on the north side of the island, in a stretch of sea today known as Iron Bottom Sound, due to the staggering number of shipwrecks on the seafloor from the battles. Task Force 63, consisting of US battleships USS Washington and USS South Dakota, were involved in a long battle on the night of 14 November 1942. South Dakota, as much through bad luck as anything else, weathered enormous Japanese fire, destroying most of her superstructure and disabling her weapons but survived to withdraw. Washington slipped around the carnage and ambushed the Japanese battleship Kirishima, dealing mortal damage. That pattern became something of a theme for me across the day, so without any further ado, let’s dive in. (I have no pictures, so please bear with me as I talk through these games.)
Game 1: Dan C., “Captain Nemo”
Name: Dan's Fleet
Faction: Imperial
Commander: Admiral Motti
Assault: Most Wanted
Defense: Planetary Ion Cannon
Navigation: Solar Corona
Imperial II (120)
• Admiral Motti (24)
• Agent Kallus (3)
• Gunnery Team (7)
• Quad Laser Turrets (5)
• Early Warning System (7)
• Leading Shots (4)
• XI7 Turbolasers (6)
= 176 Points
Imperial II (120)
• Strategic Adviser (4)
• Gunnery Team (7)
• Quad Laser Turrets (5)
• Early Warning System (7)
• Leading Shots (4)
• XI7 Turbolasers (6)
= 153 Points
Gozanti Cruisers (23)
• Comms Net (2)
= 25 Points
Gozanti Cruisers (23)
• Comms Net (2)
= 25 Points
Squadrons:
= 0 Points
Total Points: 379
Dan was one of our Alabama guests, and brought something near and dear to my heart, dual ISDs. He had teched for dealing with heavy enemy squads, and was quite disappointed to see I had very few. (I think he ended up 2-2 on the day on that count, just like I did.) Being the smart cookie he is, he figured solo Strategic meant I had a plan, one I had probably even practiced, and matching me in activations, he elected to go second. Most Wanted was right out, and while I could probably push the Ion Cannon markers out of position with my VCX, I only had one, and I hadn’t practiced it. Therefore we went with Solar Corona.
I deployed roughly center of the board, with the MC75 touching the front of the deployment zone and Home One touching the rear of it, a flotilla to either side. Dan responded exactly as I would have, castled to the corner of the board on the MC75’s side of the table, Motti on the outside (towards the table edge) and Not-Motti on the inside, with one flotilla between the ISDs, and the other on the outside (towards me) of Not-Motti.
The game went about as you would really expect it to go. I came up the middle in an offset conga line formation, while Dan wheeled to meet me. Around turn 3, it became clear the battle was going to claim the 75, but Motti had accidentally entered range and was already taking fire, so I turned the 75 hard into his ISDs and double-arced Motti himself, while Home One accelerated around the doomed ship. When all was said and done, EWS had forced both ISDs to shoot the MC75 to kill it, as Motti’s attempt to shoot it and accelerate away left the ship on one hull (something of a theme for the day). The other ISD easily killed it, but the effect of locking Motti in place while Home One finally finished it off was done. My red dice, particularly out of Home One were very very cold this game, which contributed significantly to an extra shot to kill Motti and drawing fire off the other ISD, which was not very killable even after the death of the flagship.
This game was my first clue that Home One would be a star player for the day. Many many braces were locked down, and the surety of damage greatly contributed to the victory. Dan also scored the Leia flotilla, simply by virtue of the fact it was the flotilla on his side of my fleet. Home One never found the accuracies needed to return the favor, so the final score was quite narrow, 176-158, 18 MoV in my favor.
Game 2: Glenn B
Name: Glenn's Fleet
Faction: Imperial
Commander: Admiral Screed
Assault: Advanced Gunnery
Defense: Fleet Ambush
Navigation: Superior Positions
Imperial II (120)
• Strategic Adviser (4)
= 124 Points
ISD Cymoon 1 Refit (112)
• Admiral Screed (26)
• Gunnery Team (7)
= 145 Points
ISD Kuat Refit (112)
• Skilled First Officer (1)
• Hardened Bulkheads (5)
• Expanded Launchers (13)
= 131 Points
Squadrons:
= 0 Points
Total Points: 400
Glenn’s fleet was an unusual one. Triple ISD rarely does well, and to his credit he knew fairly well how to deploy it and fly it to get maximum use out of it. Unfortunately for him, Ackbar battleships can do really well against them, particularly after my gunners had warmed up fighting Dan. I briefly flirted with Advanced Gunnery simply for the hell of it, but took his Fleet Ambush instead. I put the station in the top left corner of the zone (all directions my point of view), lined up South Dakota (MC75) behind it, Washington (the 80) parallel to the rear edge of the zone at the hairy edge of red range to his center ISD, the ISD 2, pointing towards SoDak, and the two flotillas in trail back in my normal deployment zone. His Kuat was on the far left, across the station from SoDak, the ISD-2 in the middle letting Washington cross her T, and the Cymoon on her rear right quarter, positioned to give chase. For reasons that should be obvious, this was the only time for the entire tournament I stacked more than one ConFire command on either Large. Washington had all three of her initial dials set to ConFire; South Dakota had one nav and two ConFires.
In retrospect I do think I mildly screwed this one up. I was concerned being as close as I was to the station with the MC75, if the Kuat advanced at Speed 3 (its deployed speed), there was a nonzero chance it would actually block the MC75 from being able to use the station herself. Had I deployed farther back, far enough that a speed 1 maneuver would not have carried me as far onto the station, I probably could have safely waited out the Kuat and gotten additional shots at the Kuat and the I-2. As it was, I considered it an unacceptable risk, and jumped first with the MC75 onto the station. I cut speed down 1 and cranked the ship hard to the left, towards the near board edge, forcing the Kuat to advance into a close-range double arc. Home One waited out the rest of his fleet, and tagged the Kuat for some initial damage.
Turn 2 held Glenn’s only play mistake. The MC75 led off (shocker), and hammered the Kuat, but left it alive on three remaining hull points. The correct answer here was definitely activate the Kuat to get some damage out of it, because the MC75 rammed it instead of accelerating around it (CF commands make these sorts of things happen). Instead, for reasons best known to him, he activated the I-2. It pummeled the MC75, but was unable to either ram or kill it, at which point Washington shot around it to finish off the Kuat and pull in front of the I-2. The Cymoon tried to run up behind the 80, but was still struggling to get into the fight in a relevant way.
The flotillas’ arrival and contribution of tokens at the end of round 2 meant that South Dakota was able to lead off, hitting the I-2 again before accelerating away with one hull point remaining. Washington finished the job, landing on an asteroid. The Cymoon at this point realized the better part of valor was discretion, and began a futile attempt to pull away, assassinating Ahsoka Tano as it did so. The rest of the game was fairly straightfoward. South Dakota was uninterested in discovering if she could turn to avoid the table edge and instead slammed on the brakes to speed 0, using EWS to tell the Cymoon’s side arc where to shove it. Washington followed suit on the asteroid for two turns, using her enormous broadside firepower to bring it down. That’s right ladies and gentlemen, I had two turns where my only combatants spent the entire turn at speed 0. QBTs were clutch here, as on the final shot a LS reroll of a single red die found the final damage to complete the massacre, before pulling away. Moral of the story: don’t bring Fleet Ambush, kids.
Final Score: 400-22, 10-1 with 378 MoV
Game 3: John, “geek19”
Name: Catfish Conniption
Faction: Rebel
Commander: Leia Organa
Assault: Precision Strike
Defense: Fire Lanes
Navigation: Sensor Net
Hammerhead Torpedo Corvette (36)
• External Racks (3)
= 39 Points
Hammerhead Torpedo Corvette (36)
• External Racks (3)
= 39 Points
Hammerhead Torpedo Corvette (36)
• External Racks (3)
= 39 Points
GR-75 Medium Transports (18)
• Toryn Farr (7)
= 25 Points
GR-75 Medium Transports (18)
• Bomber Command Center (8)
= 26 Points
CR90 Corvette A (44)
• Leia Organa (38)
• Lando Carissian (4)
• Fighter Coordination Team (3)
• Turbolaser Reroute Circuits (7)
• Jaina's Light (2)
= 98 Points
Squadrons:
• 2 x VCX-100 Freighter (30)
• Biggs Darklighter (19)
• Jan Ors (19)
• 2 x X-wing Squadron (26)
• 4 x Y-wing Squadron (40)
= 134 Points
Total Points: 400
Good Lord, this game was stressful. I mean that entirely seriously, this was one of the tensest games of Armada in my entire life. Jamie “kindly” offered to bump both of us to the top table to be streamed, which we declined. I’ve been friends with John for a while now, and I’ve seen this list evolve over the last few years. The comments of a certain catfish notwithstanding, it is not to be underestimated in his hands, and I was not about to start now.
An important tidbit of information here is that I am fully cognizant of the farming capabilities of this list. Last year, the Wednesday evening before the Thursday Armada tournament we did a test game with a list very similar to the current Task Force 63, critically including a single VCX on my side, compared to three on John’s. For reasons that were clearly terrible, I chose his Fire Lanes that game. Here’s the thing about Fire Lanes, every token is scored, every round. We scored every token because we went through Round 6. I traded my MC75 for a couple of John’s CR90s and flotillas. I don’t remember the exact combatant MoV, other than I had a 7-4 win. However, John had 17 of the Fire Lanes tokens, whereas I had the other one. The game was still a 7-4, but in his favor. It was not a mistake I was keen to repeat. John had even already repeated that feat today, farming 16 FL tokens off his round 1 opponent, who he also tabled, in exchange for a handful of losses and a MoV ~500.
The chain of events that occured after that was entirely predictable. I chose second player to avoid being forced to take Precision Strike and be his punching bag. He took the only one of my objectives he could contest, Intel Sweep. Between two sources of Strategic, a FCT that was entirely critical to the ease with which he stole the objective from me, and an actual fighter wing, that outcome was more or less predetermined. The question then became if I could bring him to battle despite fewer activations.
The relevant details are this: I started already in battle line formation parallel to my edge of the board, the MC75 slightly canted in towards his side of the board, while John was spread out across his deployment zone, Leia’s CR90 roughly parallel to my ships, and the Hammerheads off my forward port (left) quarter, the fighter wing spread across the area. I believe John has a picture of the entire deployment he’s putting in his writeup, so if you want a better idea of the setup, go check that. I had to now force him to enter Ackbar range while either outrunning or outranging his bombers. What could possibly be easier? (Anything, the answer is anything.)
This is another game where EWS paid off. By the time his bombers arrived on turn 2 to attack South Dakota, his Y-wings and X-wings had to choose between shooting at all or shooting with the aid of BCC. Several squads missed either shooting or with their dice, and the others were forced to spread around the ship, providing critical relief for my defense tokens. It also brought the Toryn flotilla into extreme range of my weapons, allowing the 75 to pick it off on the following activation. The maneuver afterwards however was too forward in its efforts to bring the Hammerheads into range. In retaliation, the first of the three Hammerheads roared in, eventually unloading its External Racks, one of two to do so, and beginning the process of depriving my ship of her shields. Retaliatory fire destroyed that Hammerhead, while damaging another one.
John explained to me after the game that he made the judgment call around when I destroyed the BCC that without activation advantage he would need to kill the MC75 in order to secure a strong win. Unfortunately for him after the first Hammerhead jumped me, I was much more cautious with South Dakota, and in response, his Hammerheads spent more time under my guns.The counterpoint was of course that South Dakota was now absorbing not only the brunt of John’s effort, but every die rolled was aimed at that ship. The flotillas worked madly to reset her dials to Repair and to supply appropriate tokens, while Washington began to maneuver around her bleeding sister to bring her weapons to bear.
This game really came down to the wire. On Round 5 I was critically able to destroy both remaining Hammerheads with the MC75, while Leia’s CR90 bored in with the BCC flotilla to try to finish off the limping battleship. Round 6 was the nail-biter. Leia’s CR90 dialed in a Squadron command, but after the bombers and the CR90’s double-arc were done, the MC75 still stood on one HP. Another Ackbar slash destroyed the BCC flotilla, and laid into Leia. John decided to not Lando (whether wise or not, I will not pass judgment), and my guns drilled three damage cards onto the CR90 as the 75 repaired a hull and hobbled away. Critically and for reasons lost to the mists of time (I mean, do you want to blame the Malort here, John?), the CR90 at Speed 4 had cut back towards Washington, but had not actually managed to escape her broadside by about a quarter of an inch. Had the CR90 broke the other way, it would easily have escaped weapons range. I fired again, and Lando made the damage roll worse, while the only Y-wing left to bomb my battleship missed. My ships stood, barely in one case, having cleanly swept John’s ships and earning a score that does not reflect that I was playing from behind all game and convinced I was going to lose until I checked Washington’s final arc and saw she had a shot.
400-75, 10-1, 325 MoV
Game 4: Michael J., “Nevole”
Name: Michael's Fleet
Faction: Rebel
Commander: Admiral Ackbar
Assault: Advanced Gunnery
Defense: Planetary Ion Cannon
Navigation: Solar Corona
MC80 Command Cruiser (106)
• Admiral Ackbar (38)
• Strategic Adviser (4)
• Engine Techs (8)
• Electronic Countermeasures (7)
• Leading Shots (4)
• XI7 Turbolasers (6)
• Defiance (5)
= 178 Points
CR90 Corvette A (44)
• Turbolaser Reroute Circuits (7)
• Jaina's Light (2)
= 53 Points
CR90 Corvette A (44)
• Turbolaser Reroute Circuits (7)
= 51 Points
GR-75 Medium Transports (18)
• Toryn Farr (7)
• Comms Net (2)
• Bright Hope (2)
= 29 Points
Squadrons:
• Shara Bey (17)
• Tycho Celchu (16)
• 2 x YT-2400 (32)
• 2 x A-wing Squadron (22)
= 87 Points
Total Points: 398
So John’s game was easily the most stressful of my life, but Michael gave him one hell of a run for his money. While my list had never faced his, both of us had faced the other’s list in the past playing different fleets. (He had a Madine that faced the first iteration of my list, back when I called it Hood and Prince of Wales, where Hood as Most Wanted evaded a hunting MC30 by cutting to zero to let it zoom by. I had faced his Ackbar playing I believe my Thrawn LMSU IIRC, in a much less eventful game, or at least one involving fewer shenanigans.) We both respected the other as a player, and both knew the game would be defined by whoever made a fatal mistake first. I knew with Defiance he seriously outgunned me, even if I was able to pick off either or both of the CR90s. Oh yeah, and we were top table and being streamed for all the internet to see. No pressure, none whatsoever.
I knew Michael’s objectives from previous encounters with the list, but that wasn’t really a factor here. My strongest concern with giving up first player was that I would never be able to catch the CR90s while they continued to ping away at me. That meant I would have to kill his MC80, and somehow manage to do so without losing more than my MC75 myself. Could I do it? Sure. Would I be relying on Michael making mistakes out of tiredness and stress? Also yes, and I wasn’t about to plan around that. I took first player, and took the only objective I felt I could out of his set, Solar Corona.
Unfortunately for me, Michael had correctly anticipated this was a possibility in his games, and had an obstacle plan for it. When they were all down, there was a rough diamond shape in the middle of the board, cleanly mucking up any attempt for me to deploy a gunline in the center to react to any possible deployment. As my response I set up to the left of the obstacle field, pointing across the board, to which he deployed across from me pointing 90 degrees away, towards the far short edge of the board.
As tense as the game was, the happenings are fairly straightforward to describe. I moved forward, trying very carefully to walk the fine line between getting behind him to rake him and not sticking my neck out to get hammered by Defiance. Shots were exchanged starting around Round 4, but Michael was extremely conservative with his squadrons, not at all interested in letting me flak them down then run away as fast as my engines could carry me. For a similar reason, his CR90s basically hid behind the bulk of Defiance, allowing me only one shot at each of them, neither of which hit hull, let alone scored a killing blow.
Due to initial deployment, South Dakota was on the outside of my attempt to sweep around and behind him, and that was probably for the best, given the firepower of Defiance. That left Washington as my point ship to try to sprint into position and weather his fire as best she could. By the time we reach Round 5, Washington had in fact taken a heavy beating and Michael finally committed his squadrons. I only regret one move I made during that game, to ignore flakking the gaggle of squadrons hanging out behind Washington, and instead take the much longer shot of destroying Jaina’s Light in a single long-range salvo. Needless to say I missed, whereas between blue/blue, blue/black, and External Racks, I stood a very solid chance of picking off a generic A-wing for a 11pt win, a fact that only occured to me after we shook hands when Washington missed.
How much do I regret flakking? Not that much. It was the end of a very long day for both of us, and even if I had, our tournament points and MOV were such that Michael still would have sat in second place by virtue of his larger MoV total, though it might have bumped me up from fifth to fourth over someone who claimed he had suffered his first loss in a game of Armada ever that tournament. (I took great pleasure in the fact the aforementioned loss was a rematch against Michael in Round 1, a fact I relished on his behalf.) In any case, it was a very tense and hard fought game, and I believe the only 0-0 I have ever had, yielding Michael an earned victory.
0-0, 5-6, 0 MoV
God I’m long-winded. Thank you, dear reader for bearing with me this long. Before I let you go do more productive things with your life and me with mine, I would like to thank Jamie Nasmyth for running the tournament for us and giving up four games of Armada to do so, David Finn, the owner of Giga-Bites, for his continued support of the Atlanta Armada community, John, Jack, and Nick of Fair Game in Chicago for coming down for the weekend, even if Nick did steal our Regional, and Eric and John again for hosting this writeup on their blog. I achieved everything I wanted to and more, with a great time with great people, and CANDY DICE! I look forward to next year’s event, and continuing to make Atlanta one of the places to be and tournaments to attend for high-quality Armada and competitive gaming in the future. Good luck admirals, good hunting, and Godspeed.
I love the style of write-up that GiledPallaeon uses. We share a love for naval action (although my knowledge is stretched every time I read him), and the tone of these AAR's draws me in. I spent 3 weeks on this type of list (the two whale fish farm) and gave up due to the risk of someone cutting off the front. This gives me reason to investigate again. Thanks GP as always. - deDios
ReplyDeleteI enjoyed reading your write-up - thanks!
ReplyDeleteI run a list of a Pelta w/Madine, Engine Techs, Ray Antilles, and IF, and 3 MC30s where I deploy the MC30s at Speed 3, the Pelta at speed 2 in an echelon formation with the Pelta hiding behind the MC30s. It was made to kill big ships and although ISDs can catch zooming MC30s, zooming MC30s in a battle line with Madine is almost impossible to not die to on the next turn.
ReplyDeleteThe edited list is here (no Ray Antilles this time)
ReplyDeleteName: Taffy 3
Faction: Rebel
Commander: General Madine as Rear Admiral Clifton Sprague
Assault: Most Wanted
Defense: Fleet Ambush
Navigation: Superior Positions
Pelta Assault Ship (56) as USS Samuel B. Roberts (DE-413)
• General Madine (30)
• Lando Calrissian (4)
• Engine Techs (8)
• Intensify Firepower! (6)
= 104 Points
MC30c Torpedo Frigate (63) as USS Johnston (DD-557)
• Ordnance Experts (4)
• Assault Proton Torpedoes (5)
• H9 Turbolasers (8)
• Admonition (8)
= 88 Points
MC30c Torpedo Frigate (63) as USS Heermann (DD-532)
• Skilled First Officer (1)
• Ordnance Experts (4)
• External Racks (3)
• XI7 Turbolasers (6)
= 77 Points
CR90 Corvette A (44) as USS Hoel (DD-533)
• Jaina's Light (2)
= 46 Points
GR-75 Medium Transports (18) as USS St. Lo (CVE-63)
• Hondo Ohnaka (2)
• Slicer Tools (7)
• Quantum Storm (1)
= 28 Points
GR-75 Medium Transports (18) as USS Gambier Bay (CVE-73)
• Ahsoka Tano (2)
• Comms Net (2)
• Bright Hope (2)
= 24 Points
Squadrons:
• 4 x Z-95 Headhunter Squadron (28) as F6F Hellcats
= 28 Points
Total Points: 395
Nice to see a War at Sea mini and read some history too. Great write up thank you
ReplyDelete