
 |
| Matt is my friend, and that is why I'm allowed to post semi-embarassing pictures of him |
The Redemption Campaign:
The Battle of Crystal City
Hello ladies, gentlemen, Armada fans of all ages. It’s GiledPallaeon again, stealing your regularly scheduled CGYSO content for another battle report, this time the NOVA Open 2019, which hosted the US Grand Championship (formerly known as US Nationals). I am afraid I must inform you that this writeup includes eight (8) games, twice as many as last time. Please get comfortable, get a snack and a drink, settle in, I don’t want Eric or John getting hate mail because you hurt yourself reading this.
The following report, and the tournament performance that it represents, is dedicated in loving memory to Capt. Jean Van Slate, USN (ret.).
You all may remember me from my last battle report, written this past February here -> (Second Naval Battle of Atlanta). I went silent at Worlds, and while Eric and John did encourage me to write, I did not. In short, my pride and my confidence as a player were badly damaged. I went 1-3 on Day 1, for a grand old 81st place out of 94. Ignominious is a delicate way to put it, disastrous somewhat more accurate. I haven’t hidden this result, but to date I have only brought it up if asked. My goal going into the day was to make the cut; I missed that by a factor of 2.
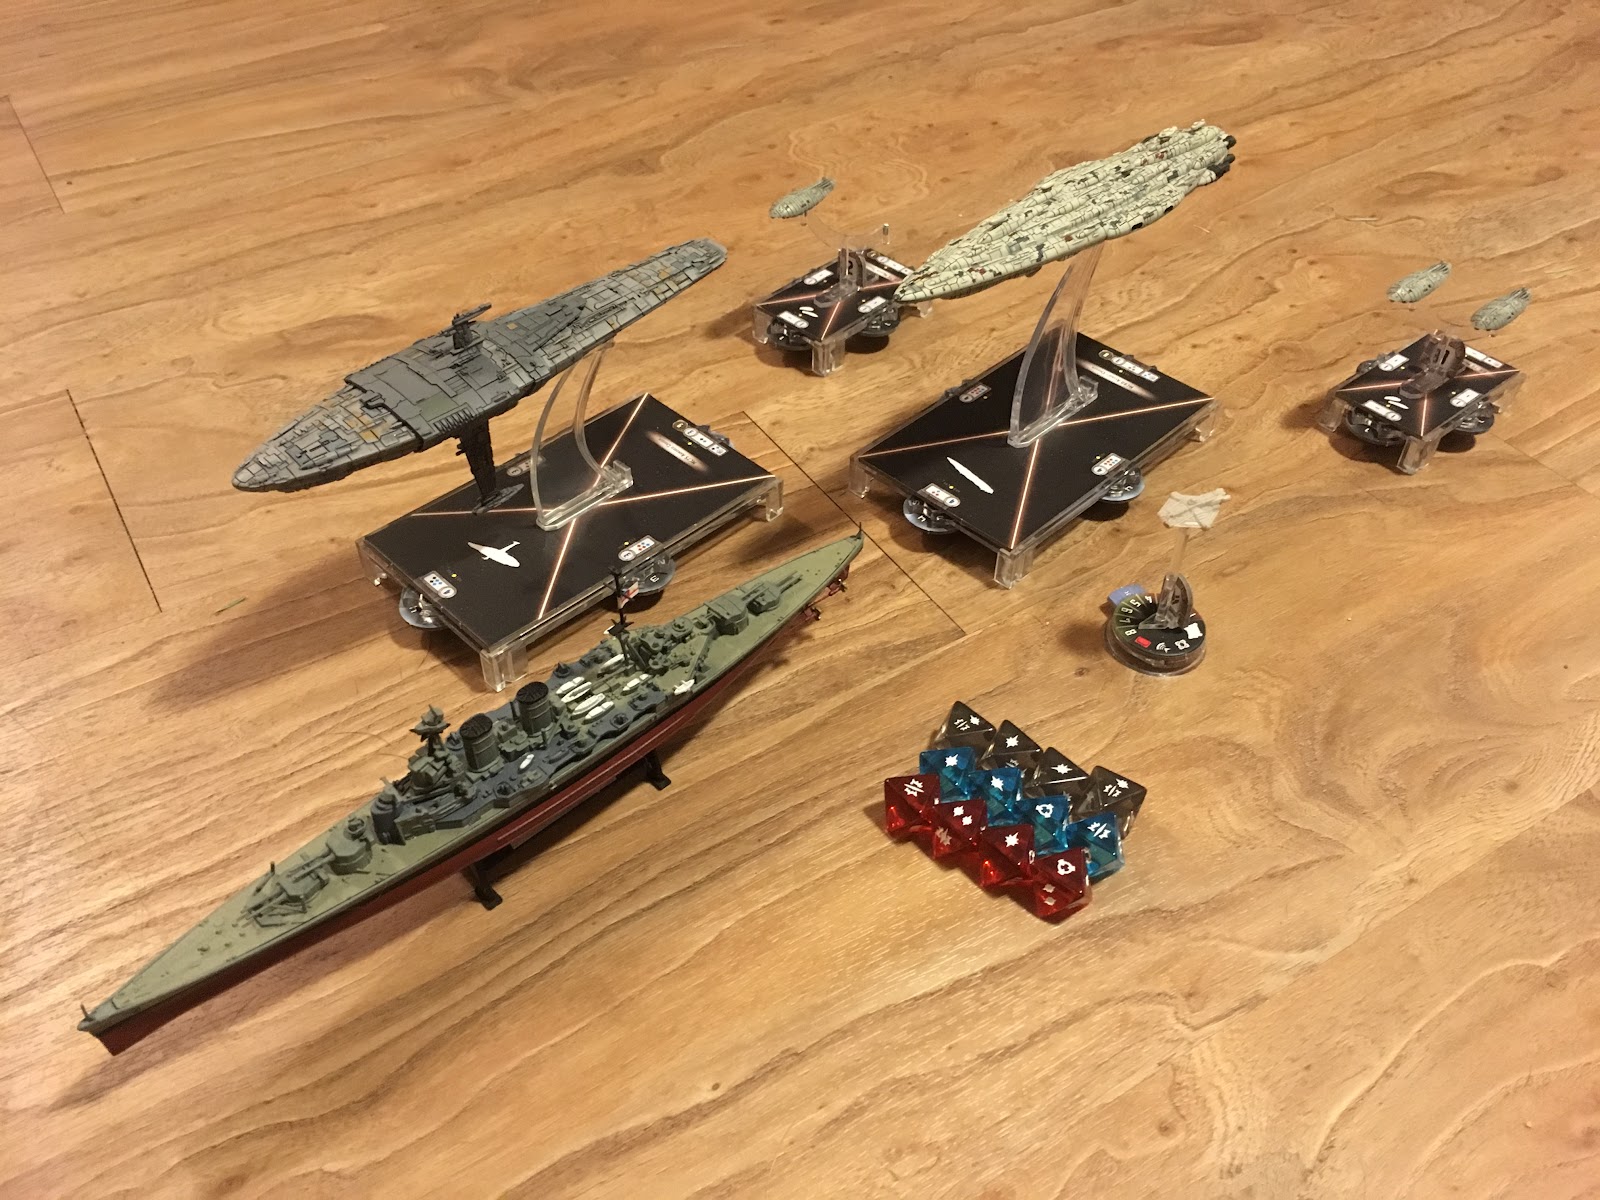 |
| Task Force 63 in its prime |
By no means was the trip a waste; I had lots of fun hanging out with the Fair Game crew in Chicago (*waves at everyone*), and I got in a truly epic Sector Fleet game with Nick Litrenta (Atlanta’s Regional champion) on day 2 when we both didn’t make the cut. I also got to experience steak on swords, which was something else, let me tell you. I came home, mourned my defeat, and shifted into Sector Fleet mode for Atlanta’s Sector Fleet tournament this past May. Went 2-1 there, two 10-1s and a 5-6 conceded to Jamie. Shortly thereafter, I graduated from Georgia Tech, got married, and moved for my new job to Washington DC. I’ve been settling into my new job, doing all the things that it takes to really start to make a home in a new area, and what that all means is that since May, I had played seven games of Armada. Not a lot. This brings us to our fleet challenge.
I had no idea what the NOVA meta would look like. I have been to two small store events since I got up here, with 14 players between them. Whether or not the Super Star Destroyer or Rebellion in the Rim would be out in time were open questions in the weeks leading up to the tournament. (Yes and no were the respective answers. As of the time of this writing, RitR is still not out, and does not even have a street date.) I had been working on Super builds for a while, but was not able to find one that I felt confident enough in to practice, let alone take to the tournament.
I’m going to digress for a second here. A year ago, I would have slapped together a Super build, probably the night before, taken it to NOVA, gotten mauled, and had a great time using that five round tournament as the ultimate shakedown cruise for my new ship. However, as my personal situation and circumstances stand, Worlds and/or Adepticon is how I get to interact in person with the majority of the Armada community. And between this year and next year, Worlds is going from an open tournament to an invite-only structure. I have lodged my protests and concerns about this decision repeatedly to FFG, but I will do it again here because it genuinely affected my choices going into this tournament.
 |
| What I wanted to play |
In the end, I made some decisions. I needed a list I was familiar with. There are only four of those that qualified as “Can Be Played In Sleep.” Two were knocked out of consideration because bad feelings. It sounds bad, but both the old dual ISD list (discussed in my battle report for the 2018 Atlanta Regional here) and Task Force 63 from this year were decommissioned after routs. I didn’t need that kind of negativity in the back of my head. That left two lists, both offhandedly mentioned in the last report. I eliminated the Raddus list because while it flew well for the three rounds it had been flown in competition, it hadn’t come out since then, and it had never faced real squadron opposition, which the Liberty in the list hates. Thus, I recommissioned this list:
Name: For Captain Van Slate
Faction: Imperial
Commander: Grand Admiral Thrawn
Assault: Most Wanted
Defense: Planetary Ion Cannon
Navigation: Solar Corona
ISD Kuat Refit (112)
• Grand Admiral Thrawn (32)
• Strategic Adviser (4)
• Darth Vader (3)
• Electronic Countermeasures (7)
• Leading Shots (4)
• Assault Concussion Missiles (7)
• Chimaera (4)
• Entrapment Formation! (5)
= 178 Points
Gladiator I (56)
• Captain Brunson (5)
• Ordnance Experts (4)
• Engine Techs (8)
• Assault Concussion Missiles (7)
• Demolisher (10)
= 90 Points
Arquitens Light Cruiser (54)
• Captain Needa (2)
• Turbolaser Reroute Circuits (7)
= 63 Points
Gozanti Cruisers (23)
• Hondo Ohnaka (2)
• Comms Net (2)
= 27 Points
Gozanti Cruisers (23)
• Comms Net (2)
= 25 Points
Squadrons:
= 0 Points
Total Points: 383
This list was developed last summer during Regionals season, and while a lot of what I’m going to say here wasn’t explicitly in mind at the time, I think I have developed an understanding of the throughline in my lists that let this and the old dual ISD build (which is much closer to this than you might think) work.
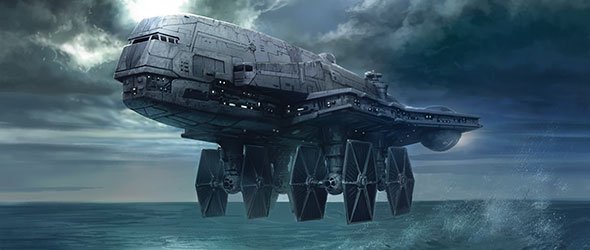 |
| The workhorse of Imperial activations since wave 3 |
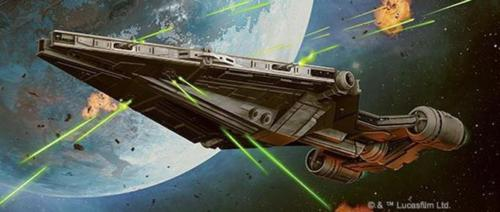 |
| Yeah, this is about how frantic my cruiser is half the time |
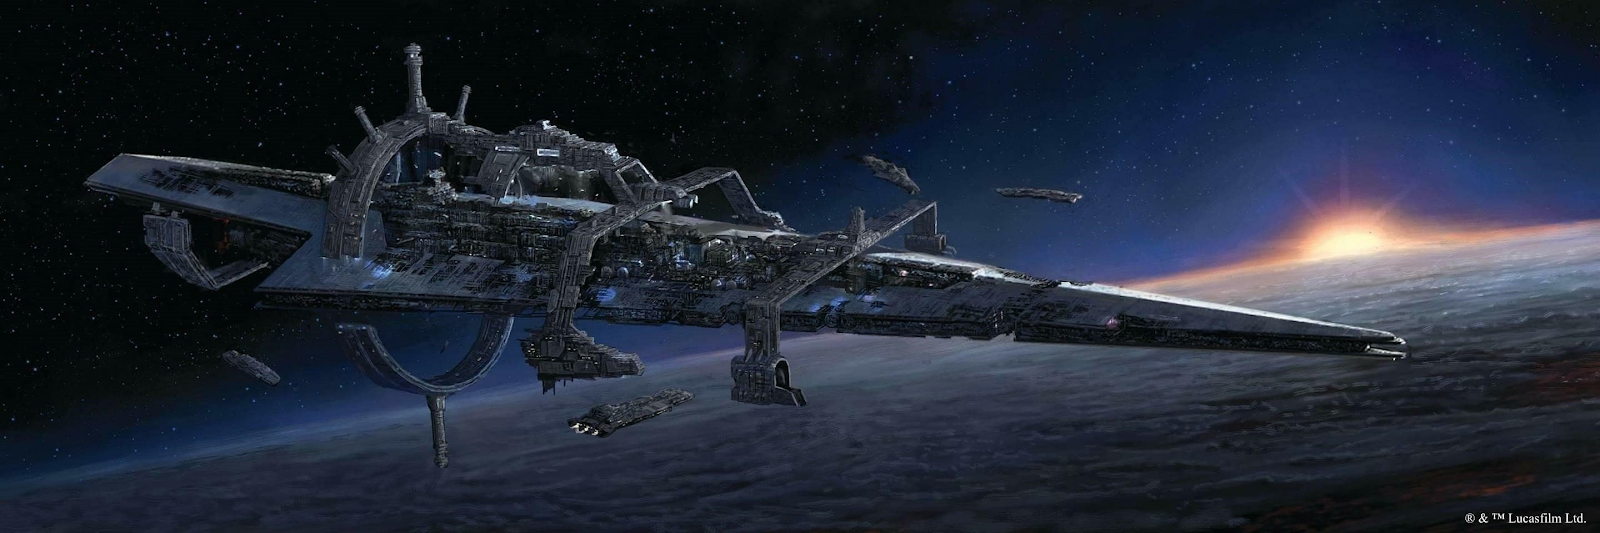
 |
| The Executor may be the queen of the fleet, but Chimaera is the crown princess. |
For defensive tech, I would like to emphasize an idea that was prominent in both fleets on the top table in Game 8 (so mine and Paul Tomashevskiy’s Super Star Destroyer). I am terming this concept “defensive offense”. Fundamentally what this means is that the defensive tech in place isn’t trying to save the ship. It’s trying to save the ship long enough that it can kill its attacker; to that end, most of the tech isn’t defensive, it’s pure offense. The enemy can’t kill you if they can’t shoot, and they can’t shoot if they’re dead. (Bug off, Rieekan.) In Paul’s list, that defense was the native capabilities of a Super, backed up by Captain Brunson. In my list, I have Brunson, Electronic Countermeasures, and Captain Needa, one per major combatant. Needa isn’t there to protect the Arquitens, although he does often improve its survivability. He’s there to protect the Turbolaser Reroute Circuits by creating redundant evades Sloane/Intel Officer/normal wear and tear have to kill both of to hamper the offensive output of the ship. Brunson lets Demo ignore one bad result (hello Ordnance hit/crits) while she is engaged closely with the enemy. ECM serves the same purpose for Chimaera, making it almost impossible to remove the ship in the event in order to catch her prey she must absorb their dominant arc for a round. For the record, I don’t think this is a new idea, but it’s why the list works so well on hyper-aggressive assault.
 |
| The Dynamic Duo |
There is however a fundamental difference between how I use Thrawn, and how two-ship uses Thrawn. Two-ship is designed to maximize the power of Thrawn’s individual dials. This is why Pryce and Squall and MMJ are also in the list; together they create an unstoppable force that even Biggsballs can struggle to contain if two ship gets a toehold. My list doesn’t do that.
Instead I am using Thrawn to maximize my ships. There is a saying (more like gospel) in the Atlanta meta: Rule 1 of Armada is ABN, Always Be Navving. That is emblazoned on the back of the shirt I wore on Thursday in inch-tall gold lettering. All three of my combatants have a major arc that they need to put on target, and the two close quarters ships are really really working for that sweet sweet double arc. On Imperial ships, the two best ways to get that are Nav dials and Jerjerrod.
“Thrawn’s not the only way to get that, Giled. That’s a really poor justification for a 32 point commander doing what a 23 can.” Yeah, that’s because I’m not done. My Thrawn dials are set to Concentrate Fire. I deviated from that pattern in one game at NOVA, my first game. I lost that match, my worst loss of the weekend, and a very helpful slap in the face to stop screwing around and stick to the plan. A Concentrate dial means my side arc on Chimaera now throws as many black dice as my front. Pre-reroll my odds of triggering ACM go from 43.75% to 57.81%. That’s a 14% jump, almost a third increase. If I reroll aggressively, as I typically do, I go from 68.36% to 82.20%. I will leave the calculations for using the dial on Chi’s front arc and on any of Demo’s arcs as an exercise to the reader.
Triggering Assault Concussion Missiles is critical to this list. Before the inclusion of Vader, repeated flurries of ordnance was the only way the list could reliably burn down another Large base. Furthermore, it is not just the combatants receiving Thrawn dials; the Gozantis get them too. This means as I move into the mid-game where Thrawn is active I can set at least one Gozanti to Navigate on its native dial and let the Thrawn dial also power Intensify Firepower! on Chimaera. The other can do the same and feed a token to another ship, or I can set a Repair dial and feed that token to a ship that needs it (usually Chimaera but they all like it.) Because I’m not using JJ and therefore have access to a full dial, I can leave Chimaera on Intensify to maximize damage, change my speed and/or yaw where I need to as the situation demands, and spend an engineering token to either recover or move shields as a reaction to enemy fires, not just my own self-damage. Any one Imperial commander would let me achieve one, sometimes two of those effects (Screed for some crits, JJ for some yaw in exchange for damage, etc.) Where Thrawn makes this list sing is that I don’t have to choose which effect I’m building my fleet around; I get all of them. That’s extraordinarily powerful.
Before we get to the games, I have two more things I’d like to address: discarded variants of this list, and what my headspace was like. For discarded variants, the most common question I am asked is “Why an Arq over a HIE Raider-2?” In short, sustainment. If I don’t bring Screed, the Raider needed to have Veteran Gunners (once RitR hits shelves, Weapon Battery Techs can take the slot for slightly more effectiveness at same cost). This pushes that Raider, because it brought Disposable Capacitors like a smart Raider, to 65 points. Double HIE Raiders are effective, and even singletons can achieve excellent results, don’t get me wrong. However, they pale against the Arquitens in a critical area: long-range sustain. Raiders have to be front-towards the enemy. They only get that long range salvo off once, and they really hate trying to scamper around and hurt things with their side arc. The Arquitens on the other hand loves that mode. It is perfectly content to hang out in the back lines, hit something hard with a flurry of red dice as it comes in, scamper away, rinse and repeat until one or both are dead. Raiders can’t do that with nearly as much aplomb. I tried most of the other Imperial commanders worth trying with this or very similar lists (Motti, JJ, Screed), and for the reasons above, they weren’t seeing nearly as much result either. Similarly, older versions of this list include Ordnance Experts over Darth Vader. OE made sure I got more crits, but the ability to lock out a brace, especially on the front arc shot, has proven more than worth the lost reliability on my dice.
“Alright Giled, you’ve yammered on for *checks notes* 3000 words about what the list is. How do you fly it?” In short, front towards the enemy; when in doubt, accelerate. If Arquitens, use last joint of the maneuver tool to point your good arc at the target and your nose where you want to go next turn instead of directly at the enemy. That might sound a bit snippy, but it’s God’s honest truth. If you’d rather just cut to the examples, this is your cue to start scrolling. Otherwise I’m going to try to translate some thoughts I dumped into a chat Thursday night into a comprehensible, useful format.
In the past, I’ve tried to keep a naval theme to these reports, and Eric did suggest classical Mediterranean naval combat for this one. I think it’s a very valid comparison, and I’ll come back to it in a future writeup, but for now, I’m going to describe the fleet as a freak hybrid of Soviet armored maneuver warfare, and Western style decentralized command.
To the maneuver warfare part, one of the fundamental assumptions that one must understand in order to study the Red Army is that Russia’s European plain is massive. Americans and Europeans often run into miscommunications about the sheer size of either continent. They get a lot closer in size when you include the wide temperate plains that stretch from Poland to the Ural Mountains, farther from Moscow than Moscow is from Poland. The Red Army had the herculean task of trying to figure out how to fight on this gigantic front, and leaned into the greatest traditions of the Cossacks to develop a theory of armored warfare that emphasized strategic and tactical speed, concentrating forces to achieve breakthrough, then allowing independent forces behind enemy lines to control the tempo of combat operations. The Soviets also assumed that the best tank-killer was another tank. Ironic as that is from the nation that invented the RPG-7 and has created a litany of anti-tank guided missiles and rocket-propelled grenades thereafter, they also aren’t wrong.
My list espouses all of those tenets. Chimaera is a Large designed to hunt, fight, and kill other Larges with abandon. Everything is Speed 3, and Demo can fake Speed 4, and take a shot (almost always a black dice shot) after she moves at Speed 3, giving her stupid long threat range. Defensive deployments like I used for most of my matches can help lure out opponents who don’t realize how far a Speed 3 ISD J-turning at the end can lunge to get a close-range double arc, but that much reach is still incredibly powerful when the activation superiority I had let me choose when and where to engage, and what with. Similarly, as I have two Large-killers, and a third combatant for setup, it is difficult for many lists to not give me any target at all as I close to combat range. Either Demo or Chimaera can choose a target, jump in, set up, blow it away, and move forward taking advantage of even greater activation superiority and tempo control.
Where I deviate from Soviet thought is my planning process. The Soviets were very rigid in their planning, working from the top down. (This is where the anecdote of history that radios in low-ranking tanks could only receive, not send messages comes from.) I instead embrace Western-style decentralization. What this means is that I let my ships react to the flow of battle dynamically. I try to avoid mentally committing myself to any particular process or plan until the situation on the battlefield has evolved into an acceptable state. In short, I am avoiding thinking and making decisions I do not have to make RIGHT NOW.
I make decisions in roughly three phases. Phase 1 is deployment. If for some reason you have deployed first (see Game 2), some decisions happen earlier. Usually what will happen is I will deploy in a defensive arrangement that can wheel and react to whatever you present to me. I am not trying to react to you unless you give me something very interesting. Once everything is done, I set all the dials to the same pattern they are always set to. (Make no decisions I don’t have to.) The only time this changes if I see Cham or Slicer Tools on the board, at which point I flop the Nav dials on the ships for ConFire, and Thrawn to Nav, usually starting turn 2 when I’m activating the Thrawn dials anyway. This is where I sketch out my game plan. E.g. Demo is going to target Ship X, the Arquitens is going to try to ping/draw the attention of Ship Y, and Chi’s job is to threaten Z and hold everyone’s attention.
 |
| Demolisher in its native habitat, next to some asteroids for Captain Brunson's space geology thing |
Where I make almost all of my decisions is at the individual ship level. Who’s in range? Who else can hit that target? And most importantly, what’s my target next round/threats between now and next activation, because that will determine where the ship needs to go. Where at all possible, I try to avoid setting specific maneuvers up, but instead defining what I want in terms of the resulting game state, and work from there. For example, in Game 8, Demolisher’s slashing pass had to result in either long range or out of range after both full activations. This meant the initial approach had to include the first part of the turn to get away from the Super Star Destroyer, including the Engine Techs maneuver to begin to open the range even during the first of the two activations.
The only other thing I can recommend to a player heading into a tournament is make sure you have something to eat, and that you are chill. I’m not saying set your own expectations low so you can exceed them, I’m saying be aware of where you are, and that you’re there to play a game and have fun. Don’t drive yourself any harder than you have to; in the end it won’t help you and it won’t help you enjoy the game. Also eating is how your brain works. The only game I lost Day 1 was before breakfast (well it was lunch, but it was also my first food of the day). Eat Armada breakfast kids, and do it with friends. It will all be much better that way.
Sometimes when I'm in an RPG, I refer to the Race to Zero (HP) in particularly challenging encounters, especially at high levels. The goal is to get the NPC to zero HP before you get to zero HP. Defensive offense is a similar concept. Great write-up!
ReplyDeleteSeems like a navy with a plan for dials and tokens does well. (This fleet and Dumpster Fire!) Is it better to build to enhance dials or dials do one thing eng. Or nav. And upgrades handle attacks?
ReplyDeleteAny updates for this list since RitR campaign? Thanks!
ReplyDelete