
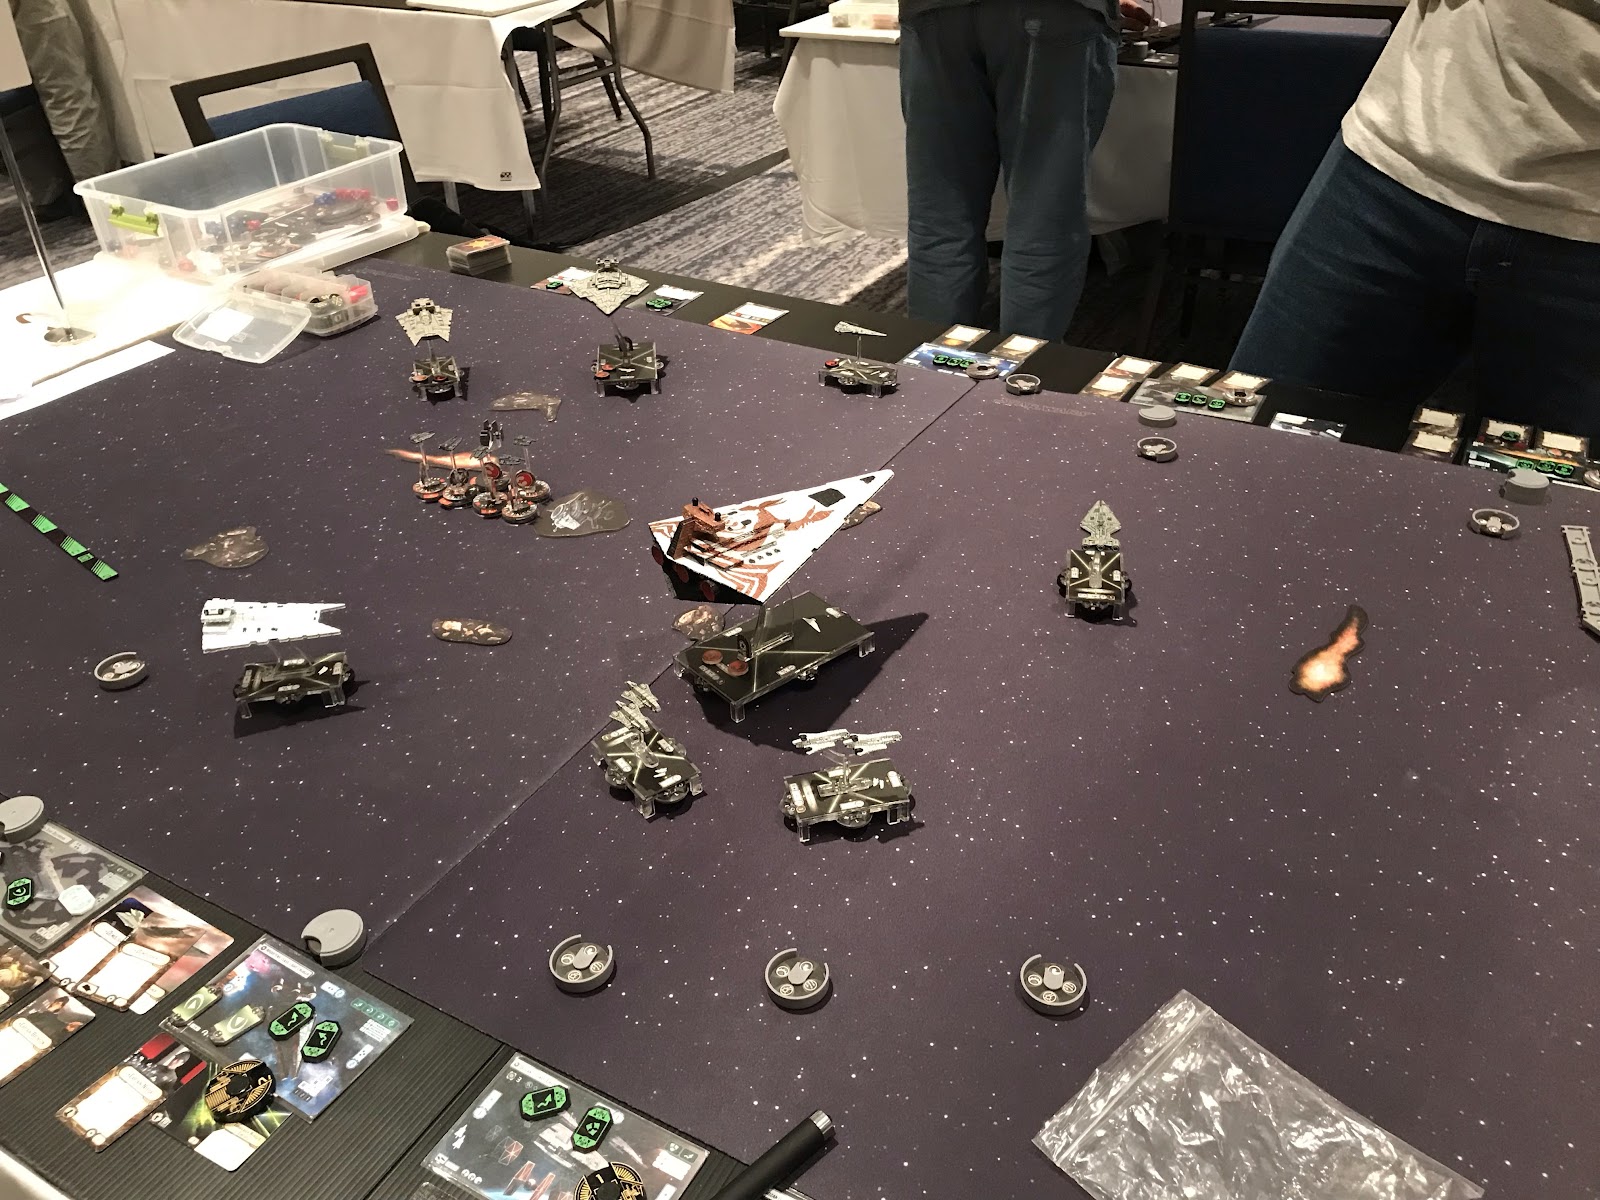
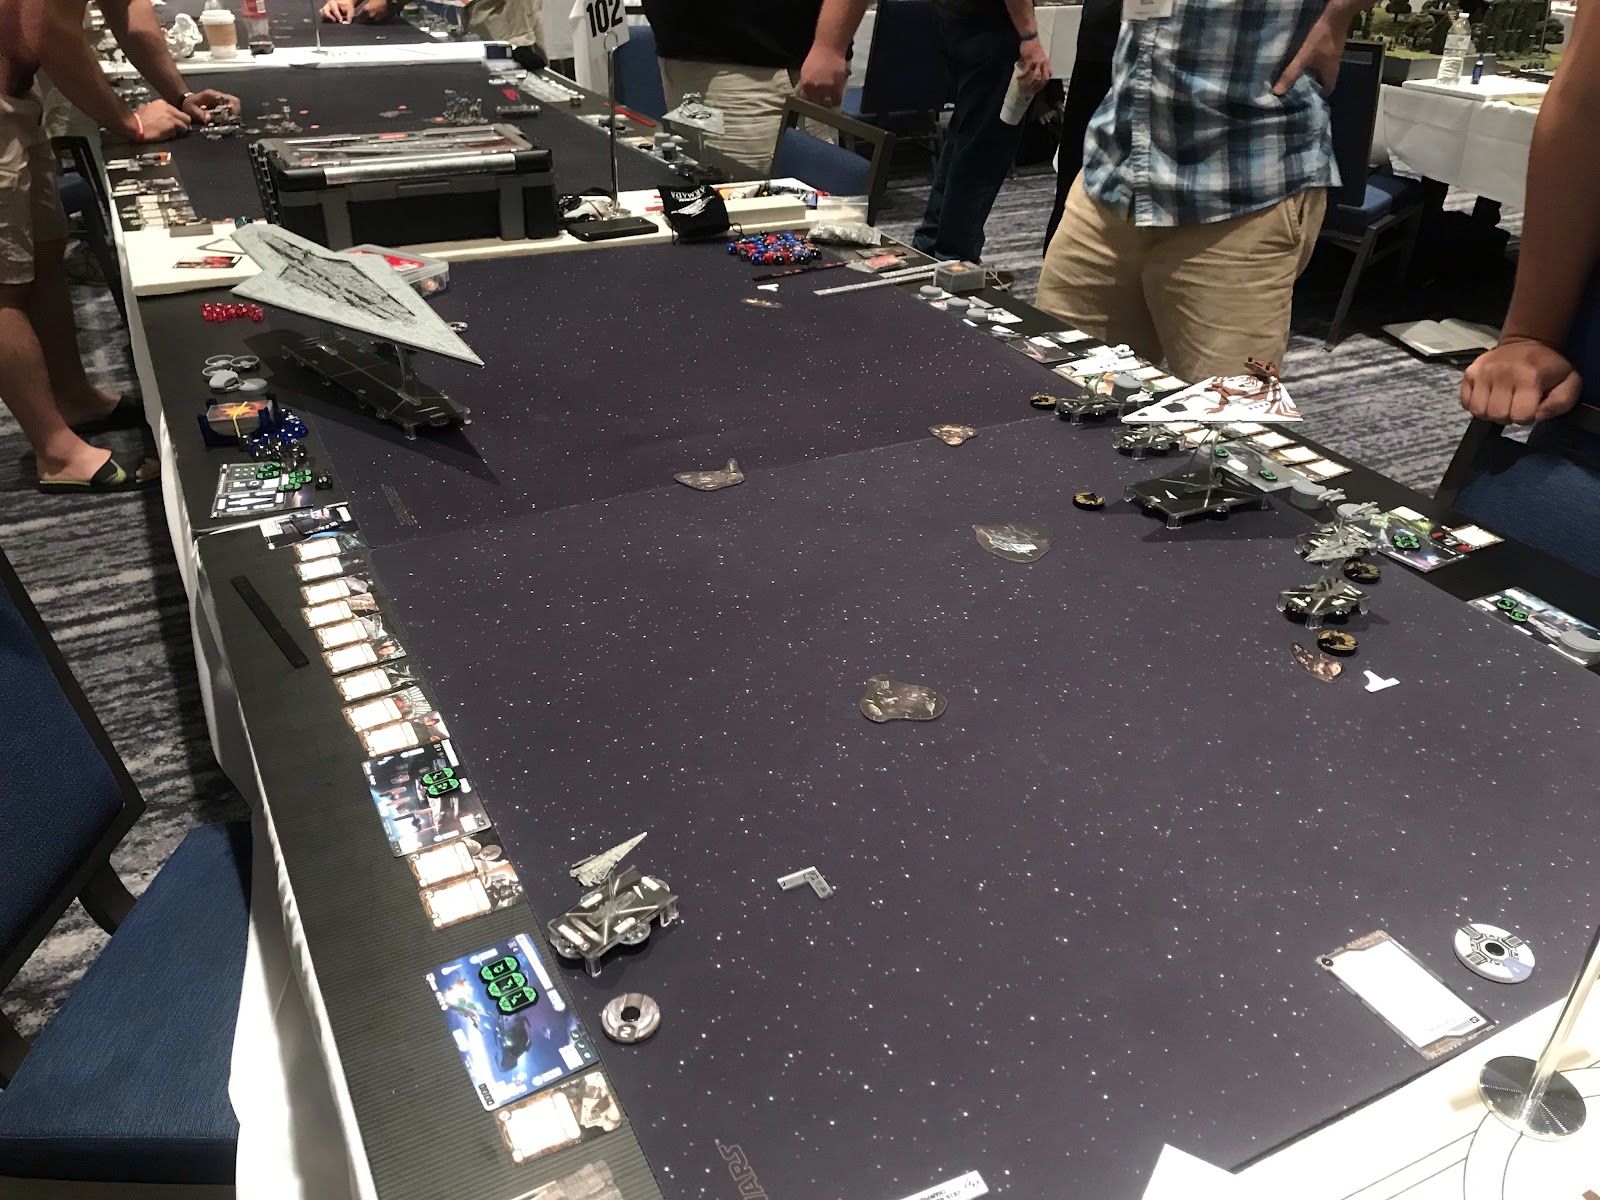
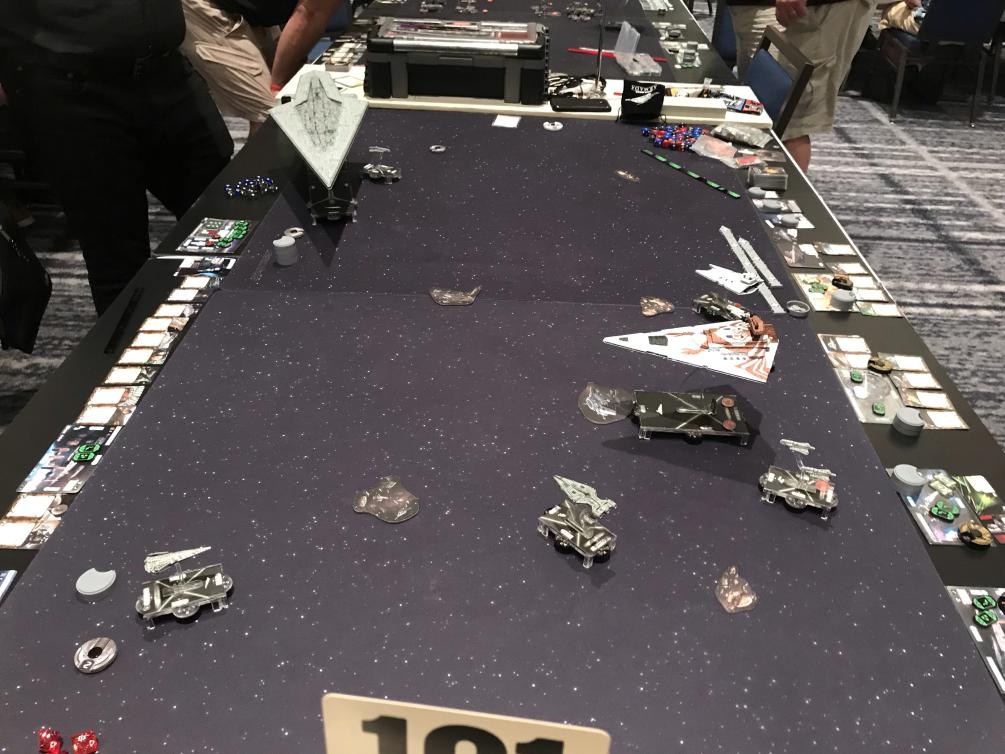
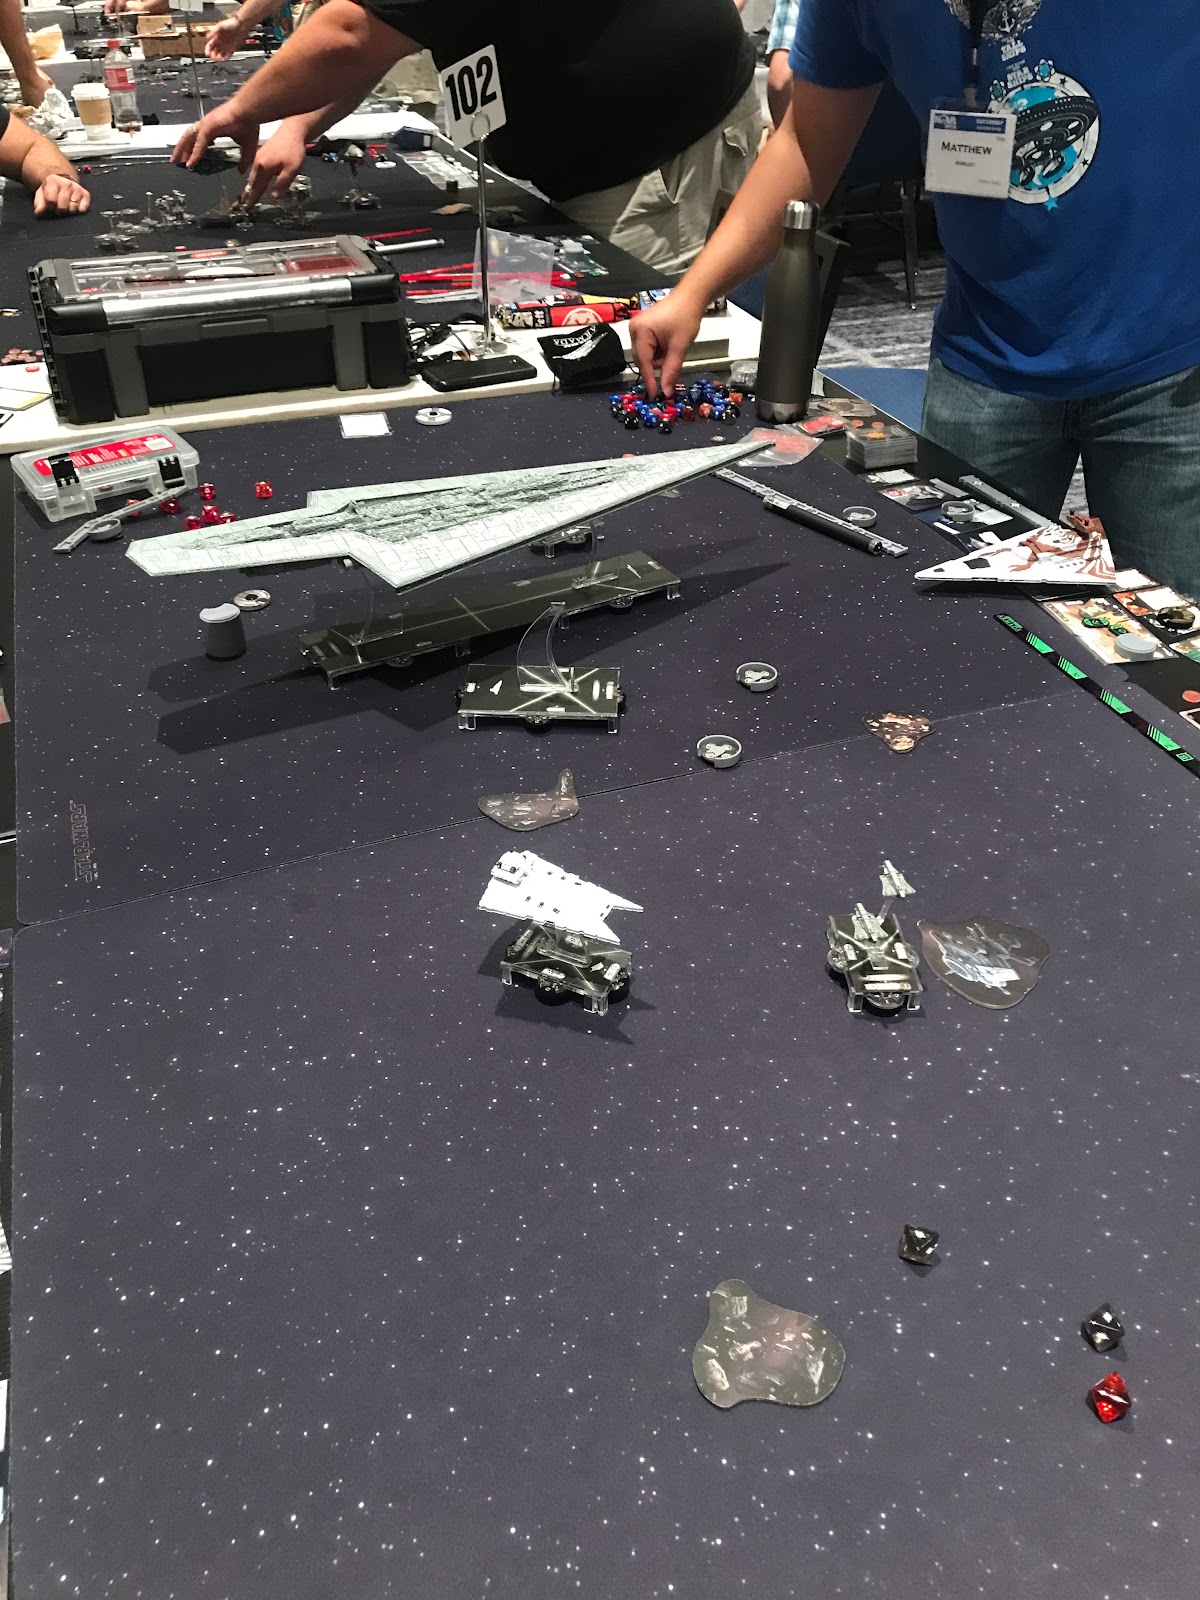
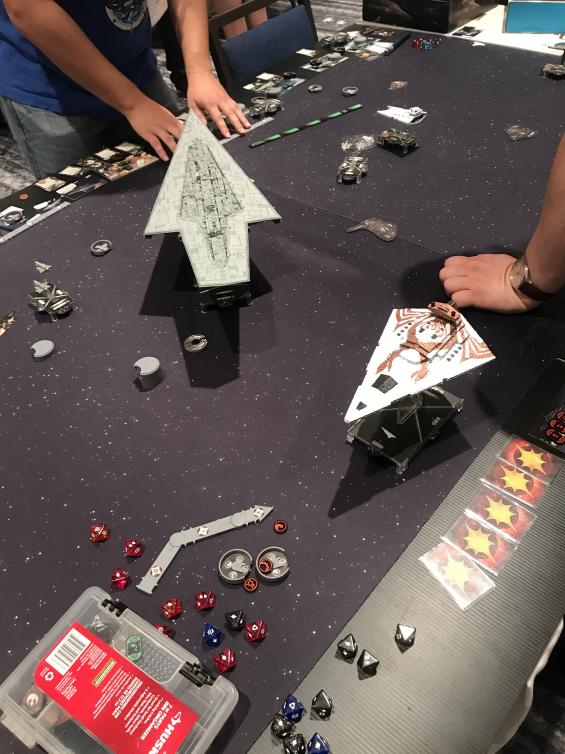
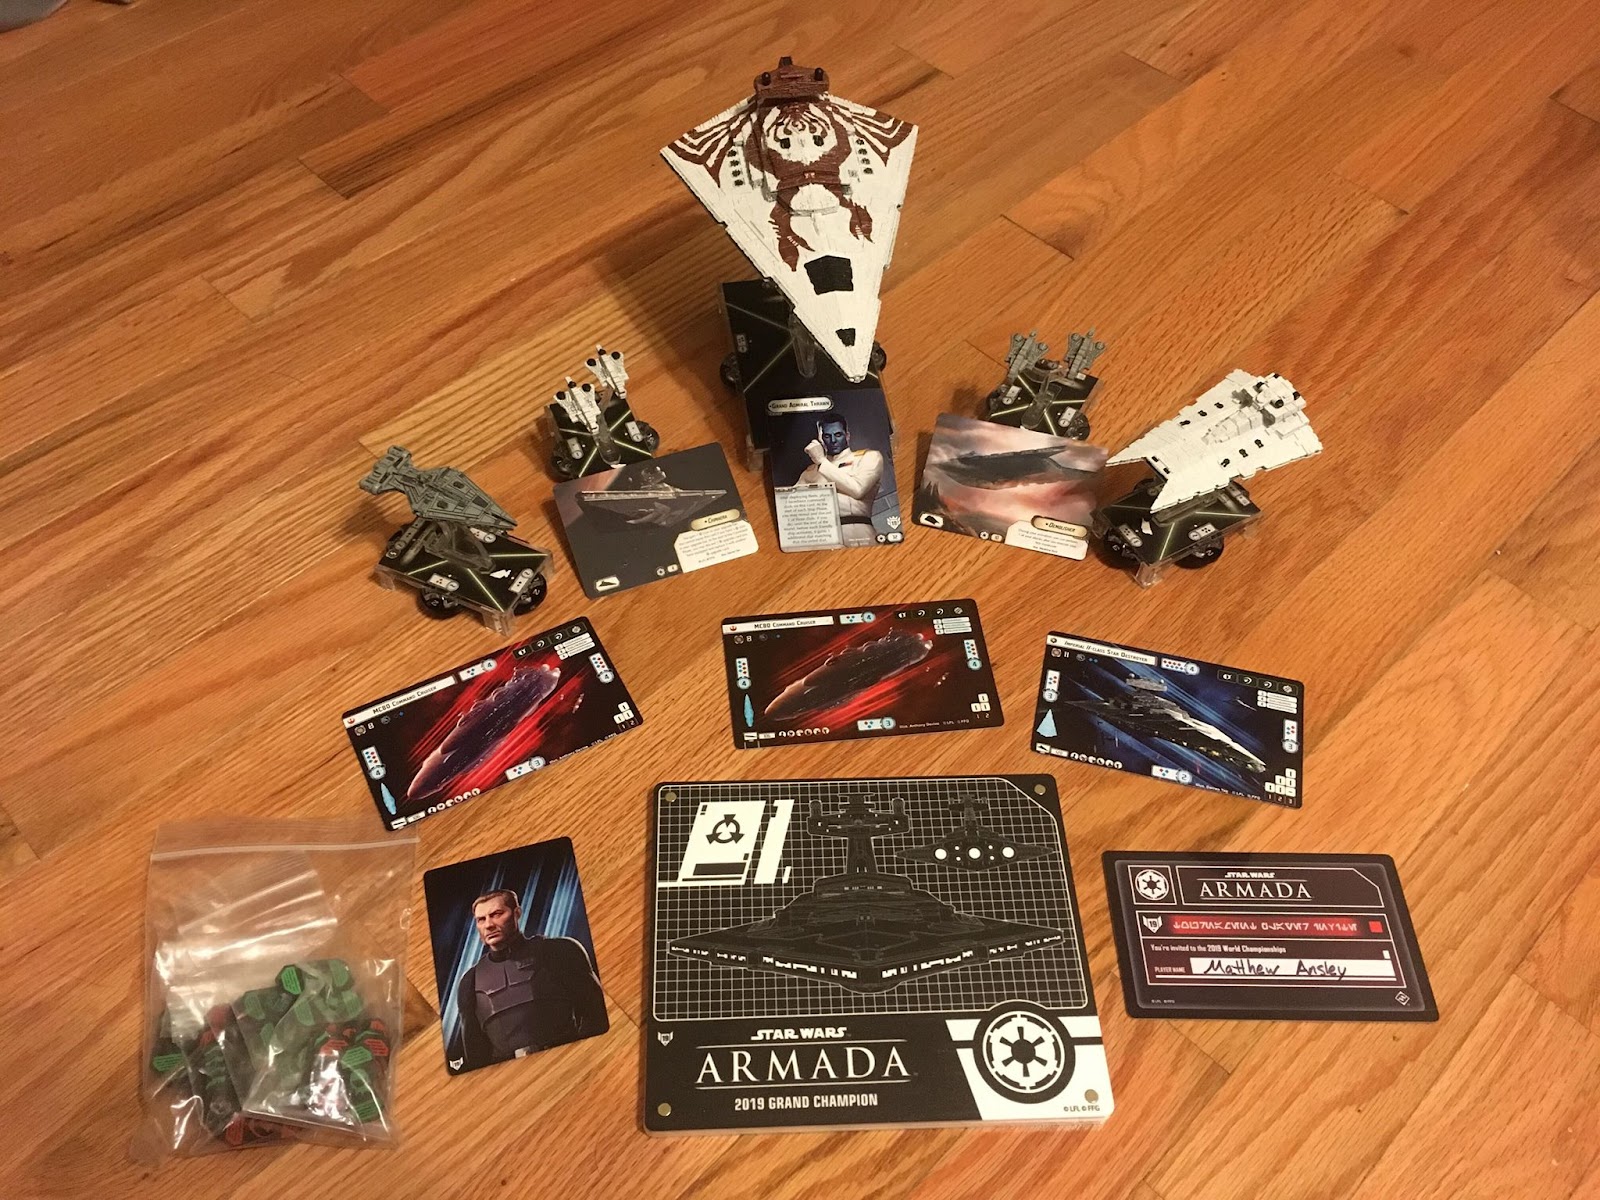
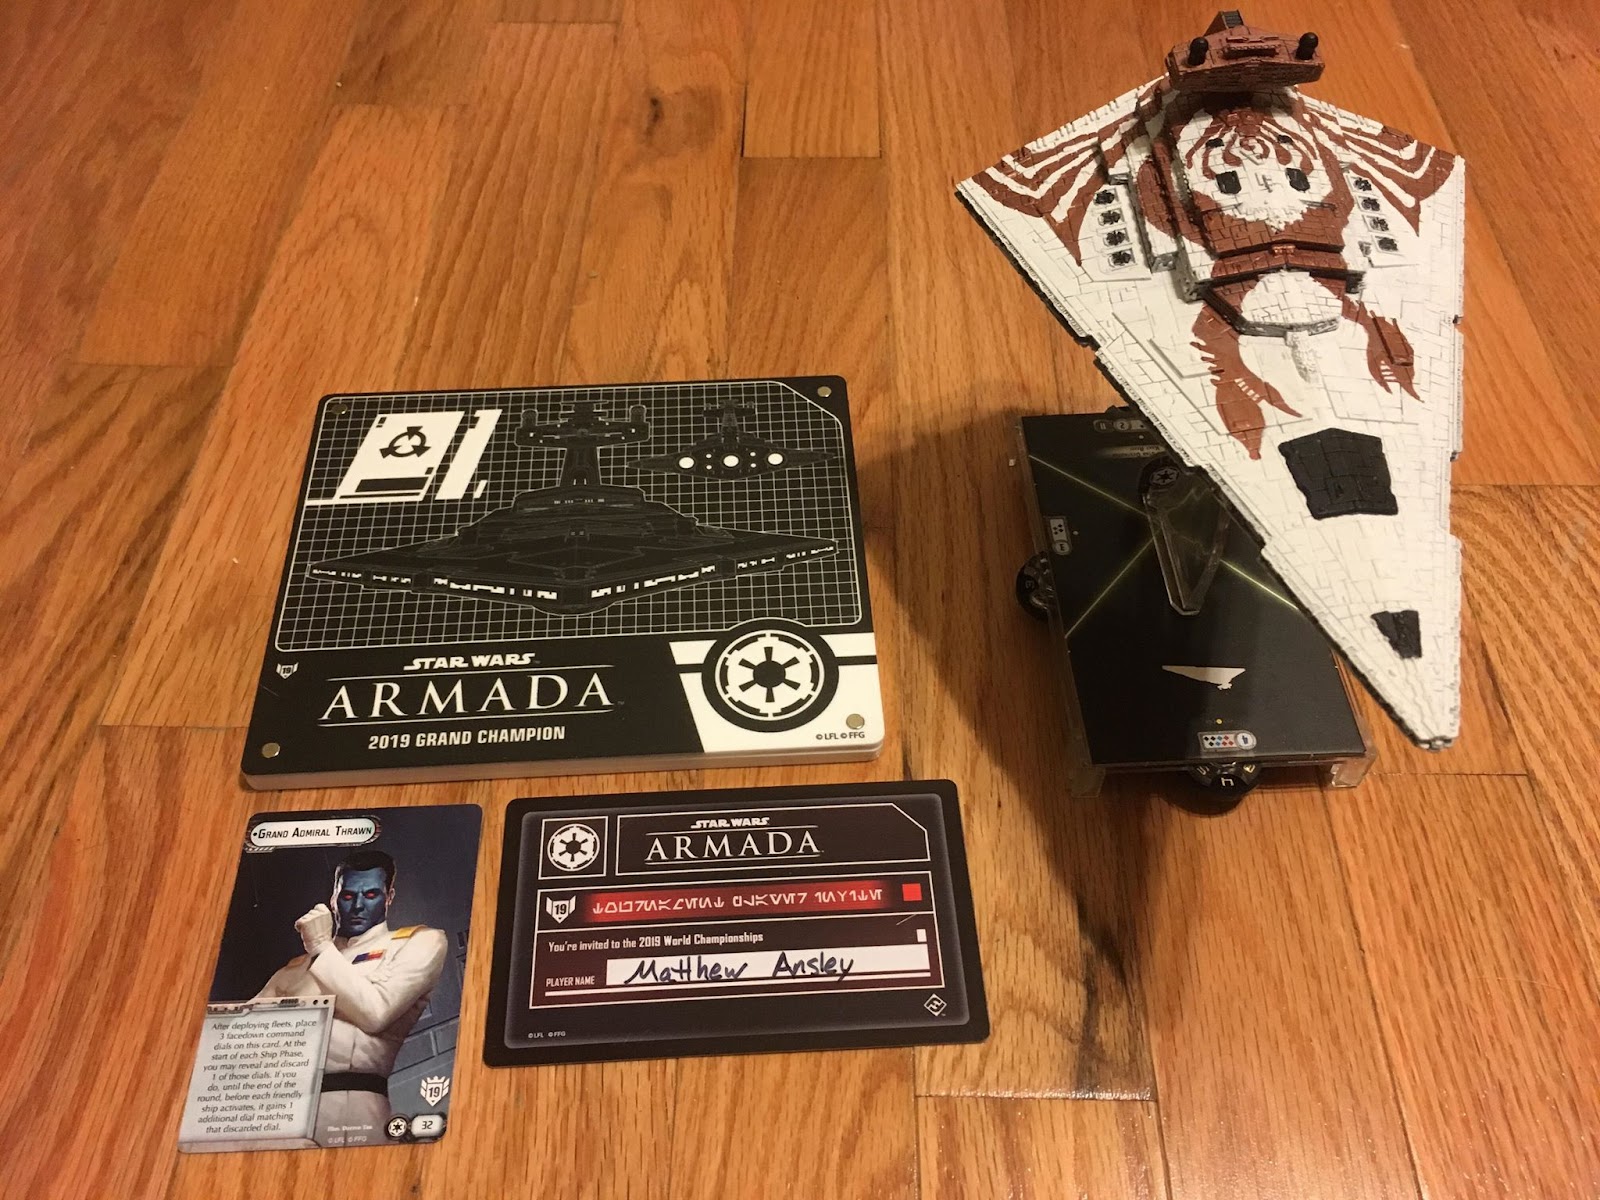
 |
| See, it's a Chevy Nova, so..... |
And now,
without further ado, THE GAMES.
I do
apologize folks, I took no pictures on Day 1 (I completely forgot) and only
took 2 on Day 2. Any pictures of the matches (other than the one of Game 6,
that’s me) from hereon in are courtesy of the excellent NOVA Open TO, Daniel
Nowak. (All art preceding this copyright Fantasy Flight Games and/or Disney
Corporation/Lucasfilm.)
GAME 1: Josh Swanson (7th place Day 1A)
Like I’ve
already alluded to, this was my first defeat before my six game winning streak.
Josh, thanks for blasting the complacency off, I really do appreciate it. This
was not the only game I made mistakes; I’m pretty sure I made mistakes in every
match. What made this one different is that the mistakes made in this one I did
not recover from.
Josh was
running basically the Euros winning list, which is itself a subtle iteration of
the Worlds winning list, though he independently derived the differences from
the Worlds version. He hadn’t gotten much Armada in quite a while being
overseas, but the list worked pretty well for him.
Name:
Remnant Reborn
Faction:
Imperial
Commander:
Admiral Sloane
Assault:
Opening Salvo
Defense:
Fighter Ambush
Navigation:
Superior Positions
Raider I (44)
• Admiral
Sloane (24)
• Hondo
Ohnaka (2)
= 70
Points
Quasar Fire I (54)
• Skilled
First Officer (1)
• Flight
Controllers (6)
• Boosted
Comms (4)
• Squall
(3)
= 68
Points
Arquitens Command Cruiser (59)
• Captain
Brunson (5)
• Engine
Techs (8)
• Centicore
(3)
= 75
Points
Gozanti Cruisers (23)
• Comms
Net (2)
= 25
Points
Gozanti Cruisers (23)
• Comms
Net (2)
= 25
Points
Squadrons:
• Dengar
(20)
• Colonel
Jendon (20)
• Maarek
Stele (21)
• Saber
Squadron (12)
• Valen
Rudor (13)
• Ciena
Ree (17)
• Mauler
Mithel (15)
• Major
Rhymer (16)
= 134
Points
Total
Points: 397
I met
Tokra at Worlds, and I respect the hell out of him. I also know that unlike
most Sloane lists, this one is better than most at holding the range open and
giving the Sloane squadrons the time they need to actually kill ships. In
retrospect and with the perfect information that comes from knowing what the
red objective actually was, I should have just taken first player, grabbed
Opening Salvo, and bored in. As it was, I was scared, and took second. He chose
my Solar Corona, and deployed in a box formation pointing at the middle of the
near close edge, which was to my right.. I deployed across from him, with Chimaera
in the middle, Demo on her left, and the Arquitens on the right.
My intent was to box him in and kill him quickly, trying to just blow up the
three real ships and be on my way before the squads could matter.
Spoiler,
none of that went according to plan. Chimaera did get fully engaged, and
ended up Vadering off Capt. Brunson to blow up Centicore in one salvo,
but at that point she was bleeding most of her defense tokens, shields were
down, and hull damage had happened between middling defense token management on
my part and exactly what rolls Josh wanted on his side. The other absolutely
critical mistake was that somehow my Arquitens ended up with a squadron
dial on the top of her stack at the beginning of the game. I have no idea how
that happened, and rest assured, dear reader, I was compulsive about checking
dial stacks, particularly at the start of the game, for the rest of the
tournament. The relevant part for this game was that it meant the Arquitens
was too close to Chimaera and too far from the board edge without the
additional yaw to get into position to intercept Sloane’s Raider, which
skittered away from the light cruiser around the board edge and made off for
the wild blue yonder. By game end, Squall, Centicore, Chimaera,
Hondo’s Gozanti, and Demolisher were all dead, with the Raider
and the Arquitens (and the respective surviving Gozantis) all
heading for their respective hills. The end result was an 8-3, 152 points in
Josh’s favor (143-295).
 |
| The wreck of the one and only time during the entire tournament Chimaera would fall (also copyright Lucasfilm) |
Alright,
I left, I bothered Adam Newton (5th place in the cut, playing Legion that day),
he gave me a pep talk, and I went and got the best catfish po’boy I’ve had in a
long time from the Louisiana food truck outside before settling in for round 2.
Let’s start the comeback hype, guys and gals.
GAME 2: Christopher Bean (12th place Day 1A)
Well,
Bean as he introduced himself to me was quite the chipper fellow, and honestly
that kind of attitude is infectious, so I was going to end up feeling better
after this game no matter what. Bean had a very unconventional Ackbar list,
which is here:
Name:
Bean's Fleet
Faction:
Rebel
Commander:
Admiral Ackbar
Assault:
Most Wanted
Defense:
Capture the VIP
Navigation:
Intel Sweep
MC30c
Torpedo Frigate (63)
• Skilled
First Officer (1)
•
Ordnance Experts (4)
•
Reinforced Blast Doors (5)
• External
Racks (3)
• XX-9
Turbolasers (5)
• Mon
Calamari Exodus Fleet (5)
= 86
Points
MC30c
Torpedo Frigate (63)
• Skilled
First Officer (1)
•
Ordnance Experts (4)
•
Reinforced Blast Doors (5)
•
External Racks (3)
• XX-9
Turbolasers (5)
• Mon
Calamari Exodus Fleet (5)
= 86
Points
Pelta Assault Ship (56)
• Admiral
Ackbar (38)
• Engine
Techs (8)
•
Intensify Firepower! (6)
= 108
Points
GR-75
Medium Transports (18)
• Comms
Net (2)
= 20
Points
GR-75
Medium Transports (18)
• Comms
Net (2)
= 20
Points
Squadrons:
• Shara
Bey (17)
• Tycho
Celchu (16)
• Hera
Syndulla (28)
= 61
Points
Total
Points: 381
Like I
said, unconventional. I don’t hate it, but there are a lot of choices here I
don’t understand that came out to bite him during our game. Chris was one of
two that outbid me, and took first player. From my own objectives, he took
Solar Corona. On deployment is where I think this particular game was decided.
The standard response of most players to Solar Corona is to deploy line abreast
in a flexible formation so it can wheel to wherever player 2 deploys his/her
forces. The problem for Bean’s fleet is that it can’t concentrate its force
well, and between second player and Strategic Advisor, two of my ships would
always be able to activate after his. Ackbar’s Pelta went in the middle,
with the GRs on either side about distance 3 away. The MC30s, which remember
are Torpedo Frigates and therefore carry no native red dice for standoff
attack, were somewhere between distance 4 and distance 3 away from the GRs,
putting the two MC30s something like three feet away from each other. Mon
Calamari Exodus Fleet only works at distance 1-4; the two frigates were pushing
three times that far apart.
Armed
with this information, I changed up my deployment. Chimaera went in the
middle as she normally did, flanked by her flotilla support. However, this time
both the Arquitens and Demolisher deployed on the same side of
the ISD, to her left. Together they set up a kill box. The Arquitens
lured out the left MC30 with a Speed 3 move turn 1, only to hammer the MC30
after it closed the range, leap over it, and leave Demolisher to swoop
in to kill it. If I’m being entirely honest, the kill felt too easy, but I
seldom face an MC30 that isn’t Admonition. The rest of the game went
downhill for Bean from there. The other MC30 took a long arc trying to catch
out Chimaera, but came too wide, leaving Chi plenty of room to
dodge range and press her offensive against the Pelta. At the top of 4,
Bean made his second serious error; the Pelta, then running along the
long axis of the board, made a sharp left turn with both the native maneuver
and Engine Techs, right back towards his side of the board. It was immediately
clear I could force the issue for the Pelta with Chimaera in
pursuit, forcing the impossible choice of being run down by the Star Destroyer
at Speed 0 so it wouldn’t fly off the table, or staying at speed and denying Chi
her fire in exchange for rocketing off the board. In the end, Bean chose the
latter. The Arquitens and Demolisher repeated their stunt with
the first MC30 on the second, having spent turns 3 and 4 wheeling behind Chimaera
to cut it off. End result was 400-0 for a 10-1, one of my two perfect games in
the event.
Game 3: Evan Paul (10th place Day 1A)
Alright,
we’re back to someone I outbid. I would like to note that unlike most lists
with bids near as high (or higher) than mine, I did not originally intend to
bid this much. (For the curious, the record high bid for the event was 31
points by Nick Litrenta.) Don’t get me wrong, first/last is a super powerful
tool when you have six activations and two black-dice reliant ships generating
the bulk of your combat power. However, this bid is entirely by default. As I
built and iterated it originally, I struck upgrades that didn’t do me any good
or that I consistently forgot to use. The only other upgrades this list
considered were Hand of Justice (I forgot this like it wasn’t even
there, and when I did remember it, it was halfway to Kansas usually), Suppressor
(meant my Gozantis had to be closer to the action, yeah no), and that’s
about it. Thus, 17 points. Here’s Evan’s list:
Name:
Evan Paul's Armada Fleet
Faction:
Imperial
Commander:
Admiral Motti
Assault:
Most Wanted
Defense:
Contested Outpost
Navigation:
Solar Corona
ISD Cymoon
1 Refit (112)
• Admiral
Motti (24)
•
Strategic Adviser (4)
•
Intensify Firepower! (6)
• Gunnery
Team (7)
• Spinal
Armament (9)
• XI7
Turbolasers (6)
= 168
Points
Victory II (85)
• Chart
Officer (2)
• Gunnery
Team (7)
•
Disposable Capacitors (3)
= 97
Points
Gladiator I (56)
•
Ordnance Experts (4)
• Engine
Techs (8)
• Assault
Proton Torpedoes (5)
• Demolisher
(10)
= 83
Points
Gozanti Cruisers (23)
• Comms
Net (2)
= 25
Points
Gozanti Cruisers (23)
• Comms
Net (2)
= 25
Points
Squadrons:
= 0 Points
Total
Points: 398
We have a
lot of similarities to my list here, and a fair few critical differences. For
one, I know other people do, but a Cymoon without Vader and/or Krennic screams
to me “I trust my red dice”. I trust my red dice as far as a fire ant can throw
them. IF is not enough. He also has a Victory, partially paid for out of
the cheaper Demolisher and the fact that the ISD is a Cymoon, carrying
Motti. I don’t hate the build, I just think mine is better. Fundamentally that
list says, “I can’t kill you quickly, but you can’t kill me quickly either, so
I think I’ll win that trade over time.” My list, as previously discussed, is
equipped with exactly enough defenses to get its weapons on target, and not a
point more. Shield versus sword, place your bets, ladies and gentlemen.
Evan’s
was the only list that could match me in activations, but I was confident in my
ability to weather his fire if I managed it properly in order to get kills and
starting flipping the tempo in my favor. With that in mind, I took first player
to help keep my Smalls alive (this ended up being a very critical thought), and
selected his Contested Outpost. Matched on deployments, I knew he was going to get
the last drop with something (it ended up being the Cymoon IIRC). What I needed
was the information beforehand on where he would be so that my ships could be
pre-positioned for their attack patterns as they went down, and minimal
adaptation to his arrangement would be necessary in game. Given that
requirement, CO it was.
Alright,
here’s where things get so very convenient for me: this is the first game of
mine that Daniel took a specific picture of. (Being table 3 helped.) Let’s have
a look.
So, reverse-engineering
the state of the game from what I remember, this appears to be approximately
the very beginning of the ship phase in turn 2. I’m pretty sure I’m measuring
whether or not the Arquitens has any targets in range already before I
begin cycling and activating Chimaera’s Fleet Command and Thrawn’s dial.
The
deployments should be fairly obvious for the reader to backtrack from here, but
I’ll go over them briefly now. The intent for Demolisher and the
obstacles to her left (picture’s right) was to have a lane to run up, pick off
anything foolish enough to be that far out on its own, then start rolling up
the flank. The Arquitens is there following along as fire support, and Chimaera
is teeing off to do what she does best, which is crack Large bases like eggs.
From this position, I was able to force both the Vic and the opposing Demo
to come into range of my ships, as he tried to force Chimaera to come
under the guns of the Cymoon without exposing it to danger. Between my two
Smalls, his Demo would have been dead if not for Motti before the end of
the turn.
From
there, the battle moved quickly. The Arq finished his Demo with
an IF-enabled front arc shot, drilled the Victory, and tried to move
off, but got hit by DCaps anyway. She escaped the carnage on one hull point
remaining. My Demo, by now behind the front arc of the opposing Vic
closed in and slowly beat it to death with missiles. Chimaera moved in
to contest the station, and easily weathered the Cymoon fire before unleashing
death of her own. Vader, lacking any truly good targets, ended up removing
Intensify, before the wounded Cymoon managed to just jump out of Chimaera’s
front. Having finished the Vic, Demolisher executed a textbook
first/last, dumping four arcs (two front, two side, all but one front at close
range) into the front of the already battered Cymoon, before moving off into
long range of its front, pointing her broadside at the path of the Cymoon. Evan
at this point faced an impossible choice; if he cut speed, he was risking staying
in close range of Chimaera, but if he was too fast, he ran straight into
Demo’s waiting missile tubes. In the end, he chose to accelerate, I
think attempting to ram Demo, to bounce back. He missed, and much to
everyone’s surprise (including my own), that one hull Arquitens floating
around the edge of the battle doing her best to not die had him in range by the
very edge of the rule. TRCs put the poor Cymoon out of its misery, leaving Evan
with Hondo’s Gozanti and four Contested Outpost tokens, to my tabling
and one token. 420-87, 333 MOV for a 10-1.
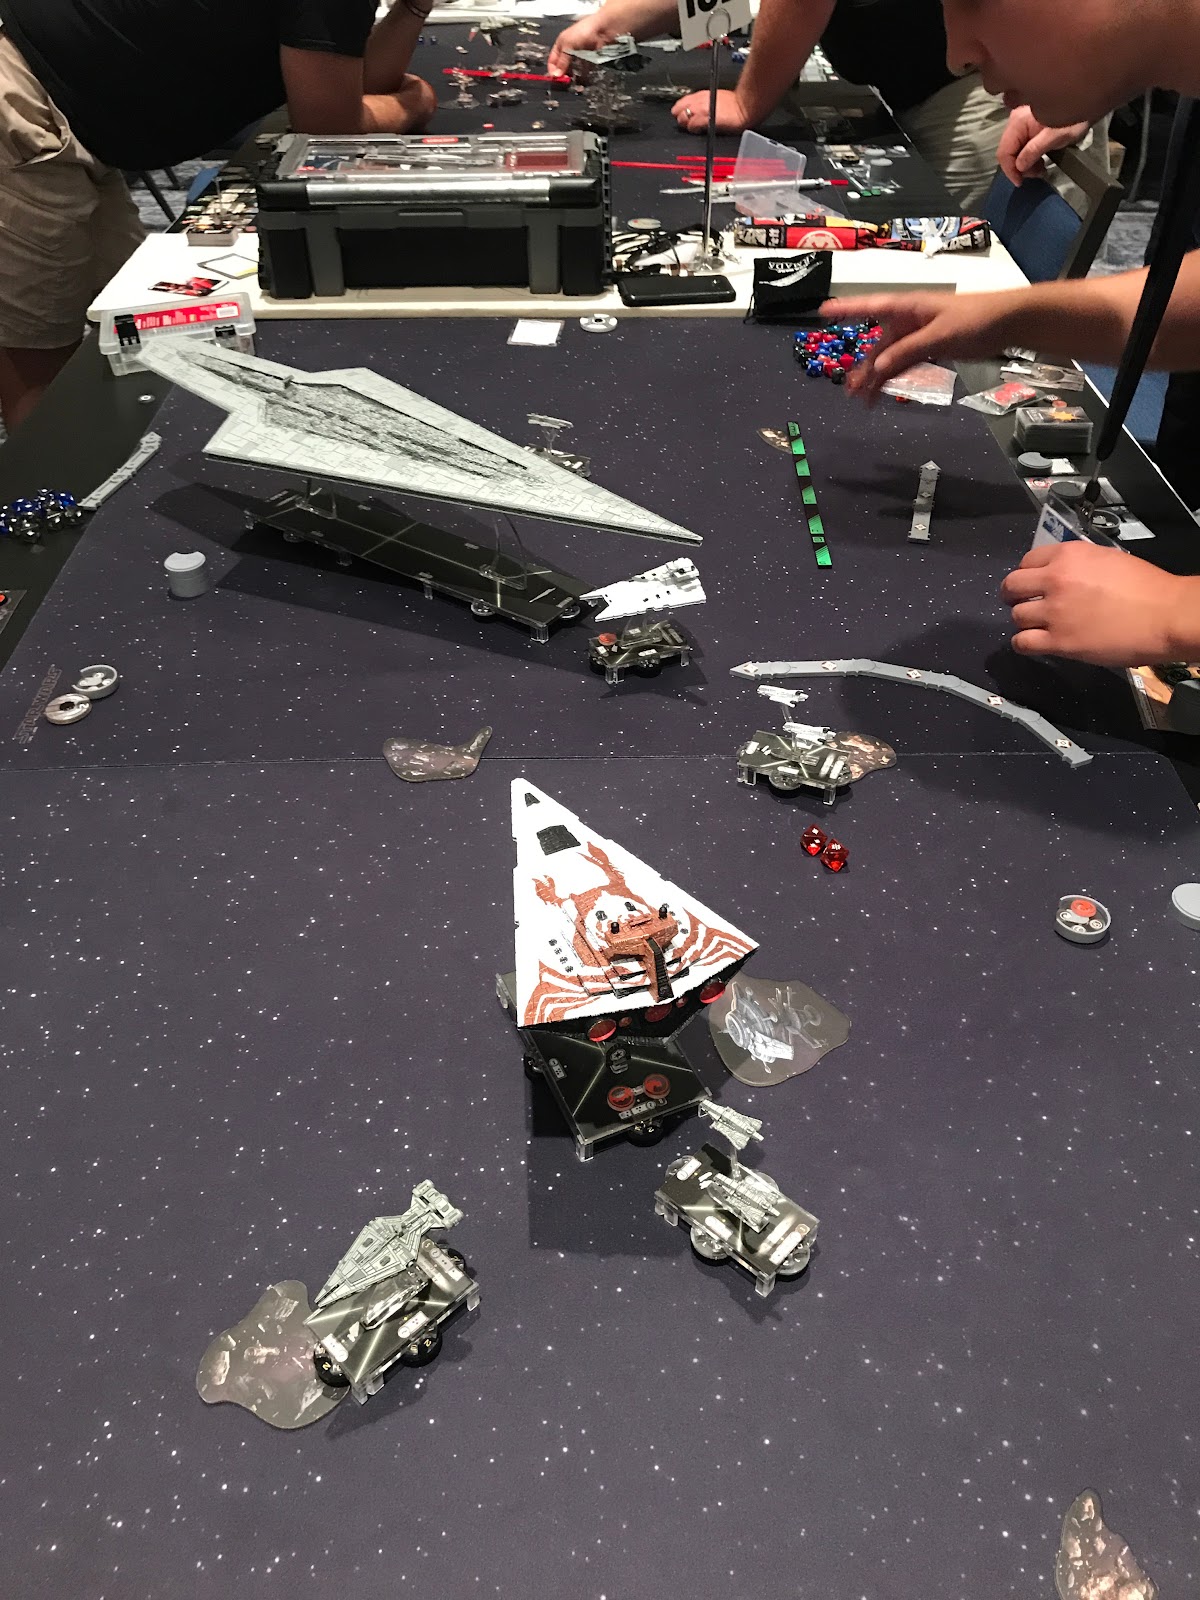
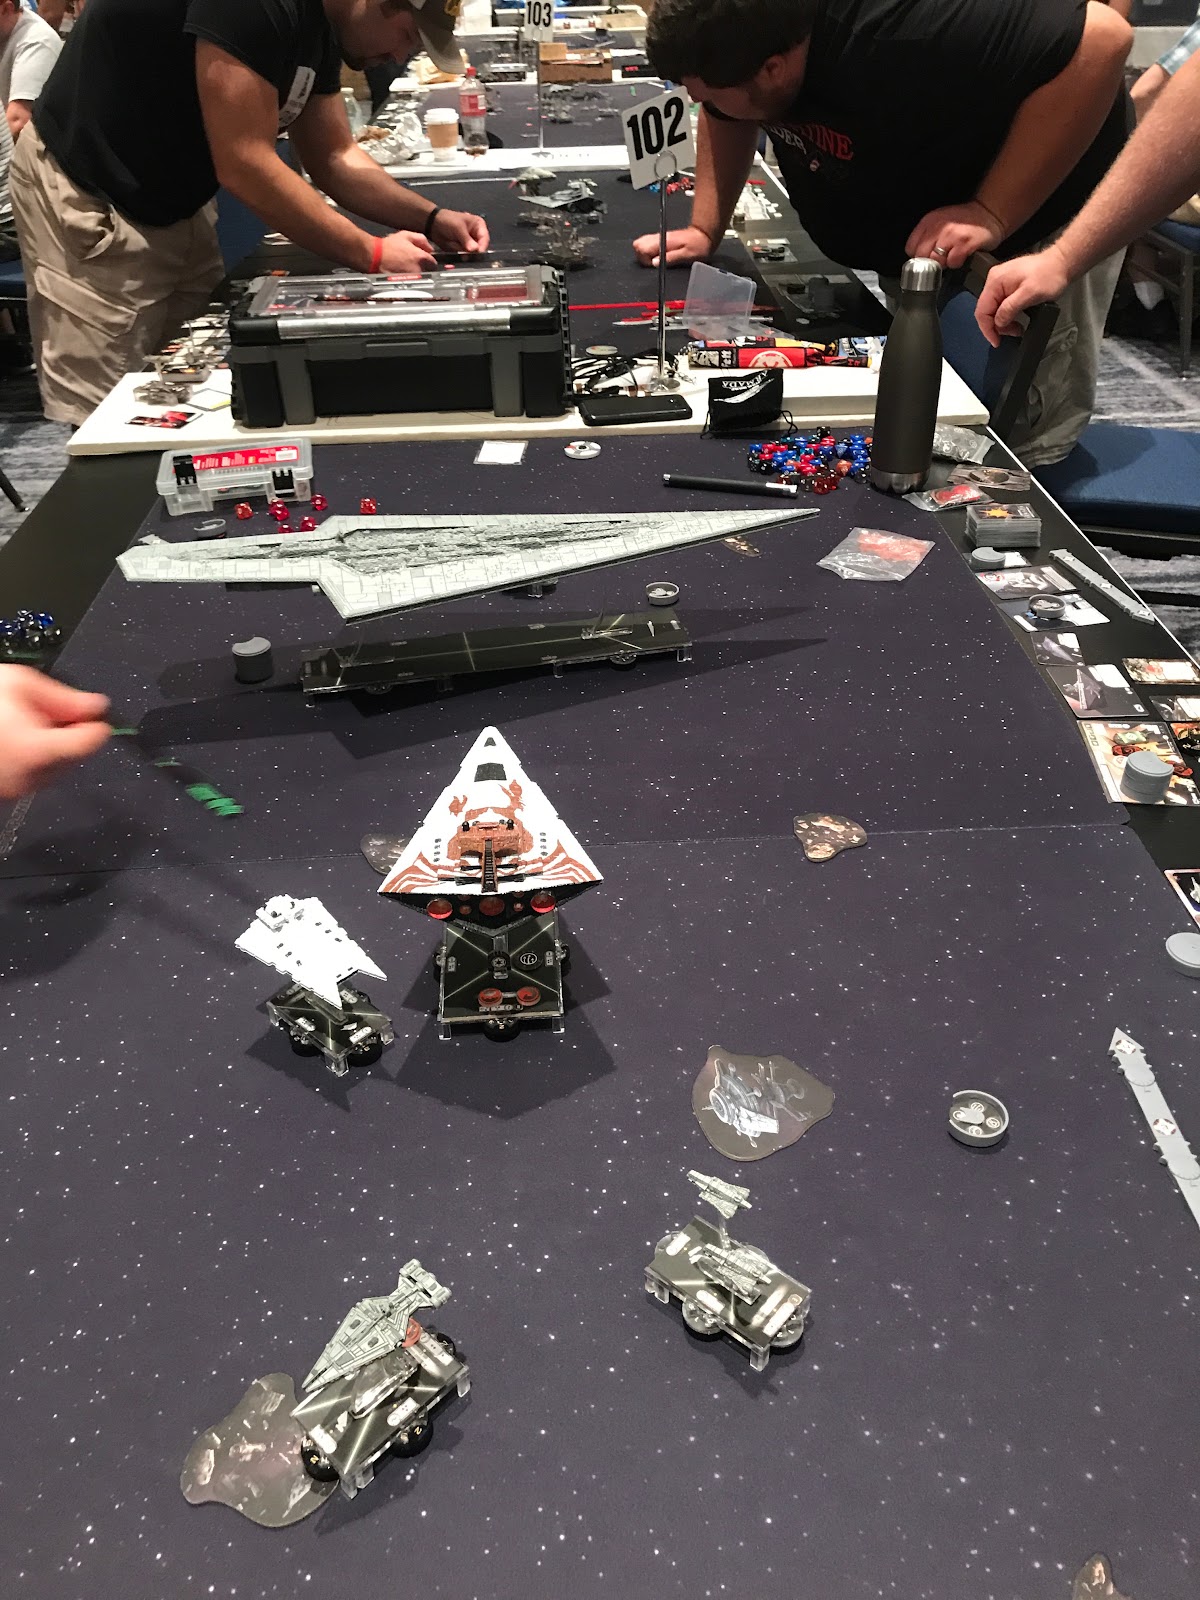
Game 4: Jeremy Gaudreau (4th place in the cut)
Alright,
now we’re playing with fire, ladies and gentlemen. After those two massive
performances, I ended up in second, edging out Mike Josselyn (you’ll see that
name again) by MOV with 23 tournament points. This brought me up against one of
Richmond’s best, Jeremy. The man had taken 15th this past Worlds, over 5 times
better than my result. Such a wonderful confidence boost going into the game.
Spoilers for those who didn’t follow the cut on Saturday before reading this,
this was to be the first of two matches in this tournament between Jeremy and
I. Jeremy’s build is very similar to the Sloane two-and-a-half ship used by
MandalorianMoose (Sam Simon) but they evolved to my knowledge independently,
with Jeremy’s version including significantly more bid and no Pryce. Here’s the
list:
Name:
Assimilated Empire
Faction:
Imperial
Commander:
Admiral Sloane
Assault:
Most Wanted
Defense:
Planetary Ion Cannon
Navigation:
Solar Corona
Gozanti Cruisers (23)
• Comms
Net (2)
= 25
Points
Interdictor Suppression Refit (90)
• Admiral
Sloane (24)
• Captain
Brunson (5)
• Engine
Techs (8)
• Disposable
Capacitors (3)
•
Targeting Scrambler (5)
• Grav
Shift Reroute (2)
• SW-7
Ion Batteries (5)
• Interdictor
(3)
= 145
Points
Quasar Fire I (54)
• Skilled
First Officer (1)
• Flight
Controllers (6)
• Boosted
Comms (4)
•
Expanded Hangar Bay (5)
• Squall
(3)
= 73
Points
Squadrons:
• Colonel
Jendon (20)
• Valen
Rudor (13)
• Maarek
Stele (21)
•
Howlrunner (16)
• Mauler
Mithel (15)
• Saber
Squadron (12)
• Ciena
Ree (17)
• Major
Rhymer (16)
= 130
Points
Total
Points: 373
That’s
right, readers, that’s a twenty-seven (27) point bid, the second highest I know
of at the tournament, and the highest that ended up matched against me. In a
discussion after our game, Jeremy said it was entirely due to scrimmages
Richmond had been running against the Super to figure out how their usual lists
could take one down. By their figuring, most Supers are pretty dependent on
first player, which leads to a pretty natural arms race on bidding he wanted to
be reasonably sure he would win. He didn’t say what if any changes to the
upgrade suite he made to get that monster bid, but I can’t imagine he had to
give up much, seeing how heavily loaded his ships still were.
Shocking
no one, Jeremy took first player. He thought about my objectives quite
seriously for a minute, before finally deciding on Planetary Ion Cannon.
Deployment was pretty straightforward; we put all the obstacles down, both of
us trying to predict where the action would be so that our Brunson could be
useful to us there. Jeremy had exactly enough squadrons that his Gozanti
and all of the squadrons could go down with all of my ships, allowing him last
placement for the carrier and the cruiser.
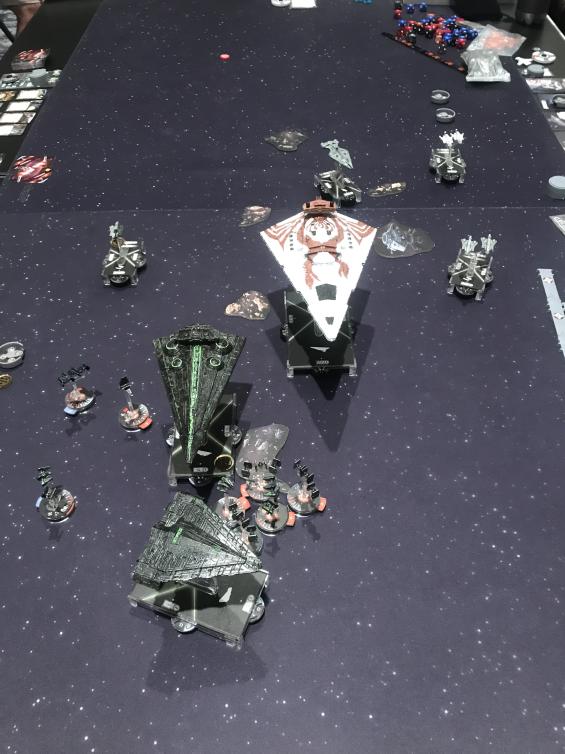
The below
photo displays the game approximately at the end of round 2, but it still
demonstrates a lot of the fundamental deployment that is hard to explain in
words. The ion cannons were concentrated to my right, as eventually was Demo.
This meant that Squall and Interdictor went to the left, where
the Arquitens was and somewhere that Chimaera could flex to. The
carrier was to the outside, screened by the cruiser, and the squadrons which
had originally concentrated around the Gozanti had used their native
Imperial speed to cross the board quickly to get into combat positions.
For reference, the Quasar is at speed 2 and was shot this round by the Arquitens,
and Interdictor has been making aggressive use of its Engine Techs to
keep itself between the carrier and the primary threat axis (Chimaera
and to a lesser extent Demolisher). The downside of this is that Jeremy has
come forward a lot, meaning Chimaera is now in firing position with a
nearly ideal targeting solution.
The
observant reader will note that if this is in fact the end of round 2 (a
proposition the flurry of flipped command dials in view would support), the
squadrons have all activated, but Chimaera is at close range of Interdictor
completely undamaged. This is right where I want to be in these sorts of
matchups.
 |
| The Borg have assimilated Imperial technological and biological distinctiveness into their own |
Here’s
where things went sideways, then corrected again. I made what could have been a
truly key error here, I forgot to Hondo. This left Lord Vader hanging out in Chimaera’s
shuttlebay waiting for something to do. This error didn’t change what Jeremy
intended to do, only how crucial the failure would be if it went sideways.
DCaps came out, hammering my poor light cruiser, but leaving it alive. Interdictor
then, with the power of the almighty Engine Techs (after pinging Chi’s
forward shields) leaped completely out of the deadly front arc. The reply was
immediate; the Arquitens activated and with the power of her free
ConFire dial hammered Squall for 7 damage after TRCs. Her Nav
dial leapt her away from the heavy cruiser, but into a position where, if left
alive, she could continue to hit either of Jeremy’s ships.
For the
record, I don’t think this was a mistake here on Jeremy’s part. He hemmed and
hawwed for several moments, before finally committing the squadrons from Squall
to go finish off the Arquitens. Down went the light cruiser, but there
was Chimaera, all of her tokens and hull, and almost all of her shields,
sitting pretty as she pleased. Squall was unable to make the same leap
away from the Star Destroyer’s front battery, and was immolated in due order.
The side arc then rippled off an ACM proc into Interdictor, leaving it
almost completely shieldless before moving off to make good her escape.
So when
the game kicked off, I was kicking myself for leaving Demolisher so far
out of position. In the end, letting her fall into linebacker/safety position
ended up being a critical game-making move instead of trying to race around the
front of Chimaera. You see, once Chimaera got out of the way, Demolisher
got into position to make the attack run you see below. Believe it or not, she
actually got close range on the cruiser’s front from there, slamming yet more
missiles into Sloane’s flagship for a total of three hull damage. Hondo, in a
show of unusual valor, came off the station and finished the trap, blocking the
ship in.
 |
| I have been chasing killboxes like this for years. Remember kids, patience pays off. |
Again
Jeremy had an impossible choice. If he got the Gozanti out of Chi’s
front arc, he might have gotten a token for Interdictor, but that meant
Vader would have murdered Targeting Scramblers with a vengeance, and allowed me
to unleash both the Star Destroyer’s rear, and the patiently waiting Demo’s
side into the battered ship. Demo was also at this point entirely
untouched, so trying to kill it with the cruiser and the two squadrons it could
summon was out of the question. He went with the only remaining option: MJ dove
on Hondo, blasting the scatter token off. SW-7s made good the kill, and the
cruiser tried its very best to dodge a Demo double arc.
Unfortunately
for the perennial villains of Star Trek: TNG, that was not to happen. Demo unleashed
a wave of fire, bringing down the prototype once and for all. Lord Vader,
finally having his shuttle prepared, ripped Comms Net off the remaining Gozanti
before Chi blew it to bits, and off into the sunset I rode, now riding
my best three game streak ever in my Armada career. 400-90, 10-1.
Game 5: Jonathan Kwak (5th place Day 1A)
Now we
come to our last game of Day 1, myself vs Jonathan Kwak. Kwak and I had played
once before, in one of the two store tournaments I had attended since moving to
DC, where the fleet you will see below bested a Mothma MC30/CR90 swarm. His
list had another impressive simplicity of purpose. Motti kept the cruisers
alive long enough for fifteen blue dice from five Decimators (and a sixteenth
blue from Valen Rudor) to wear down anyone unlucky enough to be caught by the
swarm of Evil Millenium Falcons (supposedly the instructions the designers for
Star Wars: Galaxies had when they created the original design). Here’s the
list:
Name:
Decimator
Faction:
Imperial
Commander:
Admiral Motti
Assault:
Close-Range Intel Scan
Defense:
Fighter Ambush
Navigation:
Superior Positions
Victory II (85)
• Admiral
Motti (24)
• Captain
Needa (2)
• Gunnery
Team (7)
•
Disposable Capacitors (3)
• H9
Turbolasers (8)
• Warlord
(8)
= 137
Points
Gladiator I (56)
• Skilled
First Officer (1)
•
Ordnance Experts (4)
• Engine
Techs (8)
• Assault
Proton Torpedoes (5)
• Demolisher
(10)
= 84
Points
Raider I (44)
•
Ordnance Experts (4)
•
Flechette Torpedoes (3)
= 51
Points
Squadrons:
• Valen
Rudor (13)
• 4 x
VT-49 Decimator (88)
• Morna
Kee (27)
= 128
Points
Total
Points: 400
I was
back to having initiative (never hurts my feelings), and I decided I wanted to
double down on being in the driver’s seat for this game, so I took first
player. From his objectives, all of which pretty well suit his fleet, I wasn’t
willing to cede positioning for the Rogues with Fighter Ambush, nor the
opportunity for dozens of points a round with Superior Positions, so I took
Close Range Intel Scan.
What
becomes very relevant at this point is that I’m sitting on 33 tournament points
at this point. Kwak was closest (obviously, he got matched up with me), but
he’s all the way back on 28. For whatever reason, Day 1A was really
characterized by the lobster bucket effect, where a lot of good players ended up
beating the daylights out of each other on the middle tables and keeping the
average score unusually low. Given all of these disparate factors, I have no
incentive to fight unless I am absolutely, 100%, bet my farm and my neighbors’
farm too certain that I will win the engagement. If we don’t fight sure I lose
the game 5-6, but I am also absolutely guaranteed to make Day 2 regardless of
what any other result is.
Given all
of these factors, the onus was on Kwak to either lure me in, or come out to
fight me more directly, especially if he wanted a sizable enough win to close
the gap on me and have a shot at Day 2. His deployment and opening formation
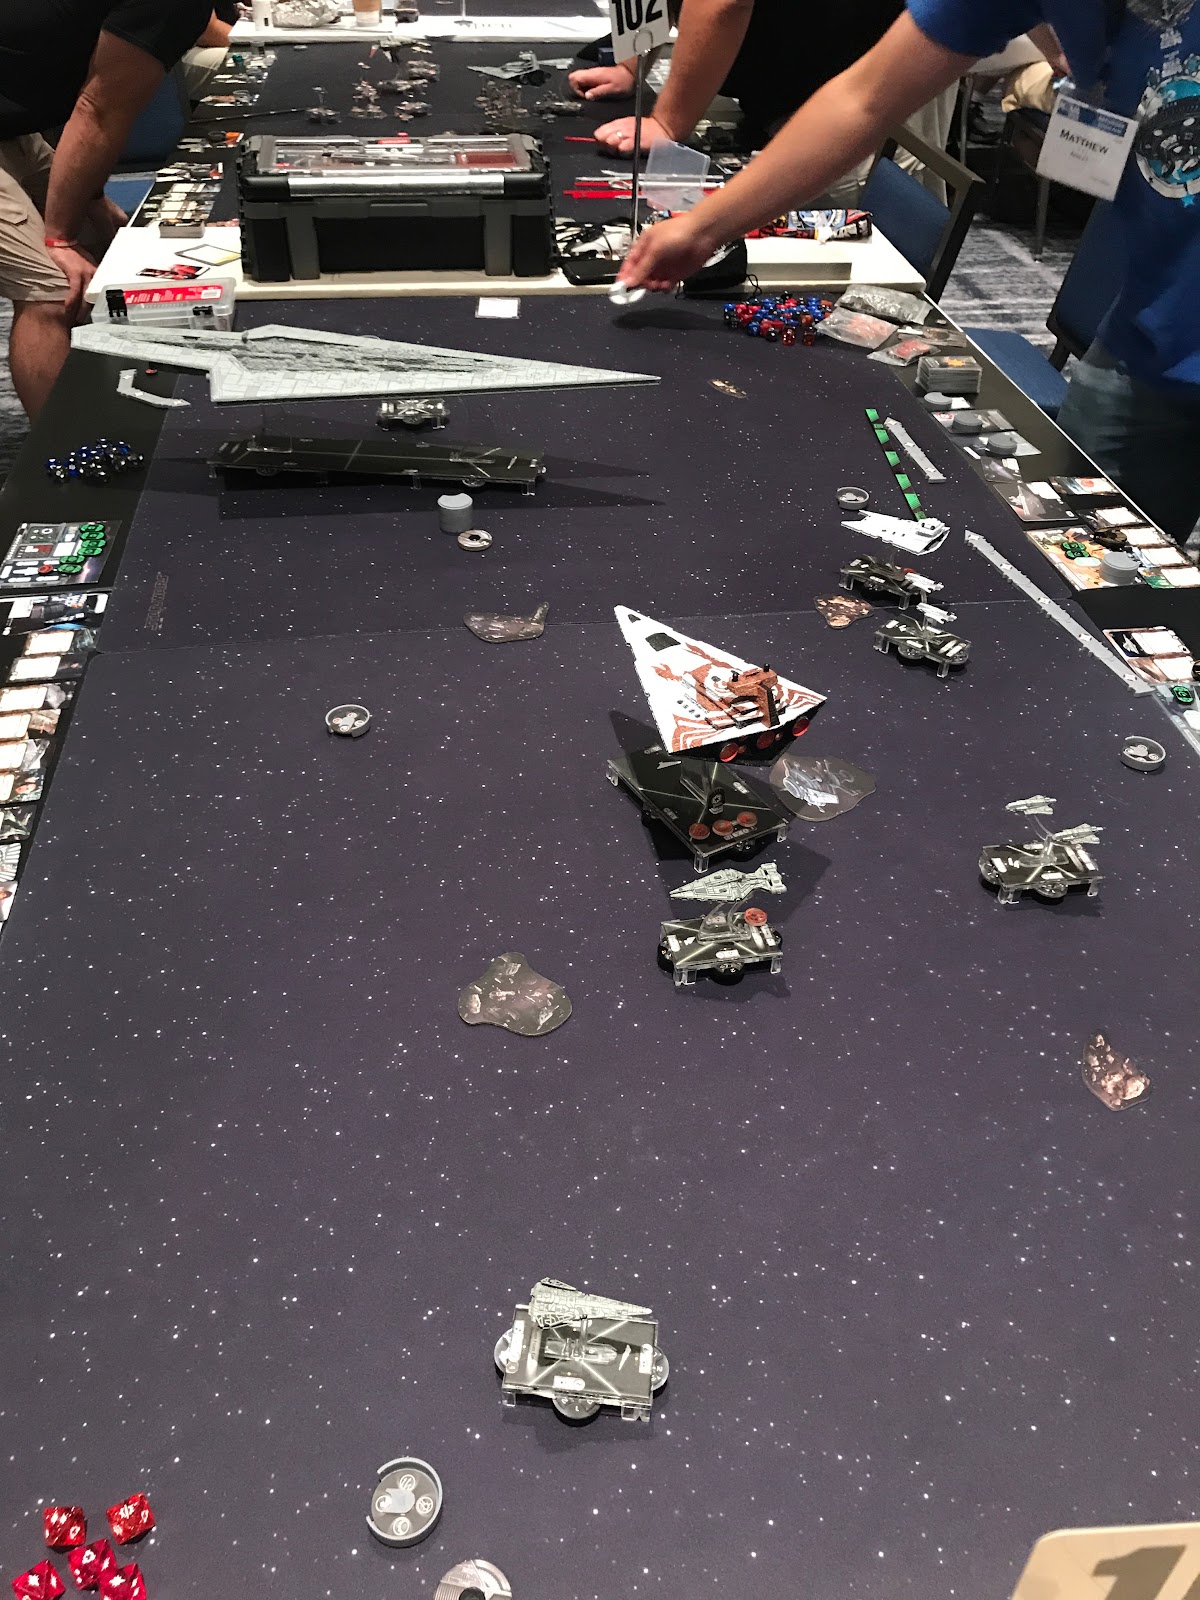
was not conducive to that however, and he ended up under the gun for the entire
game for that reason. As with Jeremy, the below photo is around round 2
(neither my Demolisher nor the squadrons have moved yet), but it still
demonstrates the original positioning.
In a
normal game, the bunker Kwak set up would have been very formidable to crack.
His Demo was in the very corner, guarding the short board edge, and the Vic
could cover most other approaches. The Decimators deployed off the Raider
in a forward position, and with the entire group hidden behind a dust field, it
would have been almost impossible to get meaningful standoff shots at the ships
before close engagement. That is, the entire group except one: the Raider.
The Raider had come out first, and as part of being the forward point
the Decimators deployed off of, it was significantly closer to me than the
other two ships. Crucially, it was also pointing along its own deployment edge,
and was at speed 2. Now I have a chance to win outright. Activation superiority
meant that I could force the Raider to show its hand before any of my
three combatants moved, and it didn’t slow down. That was the cue, and away we
went.
 |
| Let's keep everything at a safe distance. Entrapment Formation! came out for the first time all day to ensure that. |
This
suited me just fine. The Arq’s entire purpose was to pick off the Raider
and run as fast as it could. Chimaera followed, on one hand projecting
an enormous area threat to his Demo and Vic, and presenting a
backstop for the Arq should the Raider try to either crash stop
or a sharp turn inside to get behind it and back into the safety of the
Decimators. And just like in the game with Jeremy, Demo ended up
tailgating Chimaera, but rather than setting up for an attack pass she
was just trying to stay as far away as possible from the heavily armed Rogues.
In the
end, the Decimators reacted fast enough, and the ships only half did. I’m not
entirely sure if they were originally trying to cut off a flanking maneuver, or
actually realized I was just going to take advantage of the fact ships at speed
3 are faster than speed 3 squadrons, but the group cut the corner enough for my
Demolisher just as the Arquitens and Chimaera’s front arc
blew the Raider off the board on turn 5 before both ships accelerated
into the wild blue yonder safely away from the Rogues.
His Demo
did end up catching up to mine as tailgating Chimaera put uncomfortable
requirements on my activation order. Unfortunately for him, by the time that
happened, I was at distance 2 of that far right dust cloud, and Brunson made
sure my ship easily survived his one strong attack. As she left the area, Chi
pinged it for a few shields, which was all I needed. My Demo had no
chance of escaping the Decimator swarm that was now in front of it, so instead
she turned, stood her ground, and using her side and rear arcs, annihilated her
counterpart before surrendering to the inevitable. Even in her fiery death, she
accomplished a tactical good, tying up enough of his Decimators that they were
unable to move into the positions they needed to catch either the Arquitens
or Chimaera after their J-turns at the end of the board. 135-90, 45 MOV
for a 6-5. I went home first place on Day 1, a four game winning streak with
three 10s, 39 total tournament points, 1088 MOV, and the best I’ve ever done at
a major tournament ever.
I went
home, I crashed, I got up, had a 10 hour workday, watched the results of Day 1B
with great interest, and got ready to just chill out and play more Armada on
Saturday. I had already shot past my goal of exceeding my Worlds record. Little
did I know….
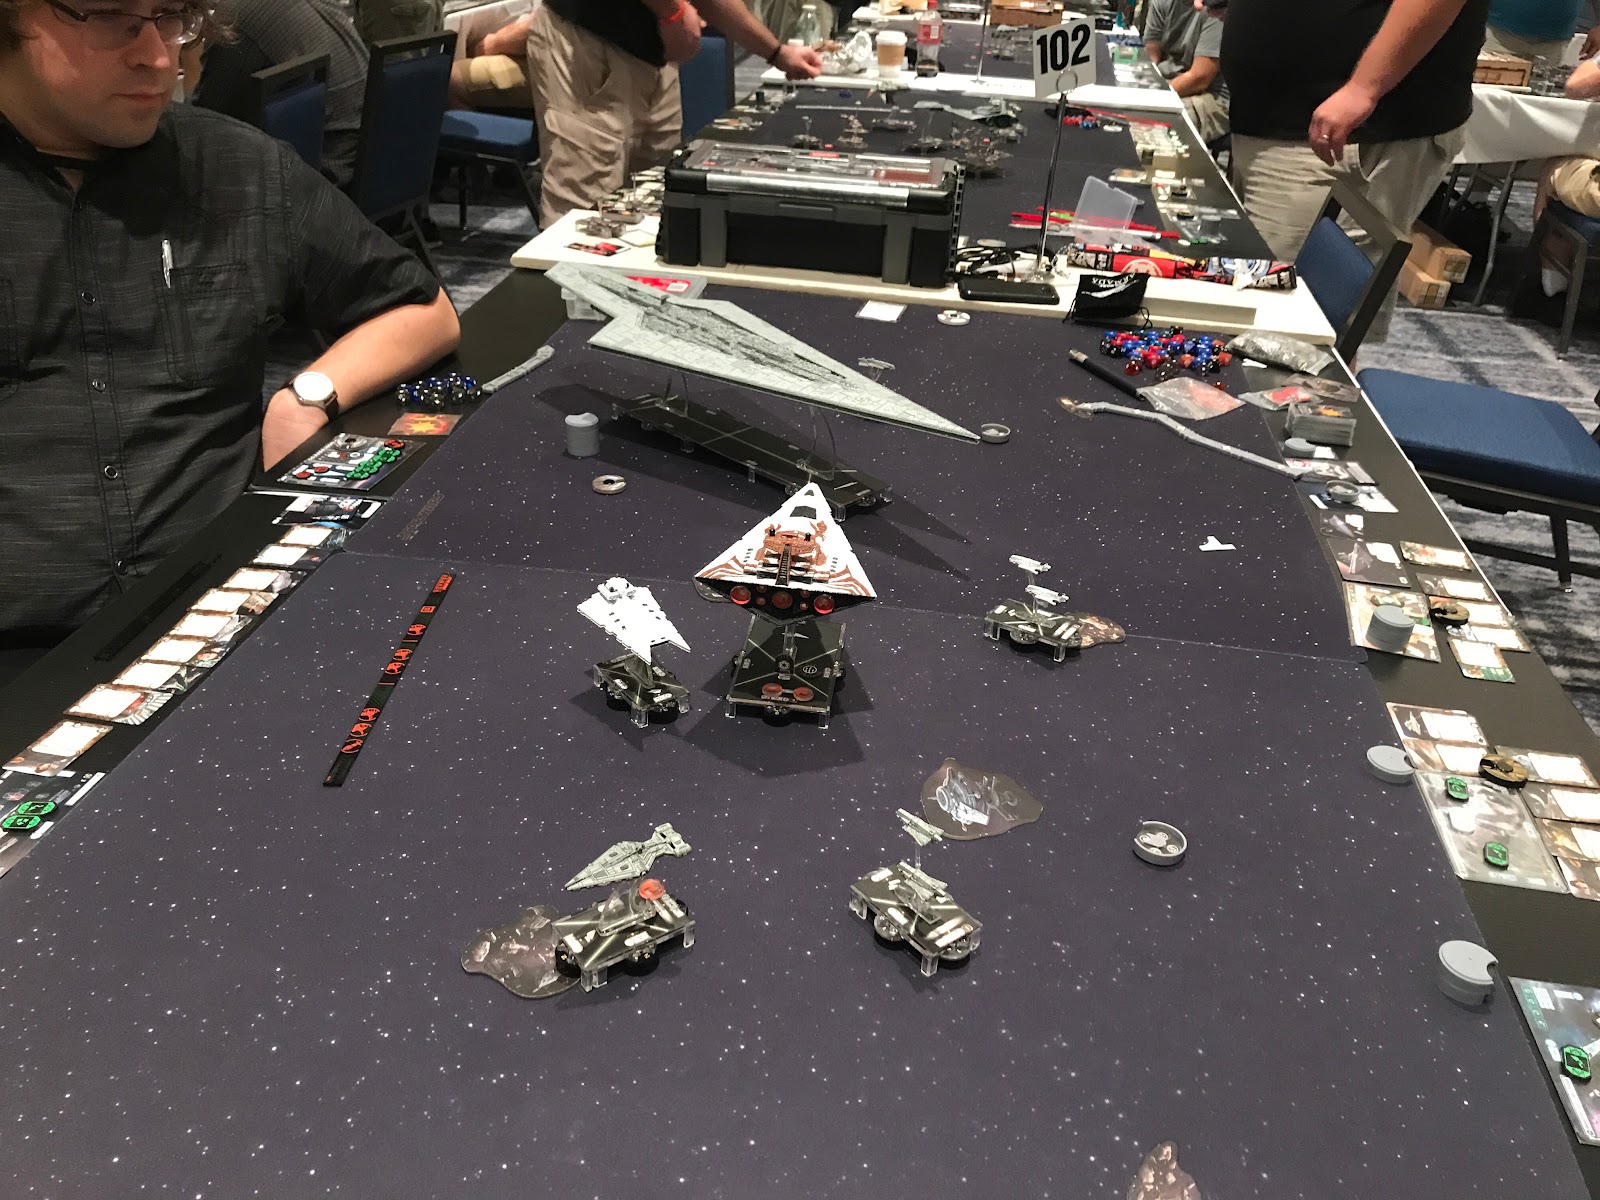
Game 6: Mike Josselyn (7th place in the cut)
So the
end result of Friday, otherwise known as Day 1B is that five players from that
day got in, while only one from Thursday got in with Jeremy (he bounced all the
way after second on the day after I defeated him), and that player was Mike
Josselyn. Friday was a much higher scoring day overall, with Paul Tomashevskyi
(otherwise known as PT106) scoring a massive 41 points of his own. I only held
second in the combined standings by virtue of MOV; Jeremy and Mike were both
further down the list. Also, Rebel players, remember to file your complaints
with the TOME gods that both Rebel players that made it in (Adam Newton’s
Ackbar, and Joseph Schofield’s Sato) got matched up against each other game 1
(game 6, depending on your point of view).
In any
case, here we are. This was to be my first rematch of the day, though not from
this tournament. Mike and I had squared off already with these exact fleets
about two months prior at a store tournament. I was victorious there, but I did
not consider that a positive thing. In my experience, when two players match up
for the second time, especially with the same or similar lists, repeat wins for
the victor of the first match are often quite difficult because while the loser
has ample opportunity to learn from mistakes made or analyze the attack
patterns of his opponent, the winner has much less information he can acquire
and incorporate into his own playstyle. I was deeply concerned that given that
Mike had seen how this list plays before he would be much more conservative
about his opening deployments and not give me much if any room to work with.
Here’s what I was facing off against:
Name:
Mike Josselyn NOVA GC 19
Faction:
Imperial
Commander:
Admiral Sloane
Assault:
Most Wanted
Defense:
Planetary Ion Cannon
Navigation:
Superior Positions
Imperial II (120)
• Admiral
Sloane (24)
• Captain
Brunson (5)
• Gunnery
Team (7)
•
Electronic Countermeasures (7)
• Leading
Shots (4)
• XI7
Turbolasers (6)
• Avenger
(5)
= 178
Points
Raider I (44)
• Darth
Vader (3)
= 47
Points
Gozanti Cruisers (23)
• Comms
Net (2)
= 25
Points
Quasar Fire I (54)
• Boosted
Comms (4)
• Pursuant
(2)
= 60
Points
Squadrons:
•
Howlrunner (16)
• Mauler
Mithel (15)
• Black
Squadron (9)
• 2 x TIE
Fighter Squadron (16)
• Valen
Rudor (13)
• Dengar
(20)
= 89 Points
Total
Points: 399
This
isn’t that far removed from the normal Sloane ace balls you’ll see running
around high tier events, with a few changes. Mike has added a Vaider to his
list to give it a secondary threat, and he has primarily paid for it out of the
squadron complement (still 7 units but more generics than usual) and the
upgrades on the Quasar, in this case Pursuant. I’ve got
activation advantage, and the squadrons are not deadly enough to kill anything
on their own, so I took first player again, and from his selection I took Most
Wanted. Surprising literally no one, his Gozanti and Chimaera
were the Most Wanted targets.
Again we
find ourselves relying on a picture to tell a lot of story, but again it’s also
partway into round 2, so it actually works. As I mentioned already, his
fighters aren’t especially effective damage dealers, so I know he has to fight
me more or less independent of my deployment. I stick to my usual “I’m
outdeployed to high heaven” plan: Chimaera in the middle of the board
(almost exactly the middle in this game), the Gozantis flanking her, and
Demo and the Arquitens on the wings. His Gozanti was
approximately across from Chimaera, to Pursuant’s right (from its
point of view). Demo had the Vaider lined up across from her on my left,
and the Arquitens had the unenviable job of staring down Avenger
until Chimaera arrived.
 |
| Yeah this is a bit of a Mexican standoff here. And like most Mexican standoffs, it rapidly devolved into extreme violence from here |
So the
above image is actually only one activation into round 2, and that activation
(pretty obviously) was my Arquitens. Both Avenger and the Vaider
came out at speed 3, which meant that when all three of my combatants
accelerated, Demolisher pinged the front of the Vaider for one damage
through the evades (results on both dice), the Arquitens had a double
arc on the front of Avenger, and Chimaera was in position for her
slashing attack as the follow up.
Now, as
anyone with an elementary understanding of geometry knows, if you’re in range
for firing solutions, you are in range of someone else’s firing solutions. This
meant, seeing as I prefer my small ships alive over dead, that my Arq
was going to go first. Concentrate Fire from the Blue Man himself and TRC meant
that the front arc did three damage, and the side arc got four damage. If I
recall correctly, neither shot was braced. Now my little ship had to run all
the way forward in an attempt to get out of that massive forward battery. She
only barely managed it; Avenger’s front had her stern in arc, but could
not draw line of sight.
From
here, activation advantage was key. I was able to force out all of his
activations before responding with either of my meaningful ones remaining. Chimaera’s
shields absorbed the pummeling provided by the TIE fighters nobly, and forced Avenger
to never fire her weapons in anger at Chimaera, though she did strip two
zones of shields off the light cruiser. Between a front arc shot that was
Concentrated because it was obstructed, a carefully aimed broadside volley, and
an Engine Tech ram, Demolisher eliminated the Vaider that round,
removing the threat from the game.
All
Thursday, as you readers may have noticed, Demolisher and the Arquitens
did the bulk of the work, and Chimaera mostly pranced around. Sure Game
2 she ran a Pelta off the table, and she killed Squall in Game 4,
but neither of those are impressive feats for a ship of her size. Now, here in
Game 6, Chimaera really got her first chance to bare her fangs. The
front arc volley at the end of round 2 left Avenger battered, but still
in possession of her faculties. Unfortunately for Avenger, Chimaera
got a textbook double arc as she pulled forward. Vader destroyed the Electronic
Countermeasures (no more forgetting Hondo), before a front arc salvo that
locked out the brace and did 7 damage and an Assault Concussion Missiles proc.
A side arc of more ACMs and four damage, braced to two damage, exactly
destroyed the ship, and Chimaera sailed through the wreckage.
From here
the game went quickly. Pursuant ended up suffering through two volleys
of red dice from my Arquitens before finally pulling out of range on
round 4. I wasn’t sure if Demolisher was going to be able to reengage
the fleeing carrier, and it had successfully evaded the Gozantis.
Unfortunately for Mike, Chimaera is Chimaera, and like all of my
games other than games 5 and 8, she was using Intensify Firepower. The final
red dice of the game from the Star Destroyer’s stern (one native, one from the
last Thrawn dial) would have failed me with two blanks, but IF saved the day
and sealed my second and last perfect game of the tournament, 400-0, 10-1.
Game 7: Jeremy Gaudreau (rematch)
For most
of the time I was waiting for Game 6 to finish on the other three tables, I was
fairly sure I was going to be facing Adam Newton’s Ackbar list in the second
game of the day. Only with about thirty minutes left did I look over to
discover that Jeremy had finally destroyed Nick Litrenta’s ISD, and this plus a
truly horrific squadron battle that had gone Jeremy’s way enabled him to vault
to a 9-2 result. The TOME gods therefore demanded rematches of the respective
days for the top two tables of Game 7, myself versus Jeremy rematching Game 4,
while at table 2 Adam squared off against Paul’s Ravager, a rematch of
Day 1B’s table 1 on Game 5 for them.
 |
| I strategically advised Jeremy to lead off with two activations before I did anything at all |
If you’ve
suffered through this much of my writing, I’m going to assume you either
remember Jeremy’s list, or are smart enough to go back and review it. Just like
Game 4, he took first player, and while he thought about it for twice as long
as the first time, he took Planetary Ion Cannons again. Unlike Game 4, Jeremy
decided that putting his two ships under the ion cannons and into Demolisher’s
path would work out better than dealing with the Arquitens again, so he
flopped which side of my deployment he put his heavy ships on. The above image
shows the result of that, with Squall way over on my left for reasons I
never fully understood, and Interdictor again assigned guard duty
between the carrier and my ship-killers.
 |
| Now it was Chimaera's turn to tailgate someone |
Now in
the above image, we are in the squadron phase of round 2. The ion cannon just
managed to reach out and tap Squall this round, so the net result of the
Demolisher pass you can see the end of here is that the carrier is now
completely bereft of defense tokens and has one hull damage on it to boot. Chimaera
has also closed the range, and has a close range double arc from her front and
starboard (right for you land-lubbers) into Interdictor’s stern. This is
one of the places where Jeremy’s possession of first player could only help him
so much; Interdictor will be forced to suffer through Vader here
regardless of whether it tries to go first because it cannot jink around the
carrier in front of it.
 |
| Press F for Demo |
For the
record, I expect very few Fs for Demolisher; it’s a reviled ship, and
for good reason given how prone it is to just removing ships from ridiculous
positions with relative ease. Between the squadron movement at the end of round
2, Squall’s additional movement, and their own activation when Squall
activated here, all five of the fighters roughly where Demo used to be
(and Jendon hanging out on the other side of Interdictor) caught all the
way up, and did a number on my defense tokens and on my shields. I think I did
probably mismanage my defense tokens here, but Demo took long enough to
die that even after Squall used her own weapons, she was still forced to
ram her for the kill.
I don’t
know what it is about Jeremy, but this was another game with a pretty big
mistake for me, albeit one that didn’t end up mattering in the end. The
eagle-eyed reader may remember two ion cannon tokens on this part of the board.
At the state shown in the last two photos, Interdictor is right on the
edge of distance 3 from the remaining token (one was already used on Squall).
We measured it before Chimaera landed on it, and I even made a comment
to myself that I would have to remember it for the start of the round. Update,
ten minutes and one bathroom break later, I did not remember the ion cannon. Chimaera
would have to kill Interdictor by the force of her own arms.
We did
remember Hondo this time, so there goes Vader and there goes Scramblers. Side
arc fires, rerolls, Intensifies, and ends up with a whopping three damage.
Front arc aims, fires, rerolls, gets Brunson’d, and ends up with 7 braced to 4,
no ACMs from either arc. Very rarely do Chimaera’s guns fall so very
flat. I was not a happy camper. Chimaera continued her headlong lunge,
landing on some of the TIE fighters that had moments before killed her smaller
companion, and sets up a double arc into Interdictor with the front also
covering Squall for the low low cost of landing on the debris field.
Thankfully
for me, that was roughly the positioning for the final relevant activations of
the game. Interdictor activated, stripping many of Chi’s shields
, but was not able to get around Squall even with her Navigate dial.
Engine Techs let her get clear of the double arc, but made it even more
pressing for Squall to clear off in order for the flagship to escape.
At the
top of 4, Squall activated again, unleashing five fighters, and a double
arc of five blue dice into Chimaera. By the time it was over, Chi
had lost all of her shields, her redirects were gone, and had suffered five
hull damage. Squall moved herself, pulling fully into the side arc of
the Kuat, but still at close range. Jeremy remarked that I was set up for the
double kill to end the game, and I’m afraid he jinxed himself. Chimaera
fired a massive front arc salvo into the side of Interdictor, locking
out her brace and her redirect before delivering eight damage and an ACM proc,
leaving the ship sitting literally in front of Chi’s nose on eight hull
damage. For the second time that day, Intensify was crucial, bringing the
damage up to exactly where I needed it to be. A side arc volley of five damage
and ACM annihilated the defenseless Squall before Chimaera rammed
Interdictor for the table. With her brace and her contain left (albeit
exhausted), the remaining forces of Rhymer and Valen Rudor were not
mathematically able to generate the four damage (engineering token generated a
shield) required to finish the ISD. That was game, 400-90, 10-1.
Game 8: Paul Tomashevskyi (3rd place in the cut)
Readers,
I know Eric and John try to keep the blog fairly family friendly (and this is
definitely getting bleeped out on the forums) so I’ll let them decide what to
do with this, but I want to give you insight into my mental state at this
point. I’m coming off a Worlds performance of 81st out of 94, almost no
practice before this tournament, and I am now sitting on 20 tournament points on
Day 2, the closest being 14, 13, and 12. The best approximation of mental
state is as follows: “HOLY SHIT HOLY SHIT HOLY SHIT WHAT THE STAR-SPANGLED FUCK
IS HAPPENING HOLY SHIT !!!!!1!!!1!11!” I can honestly say I have not ridden an
adrenaline high this high since the first time I saw Rogue One in theaters
(best Star Wars movie, fite me).
I now had
to face my boss battle, the Super Star Destroyer. And not just any Super Star
Destroyer, Ravager, flown by Paul Tomashevskyi, who took it to 41
tournament points and victory the day before. Both of us were sitting on incredible
6-1 records. And both of us had discussed at breakfast just five(ish) hours
earlier how we had accomplished our goals for the tournament (avenge Worlds,
prove the Super is competitive) and were just here to play great games and have
fun. I gotta deal with this thing?! Get outta here. Here’s exactly what I had
to take down:
Name:
Paul Tomashevskiy Nova GC 19
Faction:
Imperial
Commander:
Moff Jerjerrod
Assault:
Most Wanted
Defense:
Contested Outpost
Navigation:
Solar Corona
SSD
Assault Prototype (250)
• Moff
Jerjerrod (23)
• Agent
Kallus (3)
• Captain
Brunson (5)
• Intel
Officer (7)
• Gunnery
Team (7)
• Quad
Laser Turrets (5)
• Leading
Shots (4)
• H9
Turbolasers (8)
• Quad
Turbolaser Cannons (10)
• Ravager
(4)
= 326
Points
Gozanti Cruisers (23)
• Darth
Vader (1)
• Comms
Net (2)
= 26
Points
Raider I (44)
•
External Racks (3)
= 47
Points
Squadrons:
= 0
Points
Total
Points: 399
Now,
before we get into the game, let’s do some figures. I am sitting on 20
tournament points. Paul, the closest, had 14. In order for him to beat me in
the tournament, he needs a 9-2 to jump to 23 to my 22. At the time, I computed
that a 4-7 or better meant I could not be caught, as I would be on 24 points,
Paul on 21, and the closest Adam Newton could get was 23 on a 10-1. (As it
turned out, that game would be an 8-3 for his opponent Nick Litrenta.) If I had
been 3-8’d, Adam could match me in TP, but I would have a considerable margin
of MOV even if he got a full 400 for the win. This was not clear to me until
after the game, but the overall premise stands. Priority 1 was asset
preservation, priority 2 points preservation.
Now, I
had actually gotten two practice games against a Super in prior to the
tournament, both of them Ravagers, flown by Eric Burtch (4th Day 1A,
lost out on the cut by 125ish MOV). His did not have JJ, he preferred Piett,
but I was fully aware of the damage a fully armed Super Star Destroyer was
capable of inflicting. I had defeated him in both practice matches, always in
exchange for one small and significant damage on the other small and on Chimaera.
Unlike my test games, Paul’s Ravager was armed with QTC, meaning even at
long range my small ships would be denied the use of their damage-reducing
defense tokens. I had significant activation advantage, but I would need to
manage that very carefully to get “safe” (insofar as attacking a 19km
dreadnought could be “safe”) engagements.
Let’s go
back to the tournament points. I’ve known Paul for a very long time. My first
entry in a Vassal tournament in 2017 involved Imperial-1 class Star
Destroyers based on a concept he developed. Throughout those years, he and I
kept in touch, but never managed to meet or to play each other, even though
both of us had watched the other play on Vassal. I knew him as an expert player
of dual ISDs same as I was, and that he had transferred a lot of the aggressive
philosophy that had served him well there into this new fleet. Sitting on as
many points I was, I had very little incentive to engage unless I was certain I
could win the fight, and even that would get very dicey very fast if all of
sudden his reds went hot on me.
Given all
of these factors, and the fact that the Super could and would gleefully delete
anything of mine that it caught with that front arc, I didn’t feel I had a
choice but to go first. I needed to be able to yank a ship out of the fire
if/when that became necessary. From his objectives, I had quite the
predicament. Most Wanted would elevate Ravager into a superlaser against
whatever poor unfortunate souls he fired on. Contested Outpost would force a
fight, and as previously discussed I was already not necessarily keen on the
idea to begin with. It could also very easily put him up 80+ points, which
would make it much much harder for me to control the margin of victory I needed
to hold the tournament. Therefore I was left with the only acceptable option:
Solar Corona.
 |
| The Empire expects every man to do his duty. "Or Vader will kill him!" |
Upside of
being top table, I got like fifty pictures of this game to choose from when I
was working through writing this section. Congrats folks, my wall of text will
be quite broken up. The above image is after deployment. From hereon in, I’m
going to quote what Paul told me after the game liberally, as it will help
explain this battle of wills. His Raider is in the corner closest to the
camera, while my ships sit opposite at speed 2 for Chimaera and the Arquitens,
and speed 1 on the others. His Super is at 1, as is its Gozanti hiding
in the shadow of its stern, and the Raider is at speed 2.
_
_
 |
| Yeah, so about that battle we're supposed to have.... |
Alright,
here we are at the end of turn 1. As I came to discover later, he was just as
scared of my list actually possessing the damage to take out a Super Star
Destroyer as I was of his ability to delete my poor little smalls. For this
reason, he was doing his absolute best to force me to reveal what my plan was.
Unfortunately for him, that plan could be summarized as: Don’t fight until
forced, and under no circumstances whatsoever engage the Super on its
own terms. Thus, his drop to speed 0 did little more than reveal I was just as
scared of him as he was of me.
You may
notice the Raider and the Arquitens teeing off on the lower
portion of that photo. I’ll spare you having to keep track of them for the rest
of the game, they ran around each other, and the Raider easily escaped.
Paul told me afterwards he wanted to try to divide my attention, and to draw
off the standoff firepower the Arquitens represented. He correctly
predicted that even with activation advantage I would hold the range open
enough that the Raider would never be in serious danger, and he was
correct. I got one damage card on it, before it shot off deep into the corner
and around the back edge.
_
_
 |
| All hands, prepare for close action |
End of
round 2, now things are starting to line up. Demolisher remains hidden
in her little foxhole behind the asteroid, but the Super has accelerated back
to speed 2, and used Jerjerrod to whip the bow around. Paul told me the intent
here was that he knew he couldn’t prevent the last/first, so he was attempting
to misdirect me and draw out a mistake that would leave either Demo or Chimaera
vulnerable to a pickoff.
At this
point I was reasonably sure I could commit Demo to action without
automatically dooming her, and Chimaera is setting up for the follow-on
strike once Demo clears out. It is also quite clear that the Arquitens
cannot contribute to the battle with the Super, so it’s being allowed to derp
around chasing the Raider both Paul and I were already sure was home
free at speed 4.
 |
| Is this what the admiral meant when he said engage the enemy more closely? |
The above
is the ending activations of turn 3. Hondo’s Gozanti has landed on an
asteroid in a vain attempt to stay out of range of the Super (he did not), and Demo
has begun her firing pass. As I noted earlier in this writeup, a bigger concern
for me than winning was not losing, so rather than angling Demo to stay in the
battle, the turn is aimed to get her back out of action at the top of next
turn. She hasn’t used her Engine Techs yet in this shot, but they’ll give her
the three or so inches required that at full speed next turn she can dance away
from Ravager’s guns. Unfortunately, Chimaera also has not moved
yet in this photo, and in her attempts to get out of the front arc would end up
inadvertently giving Ravager a double arc into her bow (albeit long
range, and obstructed from the side arc).
 |
| Yeah let's prep that escape vector please |
This is
the result of the Engine Techs move, and Chimaera’s move to begin her
own attacks. The other limiting factor on Chimaera’s approach was making
sure I was leaving an escape lane for Demolisher. Note the Arquitens
derping around on the debris field, and the Raider just running around
in the back field.
 |
| Eastern Europeans have such great thinking expressions |
This is
the end result of Demo’s activation at the top of round 4. She executed
the full J turn at the end of her run, having gotten ACM off on the front of
the Super Star Destroyer out of her side arc, and used Engine Techs to fully
clear out of Ravager’s range. From here, Chimaera and Ravager
are in position to exchange front arc volleys, and poor poor Hondo’s white
paint has made him such an appealing target.
Some
notes about my positioning here, and the direction I turned Demo. I
predicted that the Super would continue to accelerate roughly on that vector,
eventually turning along that board edge. Demolisher’s wide left turn
was planned with that in mind, putting her in position for a final attack pass
at the end of the game on Round 6, fishing for crippled or dead as necessary.
Similarly, Chimaera is trying to avoid committing to any particular side
arc so the Super can’t run around in front of her.
 |
| Now the Super decides it would also like to leave |
I’m not
100% sure how much of that Paul directly predicted. What he did do though, was
decide that he didn’t want to give Chimaera her front arc shot. He fired
out of the front at Hondo first, but ended up being forced to commit both his Ravager
dial and token, and Vadering off Agent Kallus (toodles, Mutton Chops) to get
the dice results he needed to wipe out the flotilla. This unfortunately (for
him, not for me) left the shots at Chimaera underwhelming. He used the
Intel Officer on my brace for the front arc shot, but it only generated four
damage. The two reds out the side arc did manage two damage, promptly braced to
one and redirected.
I’m still
surprised how far away that JJ turn let the Super jump. It was not at the edge
of red range, I thought I had a comfortable margin. Where that left me though,
was with a decision. At that point of the game, the Super had two damage cards
on it. I knew from previous experience extended engagement from Chimaera
could very reasonably cripple the ship, and in edge cases put it in a damaged
state where a little bit extra could kill it. (Too bad both of my “little bit
extra”s were pointing the wrong way and a fair distance away to boot.) However,
committing to that would mean committing to action for both round 5 and
round 6. Paul had rolled cold on those first shots, but at close range, a
Super’s side arc is nothing to sneeze at, especially an Intel Officer-equipped Ravager.
To commit to that battle, I would need to turn right, trying to fit the ship
behind his front arc and out of the auxiliary arc.
The other
option was the brave coward’s option. Like I said, the priority going into this
game was points preservation. Paul was up, and it was pretty likely he would
stay up if I didn’t cripple him, but being first player, I was already going to
lose a game I didn’t fight 5-6 anyway. That option is of course turning left,
angling to get behind the Super and out to clearer pastures behind it. It is
the “brave” coward’s option because in the short run I would have to risk
double arcs from either side and aux arcs, or aux and stern after the move
again.
In a
casual game, I would have turned right without a second thought. We’re here to
play Armada, and that means rolling dice, dealing damage cards, and blowing
things up. But this was no ordinary Armada game. This was table 1 of the US
Grand Championship, and I had the trophy almost within my grasp. I apologized
to Paul as I did it, but in the end I didn’t feel like I had any choice at all.
I turned left.
 |
| Second game in a row my side-mounted missile launchers fail me. I must have blown through all the good ordnance already |
We
continued to play, but both of us knew the game was over. Especially when my
side arc whiffed like you see in the bottom right of the image there.
That’s after Leading shots and Intensify. Two measly damage. Should I complain,
knowing that the front arc rolled 11 damage and ACM? I don’t know but I’m going
to complain anyway. From here, Chimaera moved again, allowing a double
arc from the aux and stern arcs, but giving herself one of her own on the
stern. Chimaera’s salvos had gotten six hull damage through onto the
Super, and had blasted off all of the shields protecting the rear zones that Demo
didn’t interact with. The threat was unmistakable, and Paul obliged by moving Ravager
off at speed 2 after removing the ISD’s remaining shields. From here it was
game.
 |
| Discretion is the better part of valor |
The above
is turn 6, after Chimaera escaped into the rear of the board, now firmly
beyond the reach of Ravager’s weapons. The Raider is escaping under the
protective bow of her dreadnought charge, and Demolisher will allow it
to escape, sweeping a wide right turn out of the battle herself. My remaining Gozanti
will somehow survive Ravager’s side arc salvo (Vader ejected IO and
still couldn’t get it), and we called it. ENDEX. I had done it. I still don’t
know how.
 |
| The fleet and its glories. Obligatory glamor shot |
Dear
reader, you have now sat through fourteen thousand words describing one
incredible weekend. I hope you have learned something, I hope you have enjoyed
it, and I hope you took my warning at the beginning of this work seriously that
it was a good long read. Again, I would like to thank so many people, my wife
for putting up with my hobby and painting my beautiful flagship, Daniel Nowak
for putting on such an excellent tournament for the Armada community, and most
of all, I would like to thank you, the Armada community. I would like to thank
Master of the Fleet for keeping me playing the game during a dearth of time for
it around Wave 5, I would like to thank the forums and all of the other places
I have interacted with in a positive way to share their passion for the game
with me, and I would like to thank all of the people who have helped hone this
list and me as a player into a person that was able to take to this tournament,
play my absolute best, and ultimately emerge victorious. Thank you all.
 |
| The fleet's crown princess, as she prepares for a well-earned long overhaul. |
And thank
you to Eric and John for hosting this dissertation. You guys are great. Feel
free to comment, query, and ask away; I’ll do my best to answer as I can, and
eventually I may add some more thoughts to this, but for now, this is Giled
Pallaeon, signing off. Good luck, good hunting, and Godspeed.
Thanks for the articles! The use of Thrawn in a different way is awesome! Also perfect use of the Arquitens.
ReplyDeleteGreat battle reports and congrats on the well deserved win! Nice to see LMSU doing so well!
ReplyDeleteIs this becoming a more viable fleet archetype? Dumpsterfire is a LMSU.
ReplyDeleteLMSU did well at a few events last year as well, but Dumpster Fire also has a medium-sized squad wing and "only" 5 activations, which I consider to be a bit light for LMSU, which usually has 6-7, so I'm not sure Dumpster Fire really counts. It's a bit of everything (Big Heavy, MSU, squads) all kind of stirred together into a "does a bit of everything okay plus also Intensify Firepower and Yavaris and Garm act as force multipliers" soup. And that's fine! I just don't think of it as LMSU.
DeleteMy personal opinion is LMSU can do very well in events where bomber-heavy fleets are fairly rare. If/when you hit bomber-heavy they can keep you at range longer than you'd like and start bleeding your activations by dropping small ships fairly efficiently. Later on they'll try to bug out and grind down your big ship if you're not careful. NOVA seems to have been a meta where a lot of counter-heavy squads fleets showed up (a good amount of Sloane, for example), but not a lot of "proper" bomber-heavy squads. So Matt made a good meta call with his LMSU fleet and did correspondingly very well. I'm not so sure this type of fleet would've done as well at Gencon (which was CRAWLING with heavy bomber builds), but it's impossible to say for sure. I'll ping Matt and maybe he'll have a different opinion, though.
Thank you for the reply! I enjoy the theory and fleet building aspect of Armada the most. Only been learning for about a year. Ready to see the shake up with RitR and Wave 8!
DeleteThis comment has been removed by the author.
DeleteNope, Eric is completely correct. This list worked lacking squad cover because the dominant meta assumption at NOVA was that that would NOT be the case, thus the preponderance of Sloane.
DeleteRe: LMSU more generally, I think it's a niche archetype but one that the current meta of "Two ship isn't dead but everyone still techs for it" provides a lot of opportunities for someone to call the bluff of Sloane fleets and damage race them. It's got a skill floor that I think compounds the matchup issue it has, but it's a fun archetype that I wouldn't mind seeing become more popular.
Delete
Great write up
ReplyDeleteDo you feel if Rebellion in the rim will change this list at all?
None of the upgrades in RitR really appeal to this list IMO. Take Evasive Action isn't bad by any means, but Intensify Firepower is incredibly good, and you should have Nav dials anyway. I prefer Brunson to Iden on Demo, that's personal taste usually, and LTT is strictly inferior to TRC on the Arq because you have Needa. Nothing else springs to mind off the top of my head for upgrades. For the objectives, I don't recall having any that were wildly better than any others, but there are some options that can fit certain styles. All of the Rift objectives hurt your speed, and you need that velocity to dictate engagements on your terms. Surprise Attack is cute, and not necessarily bad for breaking enemy formations, but it also doesn't add value. If you're struggling to force good attack positions, take that. Ion Storm on paper increases your damage throughput, but your opponent can force situations where neither of you have the obstacle defense, so your tokens are being blown off left and right. Chimaera in particular hates that. Asteroid Tactics and Infested Fields are both good if you're not needing help shaping the battlefield but in dealing with enemy squadrons. On paper Fleet In Being is good, but it's also got the option to help your opponent, so I'd stick with Ion Cannons, same for Abandoned Mining Facility. Doomed Station is probably the least bad of the Rift objectives for you as a mobile Contested Outpost, but it's still not great. You're trying to stay moving fast, so trying to shape the battle and hang on to the station at the same time is very very difficult and gives up a lot of tactical surprise. Asteroid Field backfires on Brunson, and backfires on me personally because of how I use obstacles to create lanes of battle, so I can't recommend that one, though I won't not recommend it either. And Hyperspace Migration has the same issues as Doomed Station, you're forced to chase a slow-moving scoring point across the table, instead of pursuing and destroying the enemy. -GP
ReplyDelete